> ## Content Index
> Fetch the complete content index at: https://blog.addpipe.com/llms.txt
> Use this file to discover other available public pages before exploring further.
# How to Integrate Pipe Recorder with Formstack's V4 Form Builder
- URL: https://blog.addpipe.com/how-to-integrate-pipe-recorder-with-formstack-v4/
- Published: 2024-10-11T07:42:21.000Z
- Updated: 2026-05-21T08:05:34.000Z
- Author: Alexandru
- Tags: Formstack, #Import 2026-05-22 13:18
Formstack has recently made a significant update with the [release of the V4 Form](https://help.formstack.com/s/article/Formstack-most-recent-form-builder-V4-Api-Overview) Builder, transitioning from a server-side rendered approach (V3 and below) to a client-side rendered architecture. This change affects how embedded scripts like those from Pipe are executed within v4 based Formstack forms. Previously, using vanilla JavaScript or jQuery was the way to go for input field manipulation. Now, with this change, [Formstack's API](https://live-form-api.formstack.com/index.html) must be used.
The information in this tutorial applies to Formstack's new V4 Form Builder. If your form was built with the older v3 or v2 builder, and you have not [migrated it to v4](https://help.formstack.com/s/article/Formstack-Forms-Migration-tool), check out our [previous article](https://blog.addpipe.com/how-to-integrate-pipe-video-recorder-2-0-with-formstack/).
Here’s the step-by-step guide to help you integrate the Pipe Recorder using the 2.0 JS embed code with Formstack's most recent Form Builder(V4).
## Step 1: Set Up Your Formstack Form
First, log in to your Formstack account. If you don't have one, you can [create a trial account](https://www.formstack.com/pricing) for free. Then, create a new form from your dashboard or open an existing one.
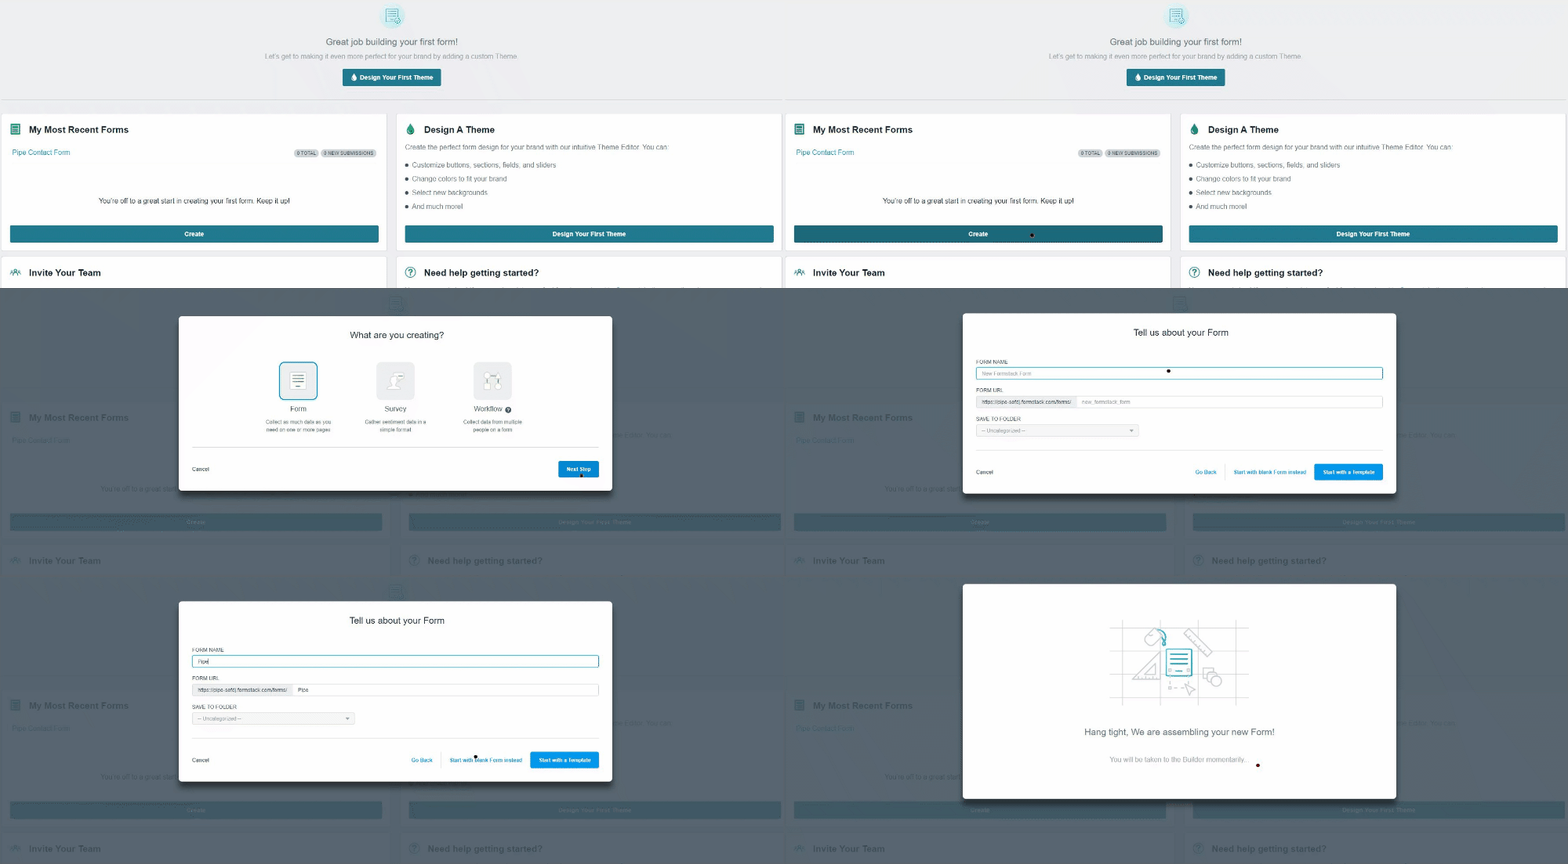
1. Click **Create Form** to start a new form.
2. Select **Blank Form** or a template.
3. Give your form a name and proceed to the form editor.
## Step 2: Add the Embed Code Field
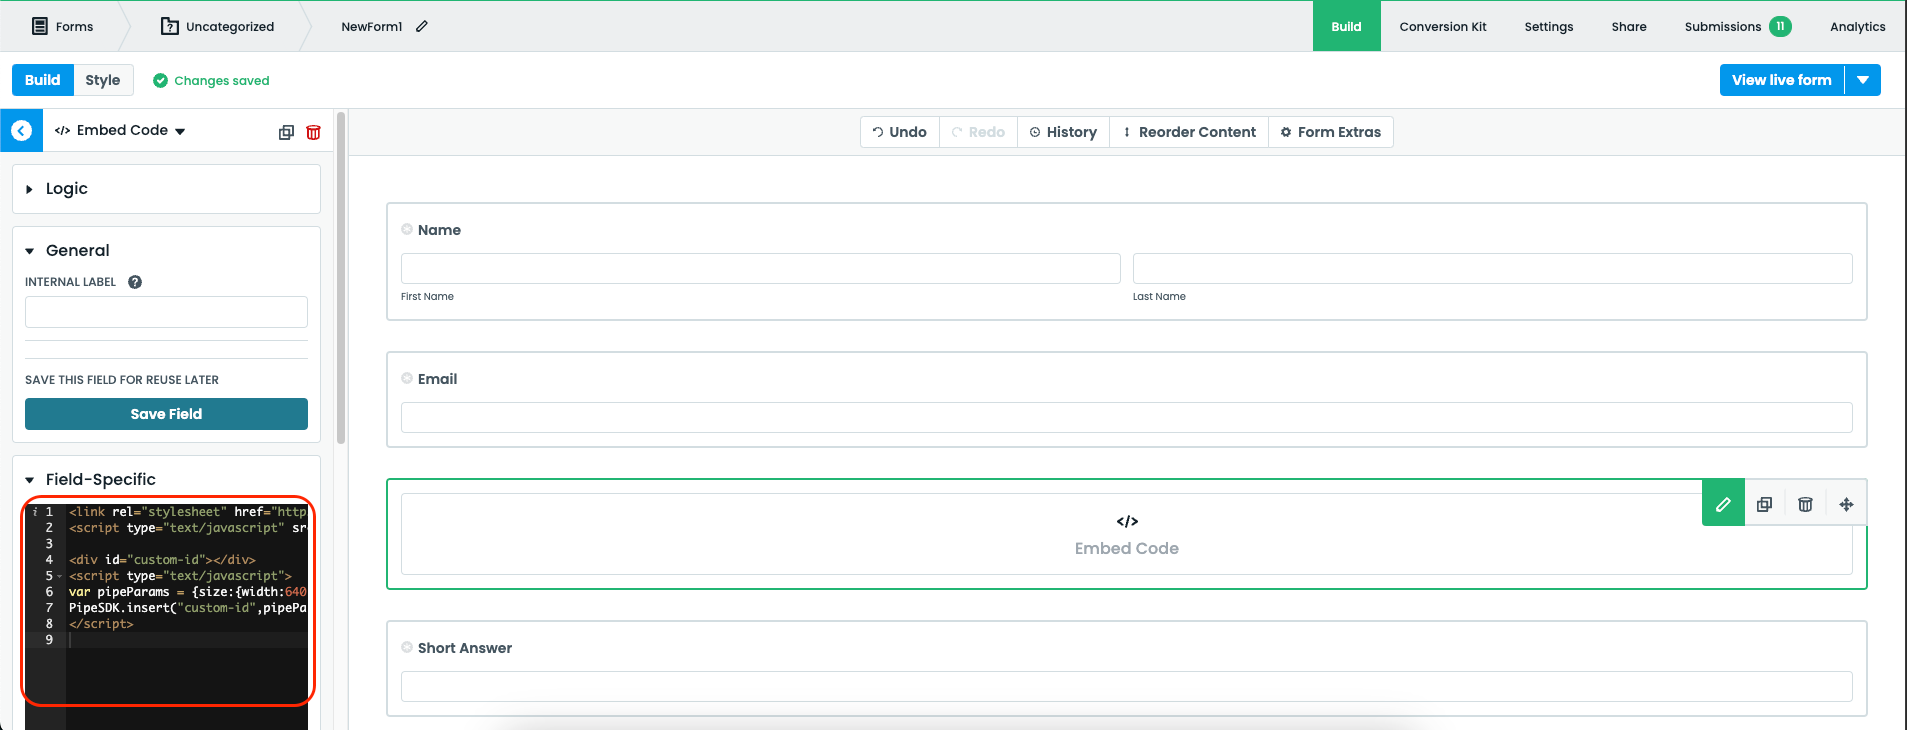
In Formstack's V4 Form Builder, the Embed Code field is located in the **Advanced Fields** section. Drag and drop the **Embed Code** field into the form where you want the Pipe recorder to appear.

## Step 3: Get Your Pipe Recorder Embed Code
To get the Pipe embed code, you’ll need to [sign up for a Pipe trial account](https://dashboard.addpipe.com/signup) (if you don’t already have one). The process is pretty straightforward; it takes just one minute, and no credit card is required.
1. After logging in to your Pipe account, navigate to the **Embed** section.
2. Copy the 2.0 JS embed code, it is in the lower right side of the page
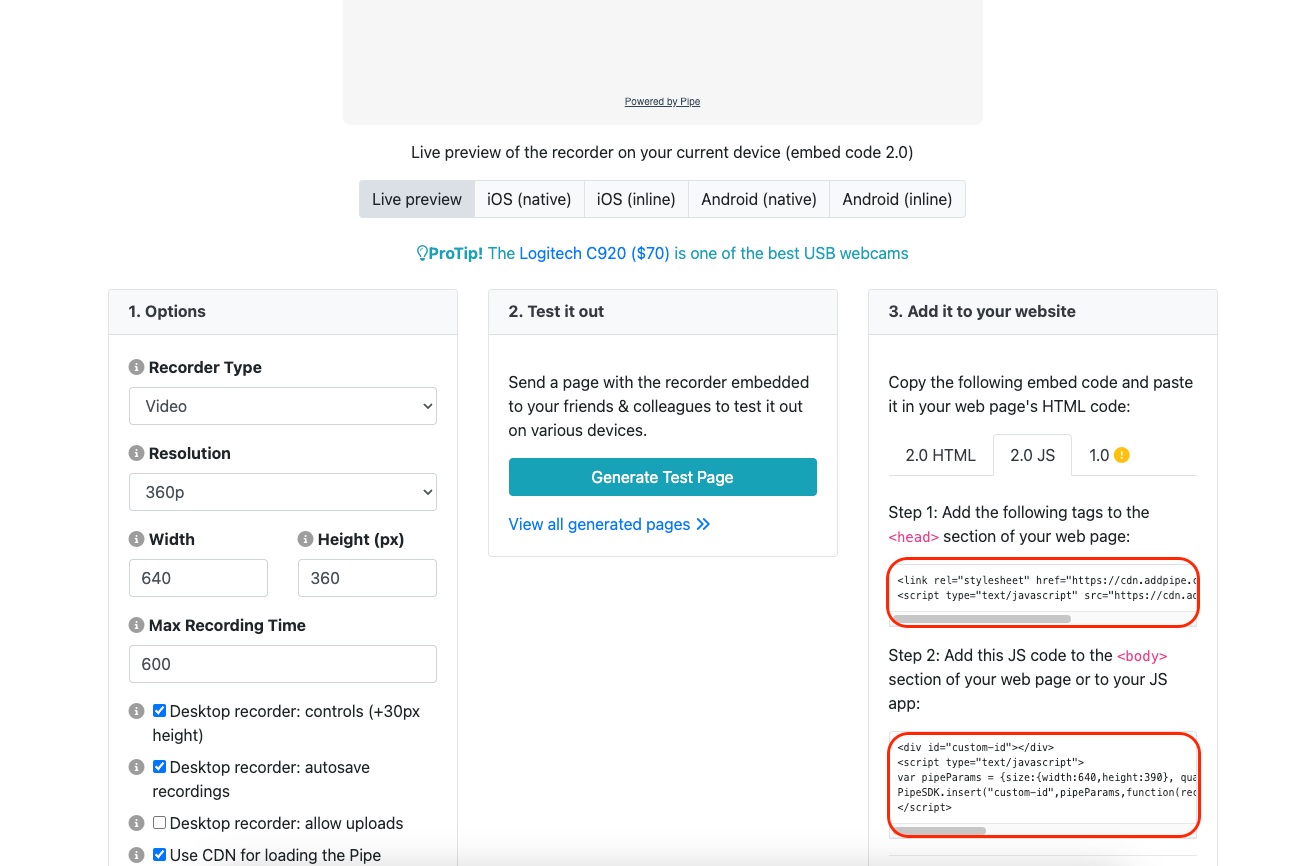
The 2.0 JS embed code should look like this:
```html
```
## Step 4: Integrate the Recorder in Your Form
Paste the 2.0 JS embed code above in Formstack's **Embed Code** field under Field-Specific.
## Step 5: Capturing the Recording URL with Formstack's Form Builder(V4) API
In Formstack V3 and below, populating the recording URL relied on directly interacting with the form fields via JavaScript. However, V4 requires a different approach. Here’s how to capture the recording URL using the [V4 Formstack Form Builder API](https://live-form-api.formstack.com/index.html).
1. Add a **hidden** **Short Answer** field to your form to store the recording URL. This field will be hidden from users, but it will be populated by us with the future recording URL once the recording is saved, and you will be able to see it in the submissions tab.
2. Assign an **Internal Label** to this field, which you will reference in the script below. In this example, we will name it `recording_url`.
3. Get your form's form ID (`FORM_ID`). This is the unique identifier for your form, which can be found in the URL when you’re editing the form in Formstack. The URL structure is: *https://www.formstack.com/admin/form/builder/*FORM\_ID**
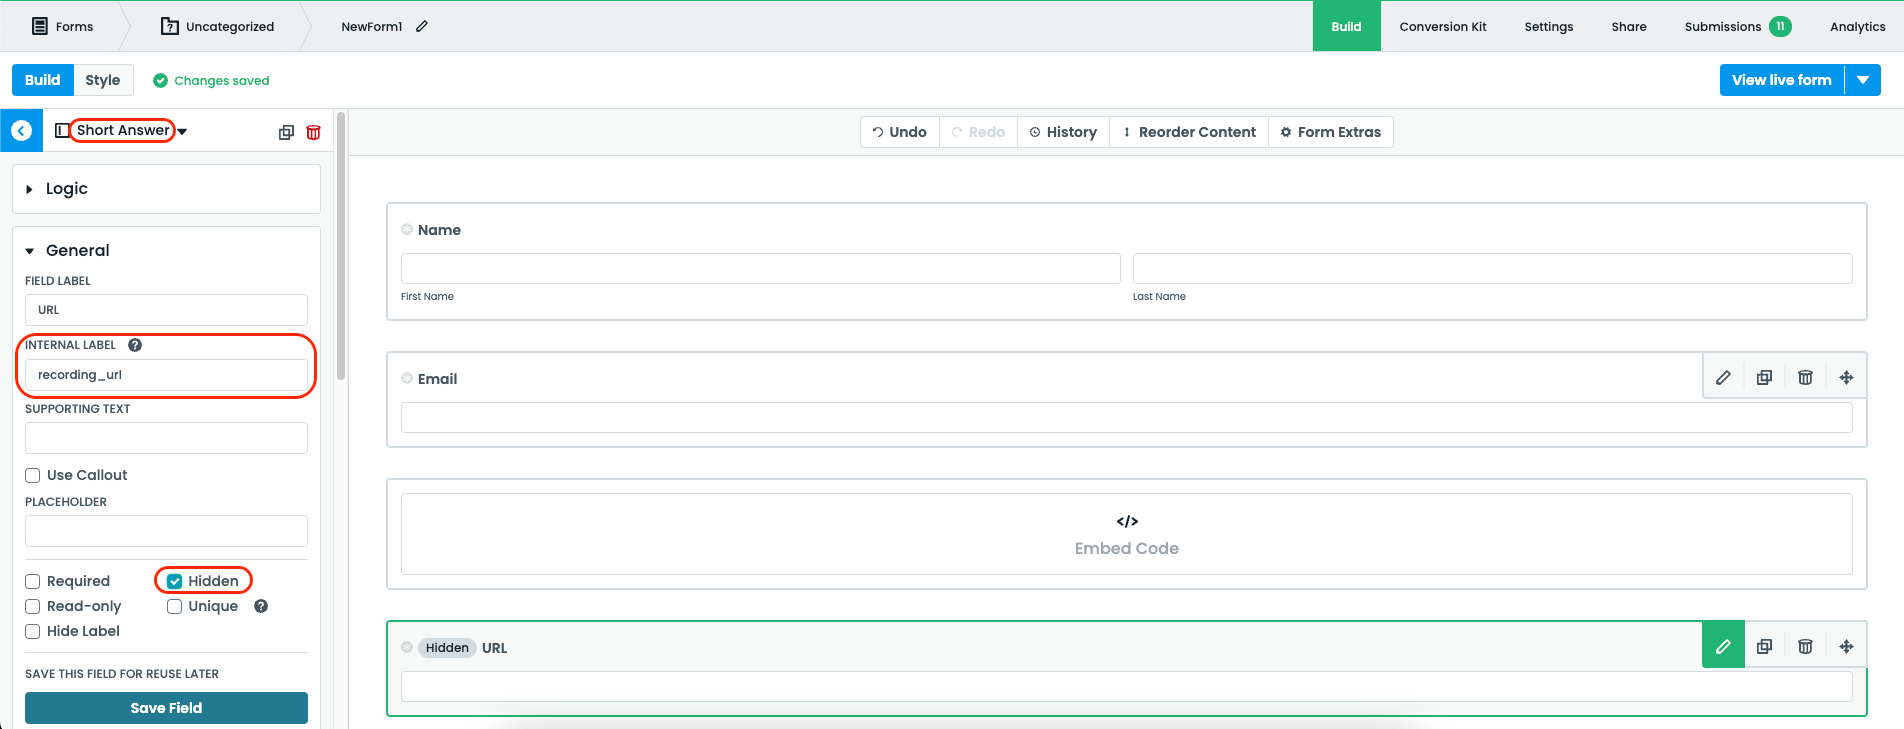
Hidden field

Form ID URL
Once you have the **FORM\_ID** and the **Internal Label**'s value, insert the code from the code block below into the **Embed Code** field under Field-Specific. The code leverages our 2.0 JS embed code's [JavaScript Control API v2.0](https://addpipe.com/docs/javascript/js-api-v2/) and the [V4 Formstack Form Builder API](https://live-form-api.formstack.com/index.html) to populate the hidden field with the recording URL once it is saved/uploaded.
```html
```
Do not forget to replace the placeholders from the code block above with the actual values (`YOUR_ACCOUNT_HASH`, `YOUR_ENV_CODE`, `FORM_ID`).
## Step 6: Test the Integration
Once you’ve added the 2.0 JS embed code and the script above
1. Click **View live form** to preview the form.
2. Test the Pipe recorder by creating a recording and submitting the form.
3. After submitting, verify that the recording URL is stored in the hidden Short Answer field. You can view your form's submissions in Formstack's Submissions tab.