Add Video Recording to Your Shopify Product Page
This guide walks through adding a video recorder directly to your product page so customers can record a short personal message themselves before adding the item to their cart. The recording gets attached to that specific line item, so it travels with the order into your Shopify admin, the order confirmation email, and the cart itself. No email back-and-forth with the customer or manual video matching to orders.
This is a step-by-step setup guide. You don't need to know how to code to follow it, though there is one block of code you'll paste in as-is. We'll explain what each part does along the way.
Why this goes on the product page, not at checkout
The video needs to be tied to one specific item. If a customer orders two personalized items in the same order, each one needs its own recording. On Shopify, the way you attach custom information to a single item in the cart is called a line item property. This is a small piece of data submitted alongside the product form, and it can only be captured on the product page itself, before the item goes into the cart.
So the recorder lives on the product page, positioned right above the Add to cart button. Once someone finishes recording, the page quietly saves the recording's link in a hidden field, and that link travels with the item all the way to your order details.
What you'll need before starting
- A Pipe account (this uses Pipe's video recorder to handle the actual recording, storage, and playback link)
- Access to your Shopify admin
- Access to your theme editor (Online Store → Themes → Edit theme)
Step 1: Get your Pipe embed values
- Sign in to your Pipe dashboard and go to Embed Recorder.
- Select the environment you want to use.
- Copy the 2.0 HTML embed code.
- From that code, note down two values:
pipe-accounthashandpipe-eid. You'll paste both of these into the code in Step 3.
Step 2: Add the recorder to your product page
Now we add the actual recording client to your product page, using a "Custom Liquid" block. This is a feature built into Shopify's theme editor; no separate app or plugin required.
- If you don't already have a product to test with, create one first.
- In your Shopify admin, go to Online Store in the left menu.
- Click Edit theme.
- Navigate to a product page (click on any product to open the Default product view).
- In the left sidebar, find the Product information section and expand it.
- Click Add block.
- Choose Custom liquid from the list.
- Drag this new block so it sits just above the Buy buttons block.
- Paste the full code from Step 3 into this Custom liquid block.
- Click Save.
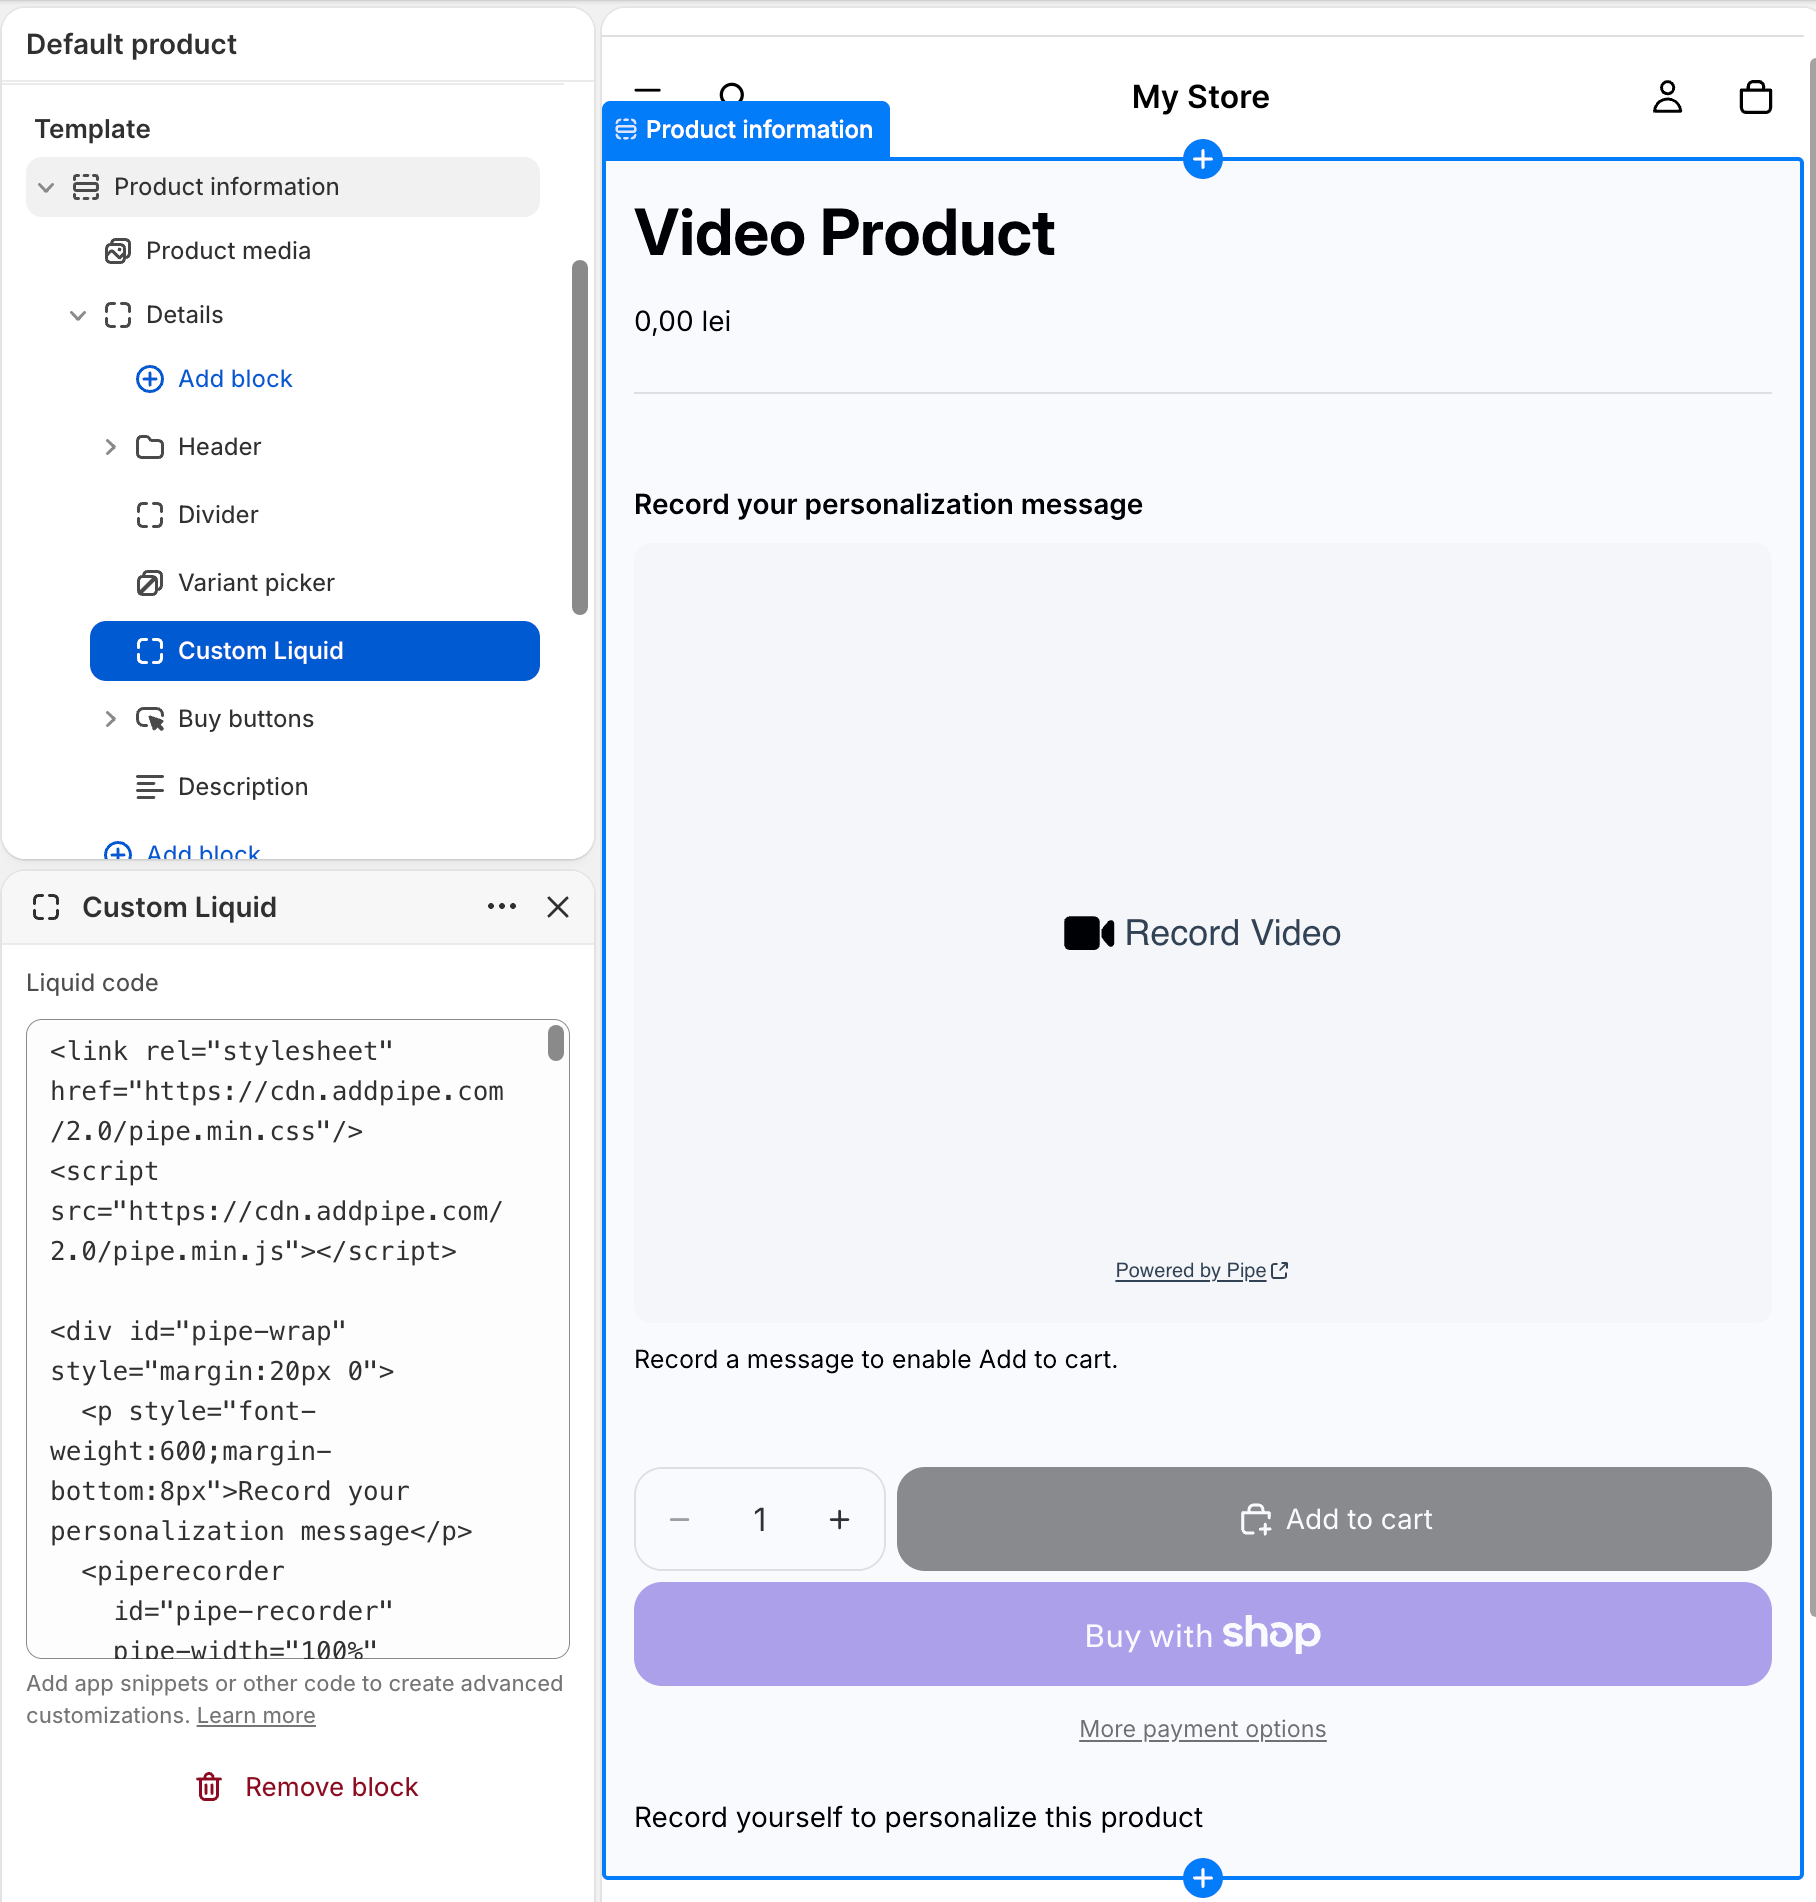
One important tip: once you've saved, click Preview to test everything in the live storefront view, not in the theme editor.
Step 3: The code to paste in
Here's the full code snippet you need to paste in the Custom liquid block from step 2. You'll need to fill in your own ACCOUNT_HASH (in two places) and ENVIRONMENT_ID, both from Step 1. Also match pipe-mrt (maximum recording time, in seconds) and pipe-qualityurl to whatever values your need.
<link rel="stylesheet" href="https://cdn.addpipe.com/2.0/pipe.min.css"/>
<script src="https://cdn.addpipe.com/2.0/pipe.min.js"></script>

<div id="pipe-wrap" style="margin:20px 0">
  <p style="font-weight:600;margin-bottom:8px">Record your personalization message</p>
  <piperecorder
    id="pipe-recorder"
    pipe-width="100%"
    pipe-height="390"
    pipe-qualityurl="avq/360p.xml"
    pipe-accounthash="ACCOUNT_HASH"
    pipe-eid="ENVIRONMENT_ID"
    pipe-mrt="60"
    pipe-avrec="1"
    pipe-payload='{"product_id":"{{ product.id }}","product":"{{ product.title | escape }}"}'>
  </piperecorder>
  <p id="pipe-status" style="margin-top:8px;font-size:0.9em"></p>
</div>

<script>
(function () {
  var ACCOUNT_HASH      = "ACCOUNT_HASH";
  var REQUIRE_RECORDING = true;   // set to false to allow buying without a recording

  var recordingUrl = null, recordingId = null;

  function getForm() {
    var wrap = document.getElementById('pipe-wrap');
    return (wrap && wrap.closest('form[action*="/cart/add"]'))
        || document.querySelector('product-form form[action*="/cart/add"]')
        || document.querySelector('form[action*="/cart/add"]');
  }
  function getAddBtn() { var f = getForm(); return f && f.querySelector('[name="add"]'); }
  function setStatus(t) { var s = document.getElementById('pipe-status'); if (s) s.textContent = t; }

  function setProp(form, name, value) {
    var input = form.querySelector('input[data-pipe="' + name + '"]');
    if (!input) {
      input = document.createElement('input');
      input.type = 'hidden';
      input.name = 'properties[' + name + ']';
      input.setAttribute('data-pipe', name);
      form.appendChild(input);
    }
    input.value = value;
  }

  function syncProps() {
    var f = getForm();
    if (!f || !recordingUrl) return;
    setProp(f, 'Video message', recordingUrl);
    setProp(f, '_pipe_recording_id', recordingId);
  }

  function lock()    { var b = getAddBtn(); if (b) { b.disabled = true;  b.setAttribute('disabled', 'disabled'); } }
  function unlock()  { var b = getAddBtn(); if (b) { b.disabled = false; b.removeAttribute('disabled'); } }
  function refresh() { if (recordingUrl) { syncProps(); unlock(); } else if (REQUIRE_RECORDING) { lock(); } }

  function ready(fn) {
    if (document.readyState === 'loading') document.addEventListener('DOMContentLoaded', fn);
    else fn();
  }

  ready(function () {
    if (!getForm()) { setStatus(''); return; }

    refresh();
    if (REQUIRE_RECORDING) setStatus('Record a message to enable Add to cart.');

    document.addEventListener('submit', function (e) {
      if (e.target !== getForm()) return;
      if (REQUIRE_RECORDING && !recordingUrl) {
        e.preventDefault();
        e.stopImmediatePropagation();
        setStatus('Please record your message first.');
        lock();
        return;
      }
      syncProps();
    }, true);

    new MutationObserver(refresh).observe(document.body, { childList: true, subtree: true });
  });

  PipeSDK.onRecordersInserted = function () {
    var rec = PipeSDK.getRecorderById('pipe-recorder');
    if (!rec) return;

    rec.onSaveOk = function (recorderId, streamName, streamDuration, cameraName,
                             micName, audioCodec, videoCodec, fileType,
                             videoId, audioOnly, location) {
      recordingUrl = 'https://' + location + '/' + ACCOUNT_HASH + '/' + streamName + '.mp4';
      recordingId  = videoId;
      refresh();
      setStatus('✓ Recording saved - you can add the item to your cart.');
    };
  };
})();
</script>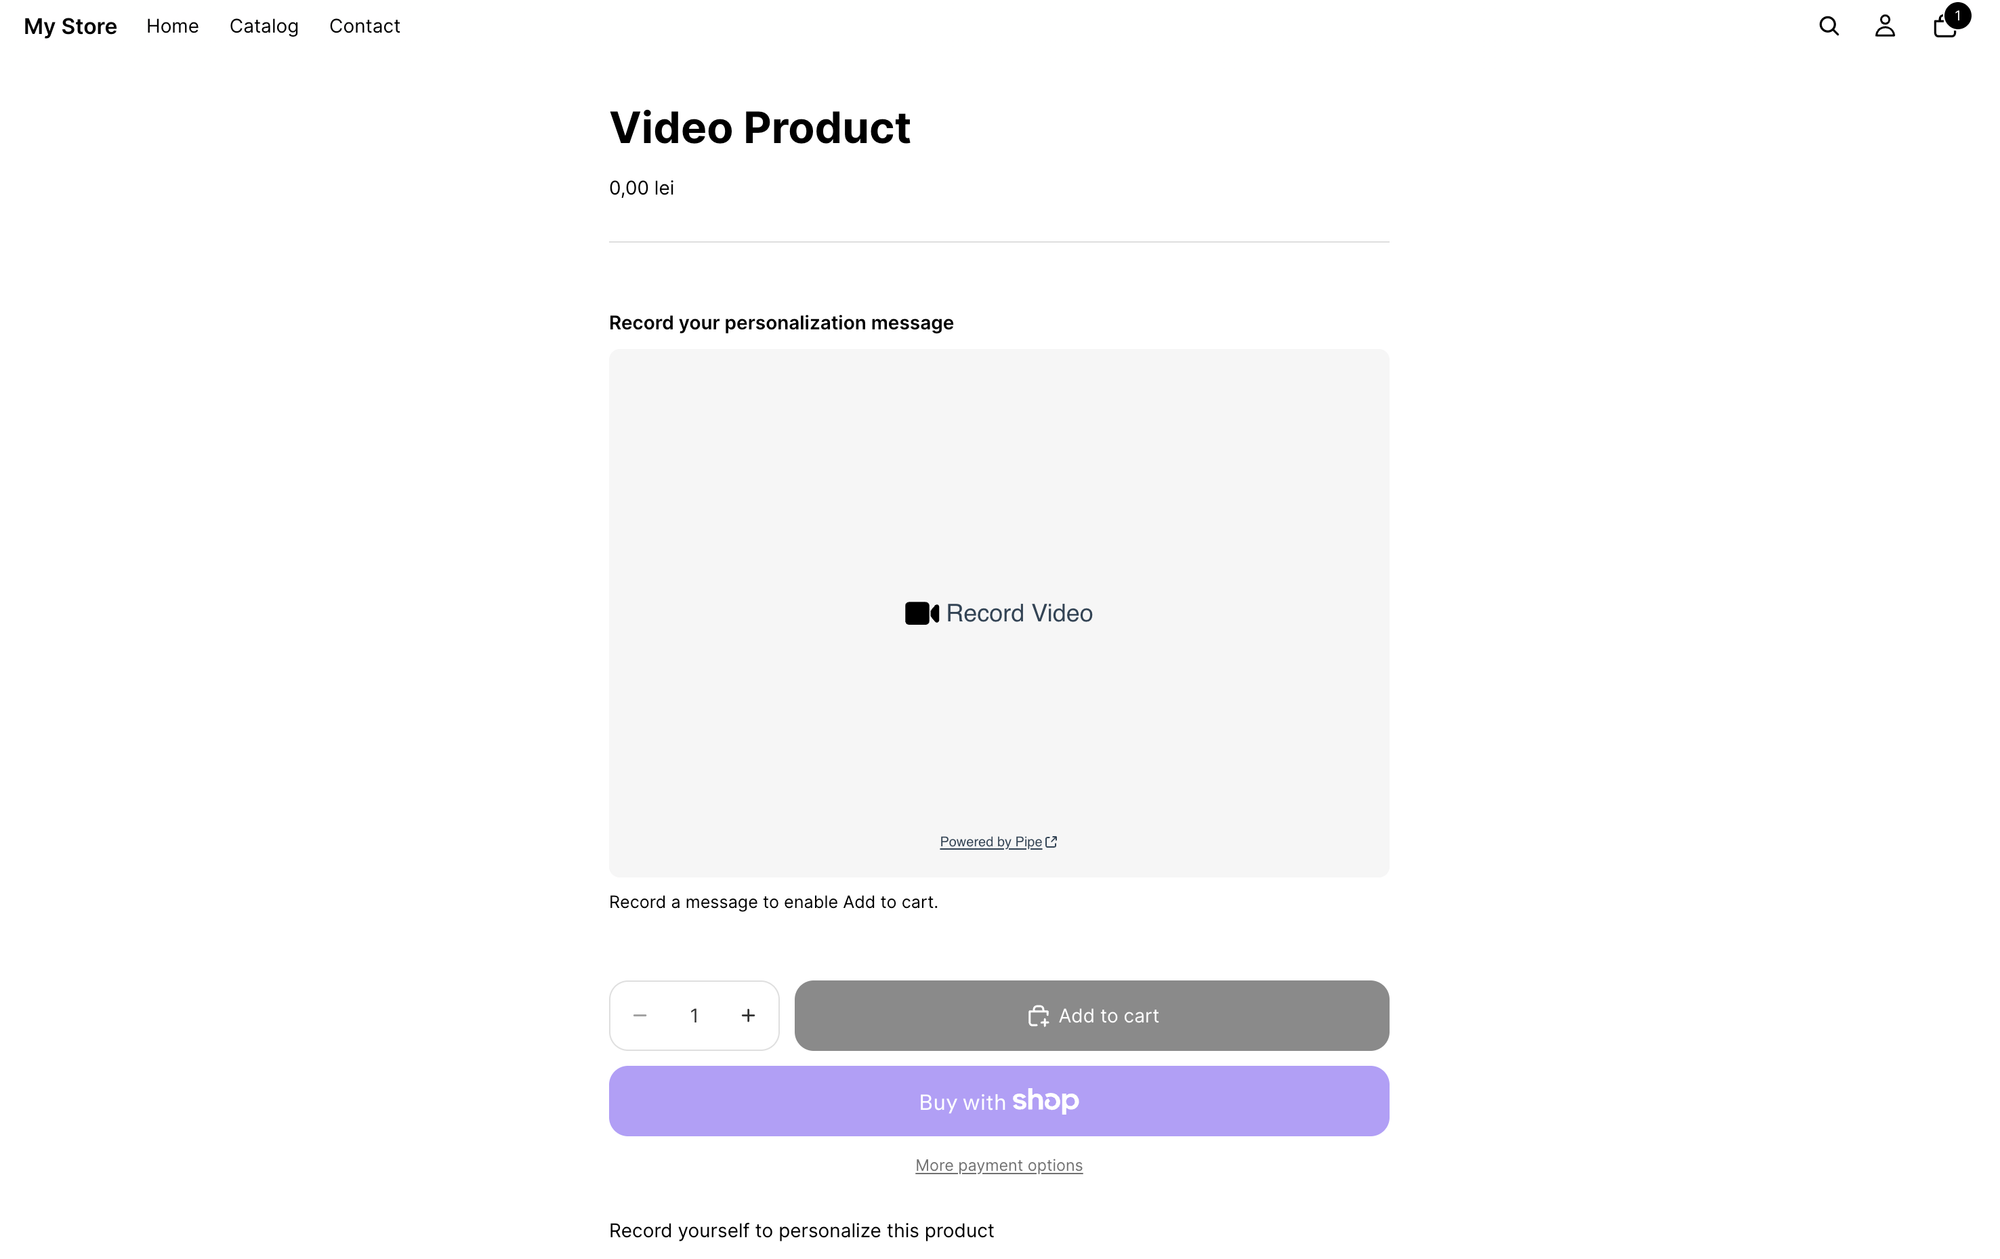
If you'd rather let customers skip the recording and buy the product anyway, change REQUIRE_RECORDING to false. Left as true, the Add to cart button stays disabled until a recording has been made.
What this code is actually doing
You don't need to understand every line to use this, but here's a plain-language breakdown of what's happening, in case something doesn't behave as expected and you want to know where to look.
It loads the recorder. The first two lines load Pipe's styling and its script. The <piperecorder> tag is a placeholder that Pipe's script finds once the page loads and builds the actual recording interface inside it.
It labels each recording with the product. The pipe-payload field attaches extra information to every recording made through this widget, in this case the product's ID and title.
It waits for the page to fully load before looking for the cart form. This is the trickiest part of the whole setup, and it's why the script is structured the way it is. Since the recorder block sits above the Buy buttons block, the actual <form> element for adding to cart doesn't exist yet at the exact moment the page starts running this script. So instead of grabbing the form once, the code looks it up freshly every time it needs it.
It saves the recording into two hidden fields on the form. When the recording finishes uploading, two things get written invisibly into the product form:
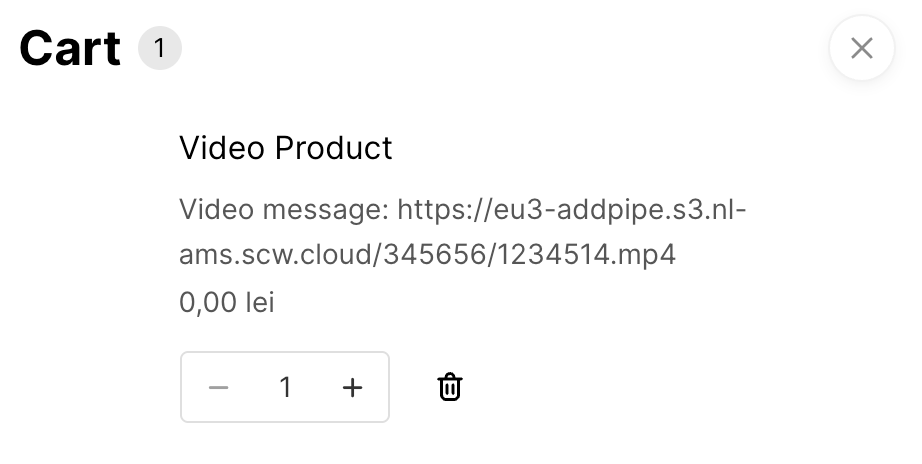
- Video message - a property that becomes visible to both you and the customer. It shows up on the cart page, in the order confirmation email, and on the order page in your Shopify admin, as a link straight to the video.
_pipe_recording_id- this one stays hidden from the customer (the underscore at the start is Shopify's way of marking a property as internal-only). It's still fully visible to you in the admin and through the API, and it holds Pipe's own recording ID, which lets you match this exact recording to Pipe's webhook data if you ever need to process orders automatically.
It won't let someone check out without recording, if you want it that way. With REQUIRE_RECORDING set to true, the Add to cart button is disabled until a recording exists. The script also listens for the form submission a little earlier than usual (during what's called the capture phase), so it can stop the add-to-cart action completely if needed. This extra step matters because many Shopify themes will silently re-enable a disabled button on their own, so a simple disabled attribute by itself isn't always enough to rely on.
It survives customers switching variants. Many Shopify themes redraw parts of the product page when a customer picks a different size or color, and that redraw can wipe out the hidden fields we just added. The code monitors these page changes in the background and quietly restores everything if they occur, so you don't lose the recording data.
Testing the whole flow, start to finish
Before you launch this to real customers, walk through the entire process yourself:
- On the product page, record a short test message and wait for the "✓ Recording saved" confirmation to appear.
- Click Add to cart. On the cart page, you should see a "Video message" property listed under that item, with a link.
- Place a full test order, all the way through.
- In your Shopify admin, go to Orders and open the test order. The Video message link should appear directly under the line item's name.
Once this is set up, it runs on its own. Customers record their message; it gets tagged to their exact order, and you can find it sitting right there in your Shopify admin whenever you're fulfilling the order- no separate inbox to check, no manual matching required.
