
Pushing Recordings to Cloudflare R2
Learn how to push new audio, video, and screen recording files recorded through the Pipe Platform to your Cloudflare R2.
R2 is Cloudflare's object storage solution. It offers S3 compatibility while eliminating the costly download bandwidth fees associated with typical cloud storage services. This allows users to download files as often as needed without worrying about unexpected bandwidth charges.
For up-to-date info, check out Cloudflare's official documentation.
Here's what you need to do to push recordings and their associated files through the Pipe Platform to your Cloudflare R2:
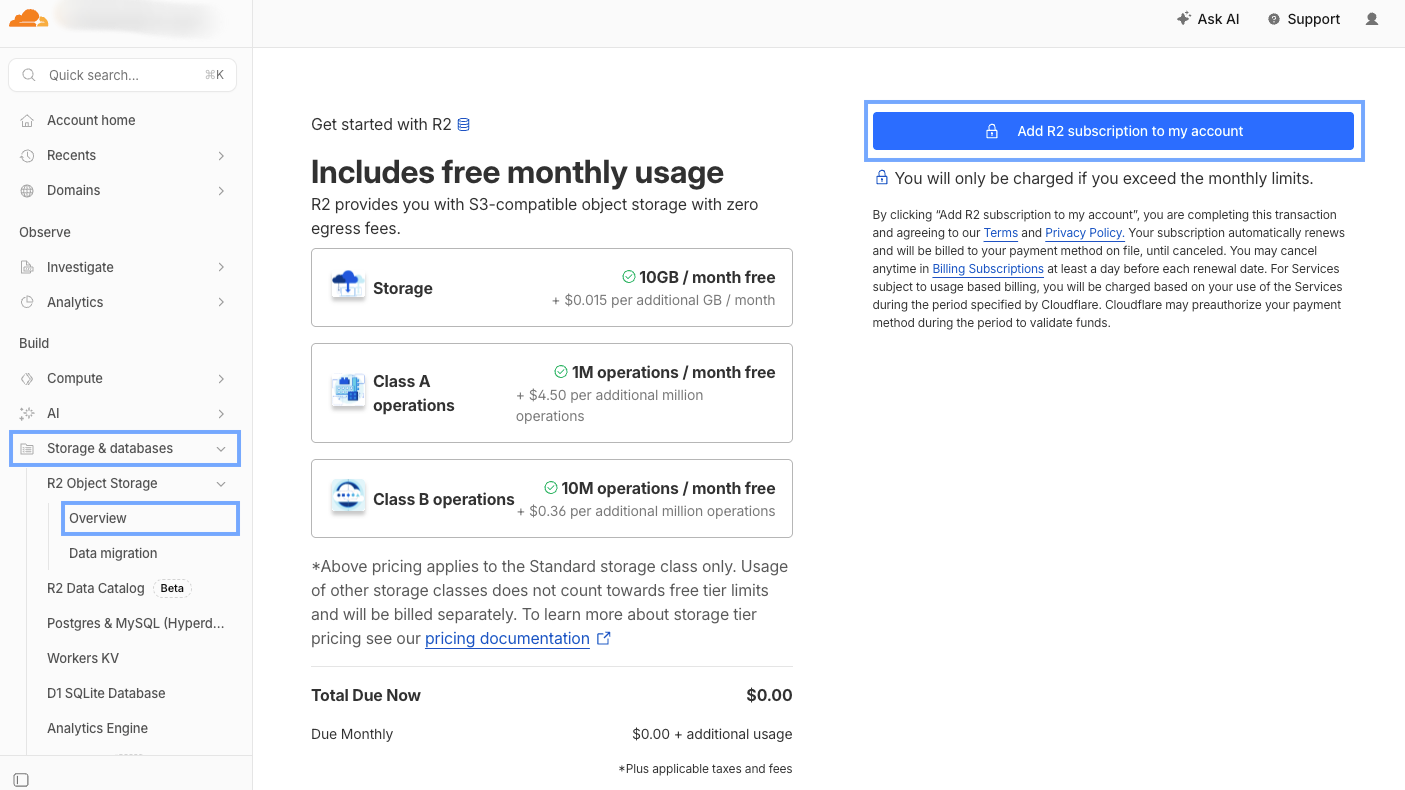
Step 1: Enable the Cloudflare R2 subscription with up to 10 GB/month free storage
Go to the Cloudflare Dashboard and sign in, or create an account. Check if your account has an R2 subscription by going to Storage & databases → R2 Object Storage → Overview. If you see the Add R2 subscription to my account button, click it and follow the prompts to activate the R2 subscription.
Cloudflare R2 includes a free tier for storage up to 10GB/month. You will only be charged if your usage exceeds the free tier limits.
Step 2: Create a Cloudflare R2 Bucket
With object storage, all your objects are stored in buckets, so you need to create a bucket. To do that, go to Storage & databases → R2 Object Storage → Overview, then click the Create bucket button.
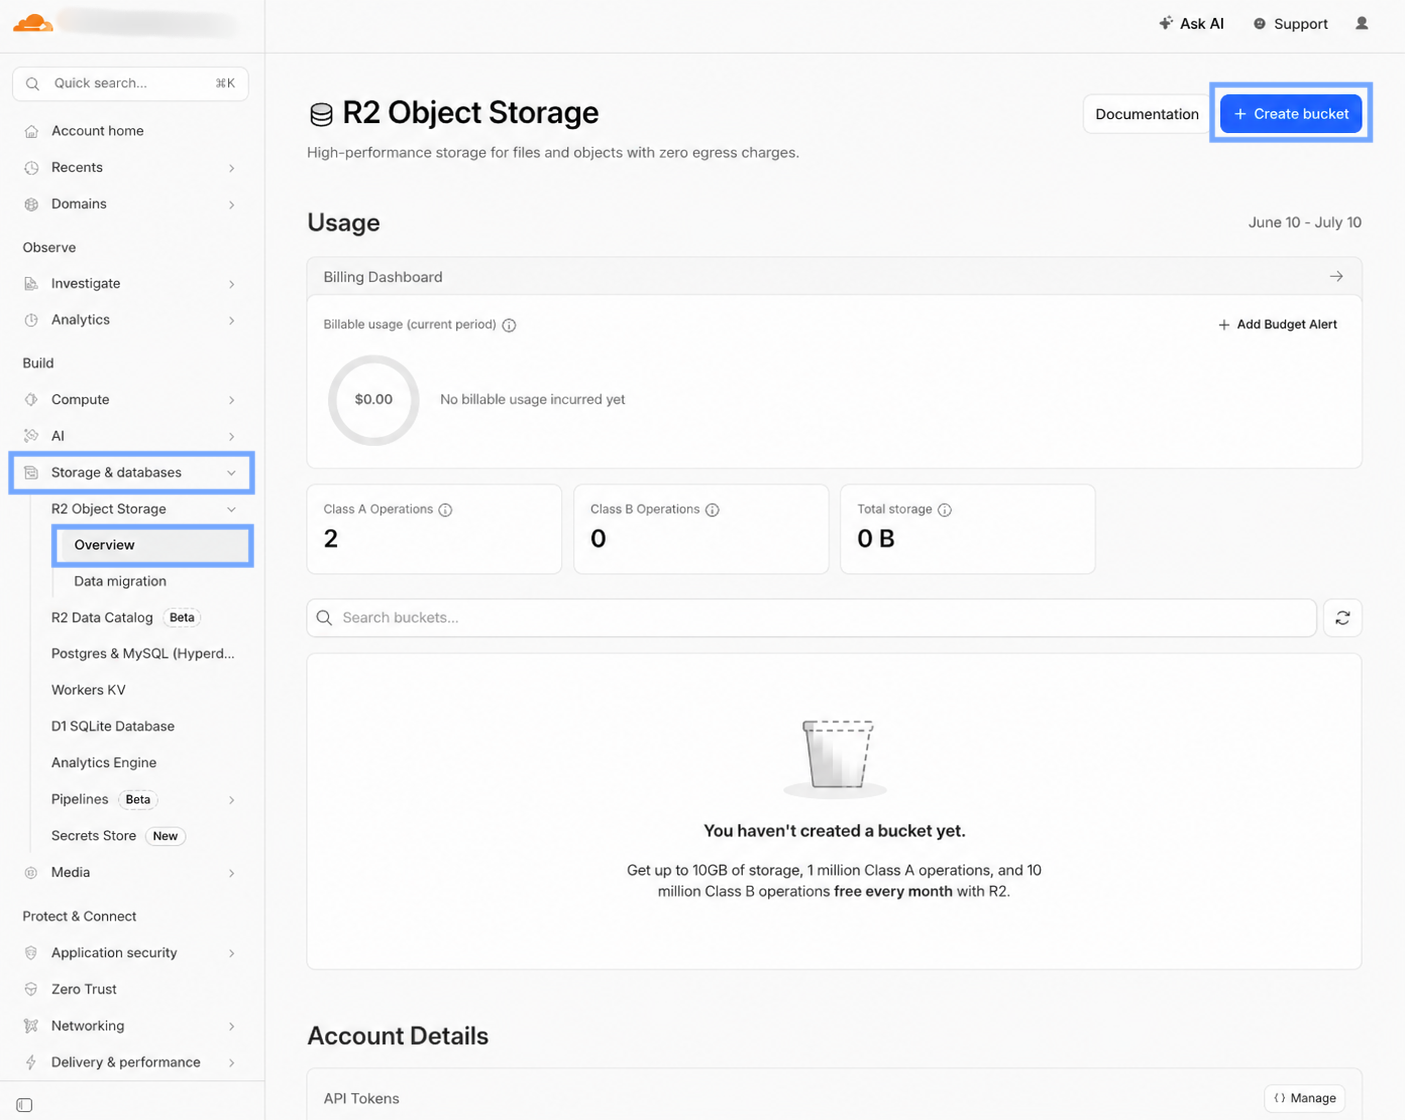
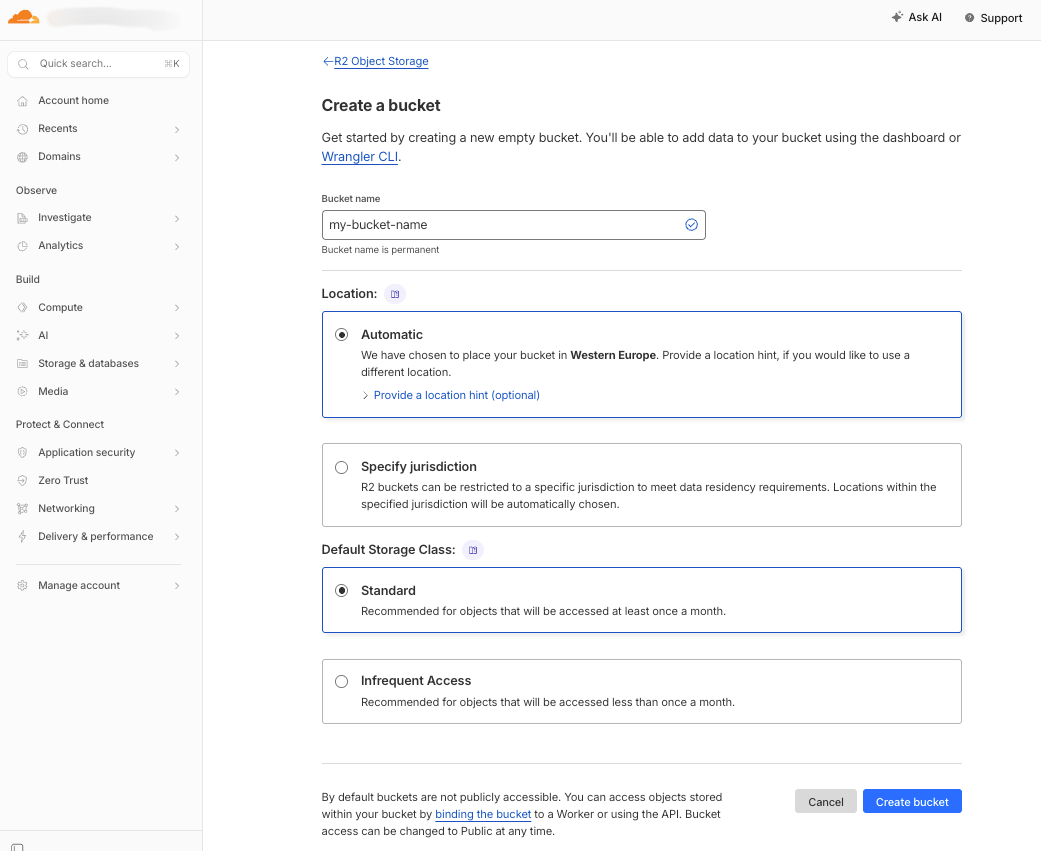
The bucket configuration page will appear with the following information:
- Bucket Name: Enter a unique name
- Tip: Use only lowercase letters, numbers, and hyphens. Do not begin or end with a hyphen. Use 3 to 63 characters.
- Location: Leave this as Automatic. Cloudflare’s global network will handle edge routing and optimization for you.
- Default Storage Class: Only the Standard storage class is included with the free tier
Click the Create bucket button to save your bucket configuration.
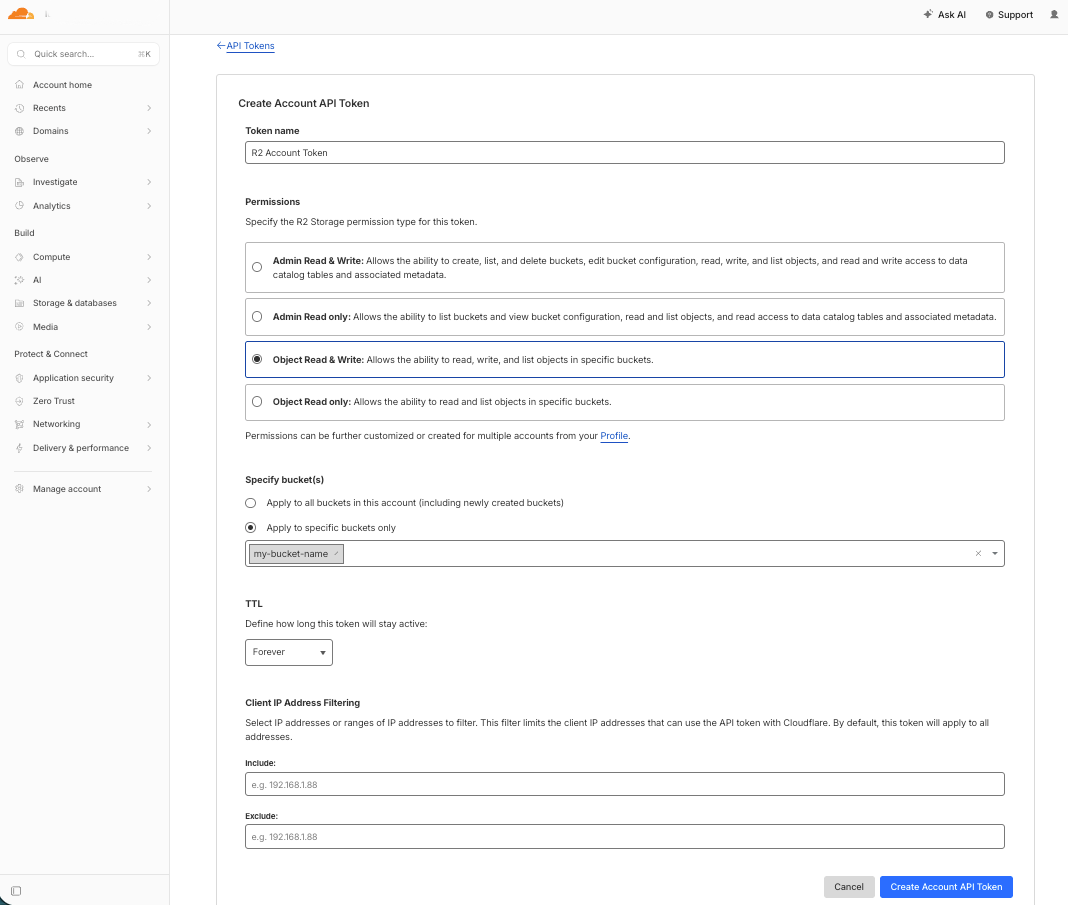
Step 3: Generate API Keys
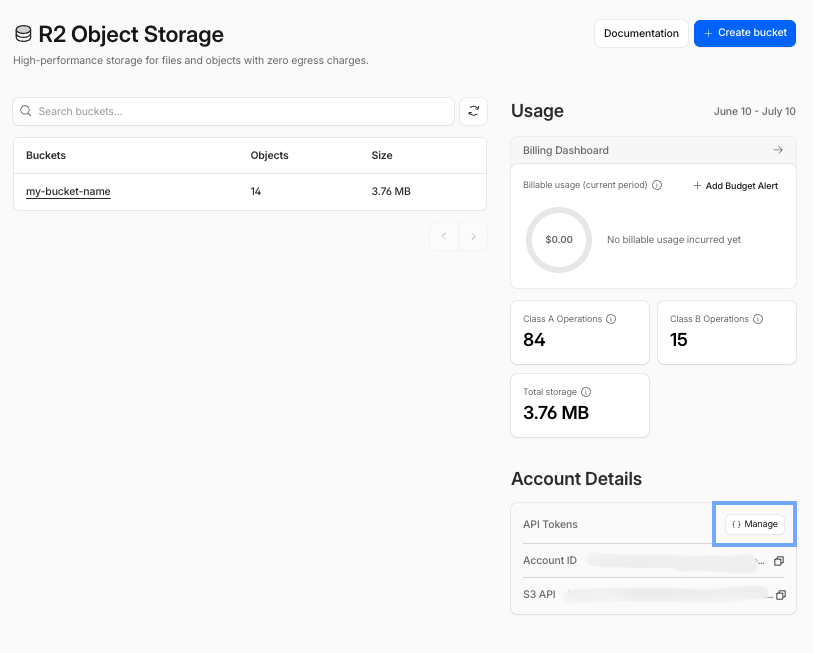
Because R2 is S3-compatible, you’ll need an Access Key ID and a Secret Access Key. To generate these keys, go to Storage & databases → R2 Object Storage → Overview. In the right sidebar, under Account Details, click the {} Manage button.
On the next page, click the Create Account API token button. This will open the Account API Token configuration page with the following information:
- Token name: Use something verbose like Token for pushing from Pipe to Cloudflare R2
- Permissions: Select Object Read & Write
- Specific bucket(s): Choose Apply to specific buckets only, and select the bucket you created
- TTL: Default is Forever, but select whatever option makes sense for you
- Client IP Address Filtering: You can add the IPs from our docs for extra security
Click the Create Account API Token button to complete the token creation.
Note: Save your keys because Cloudflare will only show you the Secret Access Key and the Access Key ID once. If you close the page, you won’t be able to view them again. Also, note your S3 endpoint URL: https://<ACCOUNT_ID>.r2.cloudflarestorage.com
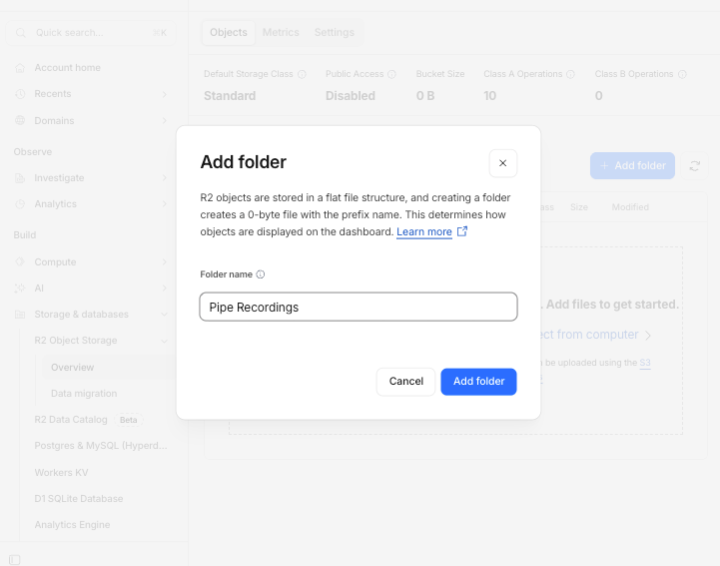
Step 4: Optional: Create a Destination Folder in Cloudflare R2
In your Cloudflare dashboard, navigate to the Storage & databases → R2 Object Storage → Overview, then click on your bucket name. After that, click the Add folder button to create a folder where you want your Pipe recordings pushed. You can name it Pipe Recordings to keep things organized from the start.
Step 5: Configure Pipe to push files to your Cloudflare R2 storage
Sign in to your Pipe Account Dashboard. The push-to-S3 storage feature is currently available during the trial or with a Creator or PRO subscription. Once logged in, go to Storage → Your Storage and click Amazon S3 or Compatible Services storage type.
Fill the S3 Credentials form with the following values:
- Access Key ID — From your R2 API token
- Secret Access Key — From your R2 API token
- Bucket name — Your R2 bucket name
- Bucket folder: Leave empty, or enter your folder name (e.g. Pipe Recordings)
- Bucket region or custom endpoint*: Custom endpoint...
- Custom endpoint — Enter your R2 endpoint (
https://<ACCOUNT_ID>.r2.cloudflarestorage.com) - Canned ACL: none.
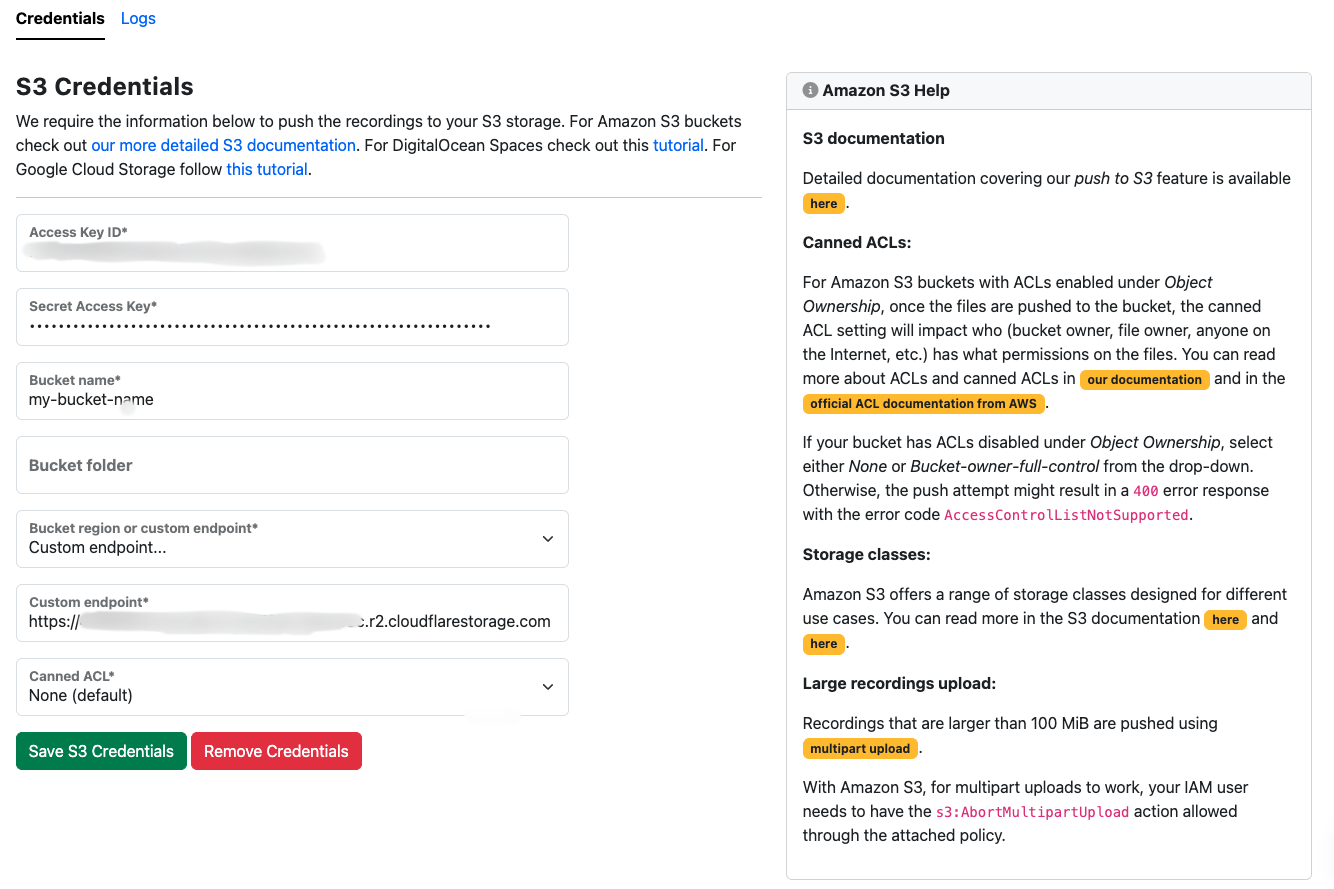
Click the Save S3 Credentials button to save the information. To confirm everything is working, you can make a test recording in Pipe and then verify that the recording files appear in your Cloudflare R2 folder.
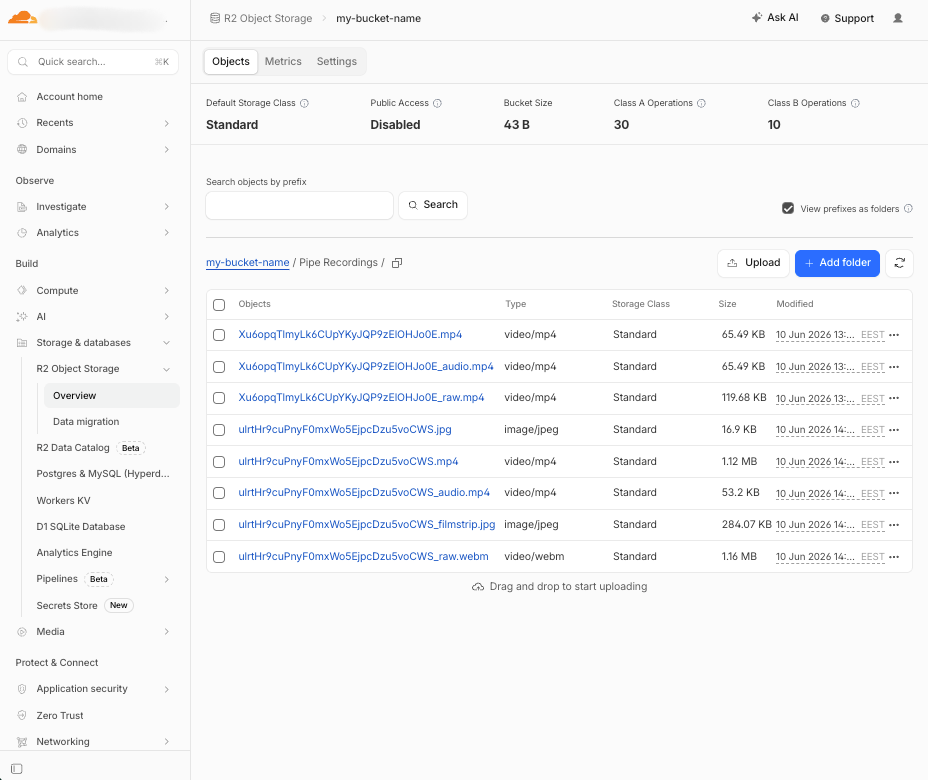
Here's my R2 storage bucket after a few tests:
If the push to your Cloudflare R2 storage fails, you can identify the issue by reviewing the S3 storage logs in the Pipe account dashboard.