
How to add multiple Pipe video recorders to Formsite forms.
In this tutorial, we will show you how to use the new 2.0 Pipe embed code which introduces the possibility to add multiple recorders to your Formsite forms.
We have already covered in the past how to embed the Pipe video recorder to Formsite forms using our 1.0 embed code.
In this tutorial we will show you how to use the new 2.0 Pipe embed code which introduces the possibility to add multiple recorders to your Formsite forms.
Requirements
To follow this tutorial you will need an account with:
Both Formsite and Pipe offer a 14 days free trial, so you can easily test this integration without worrying about the cost for now.
Create a new form
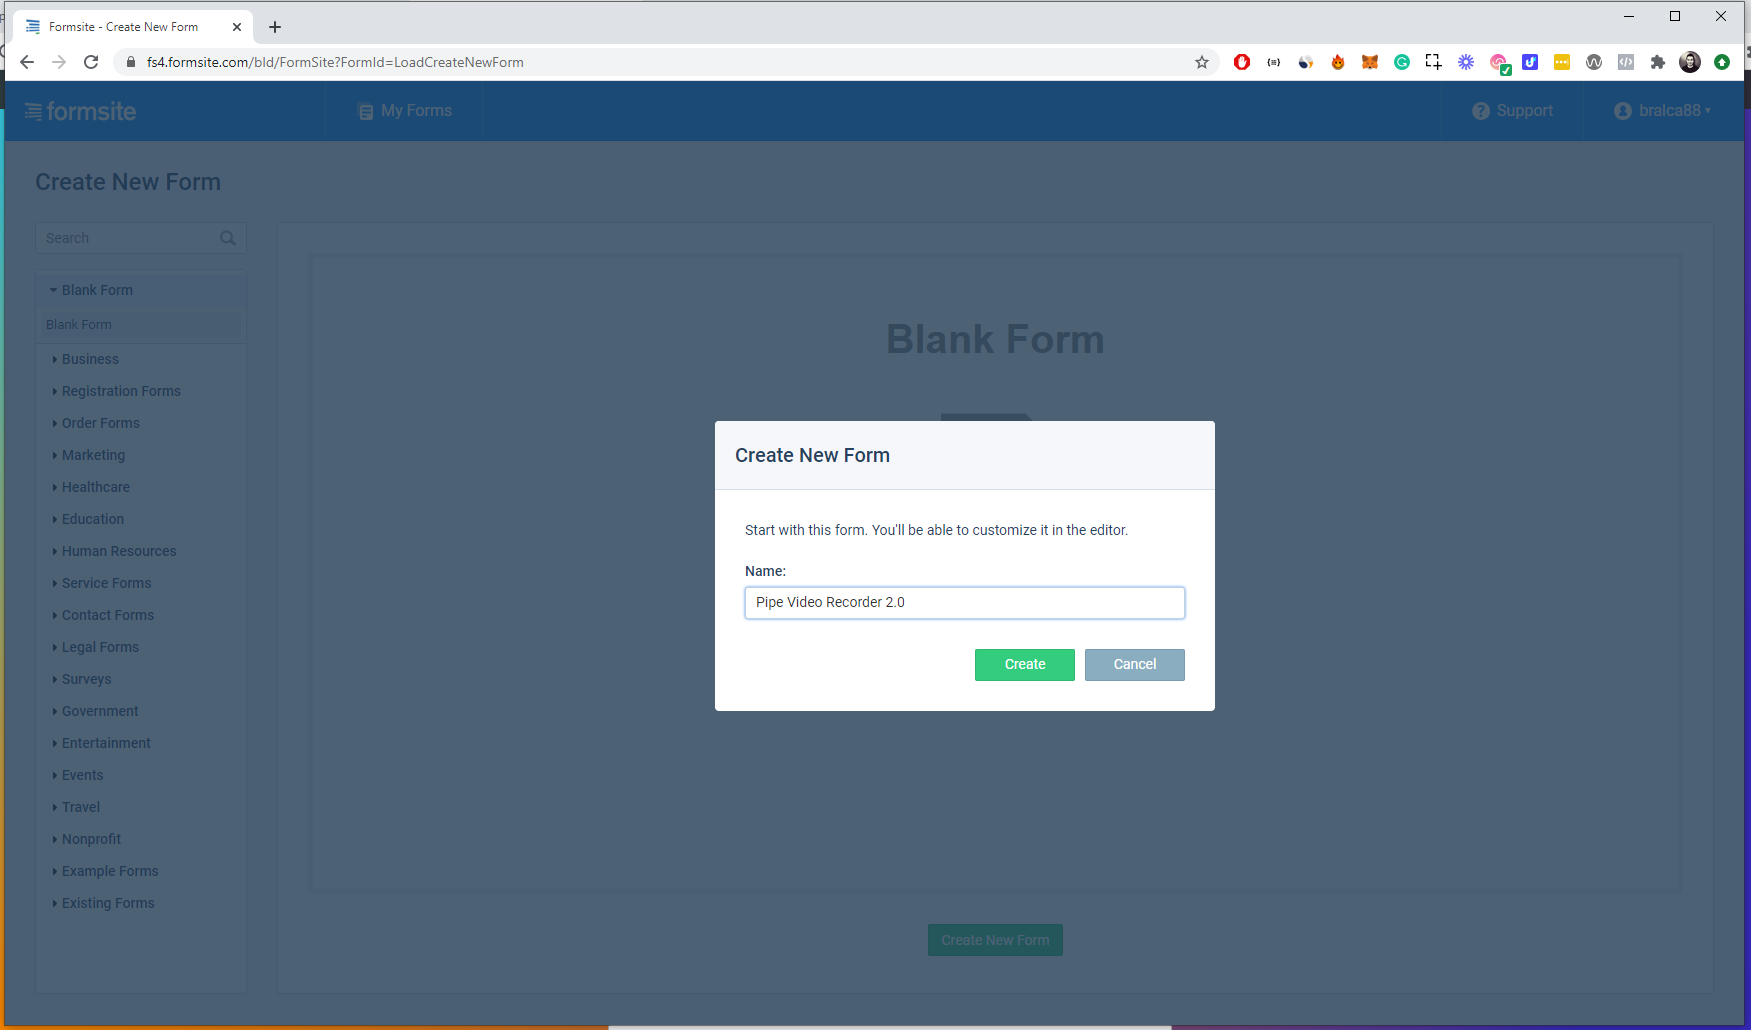
Once you have your Formisite account ready, click on the + Create New Form button at the top of the page. You will be asked to either use a template or create a blank form. I chose the blank form.
Click on Create New Form and in the next screen choose a name for your form.
Adding the Pipe 2.0 JS embed code to your form
The first field that we will add is a Custom Code item, where we will insert the first part of the Pipe 2.0 JS embed code.
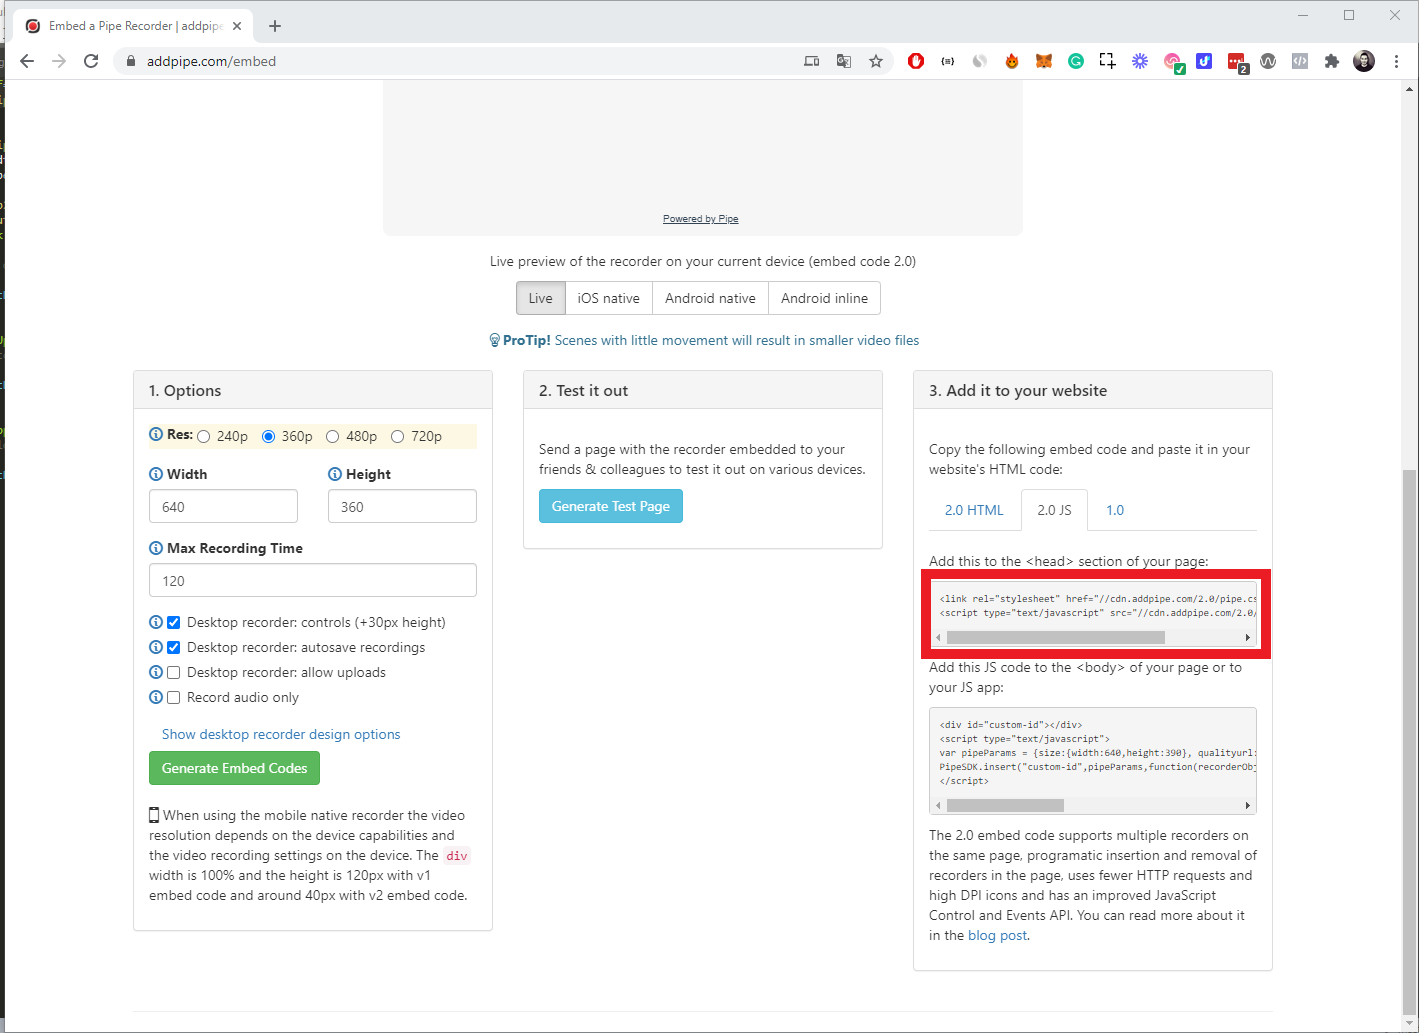
You can find the Pipe 2.0 JS embed code in your Pipe account area’s embed section.
Go to https://addpipe.com/embed and scroll down to the bottom of the page. On the right side there is a section containing the 2.0 JS embed code. Click on the 2.0 JS tab and copy the first part of the embed code.
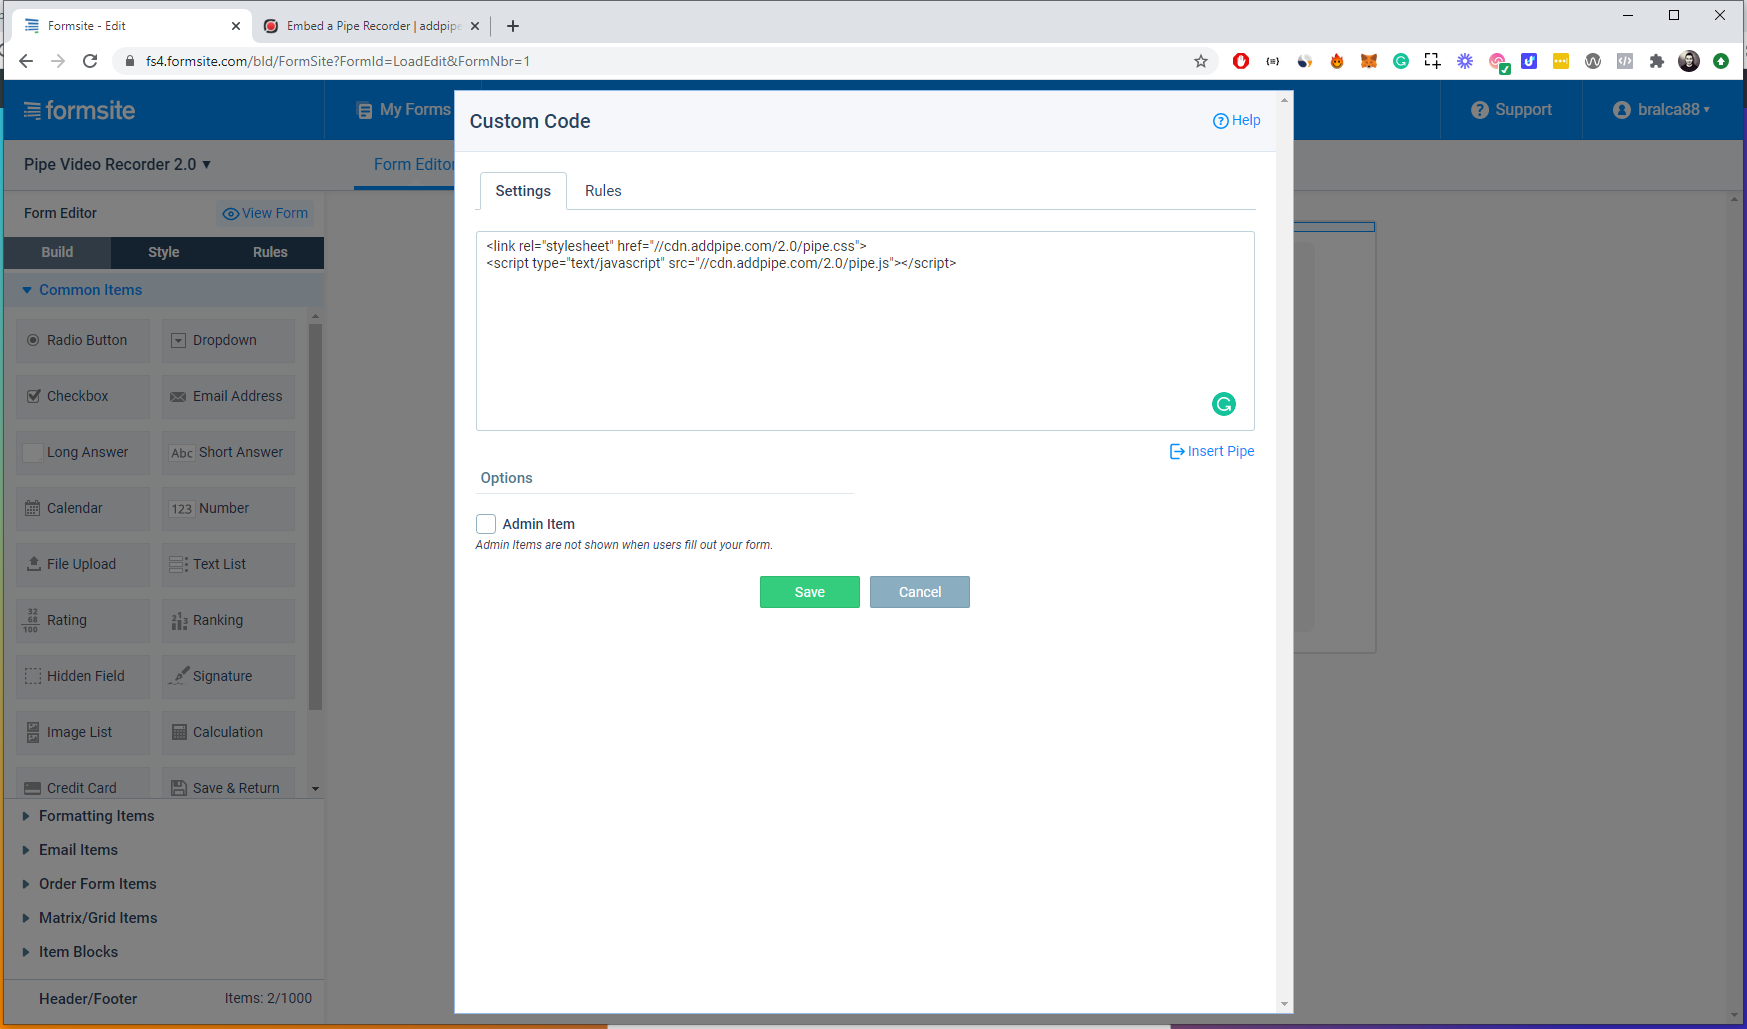
Back to the Formiste forms editor, drag the Custom Code field, under the Formatting Items, drop it to your form and paste the first part of the Pipe 2.0 JS embed code.
Now repeat the same process to add the second part of the Pipe 2.0 JS embed code in a new Custom Code field. From your Pipe account area copy the second part of the 2.0 JS embed code, add a new Custom Code field to your form and paste the code in its Settings section.
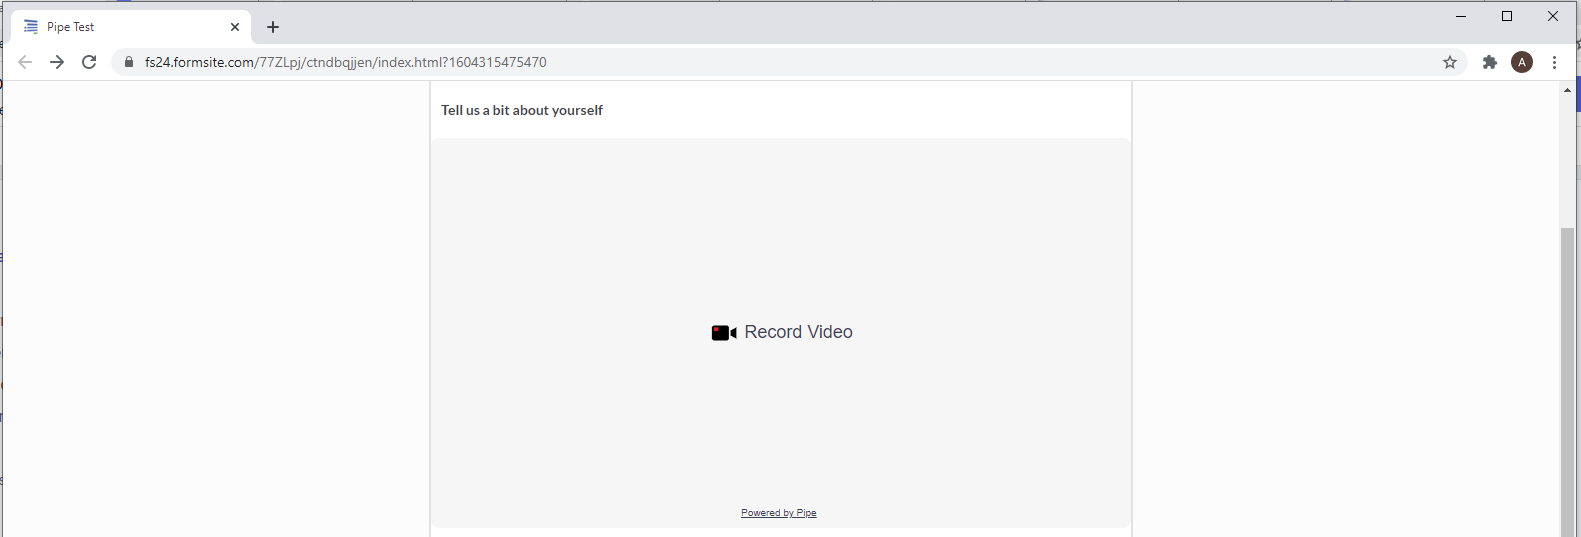
Great! We can already test our first video recorder!
Click on the View Form button. In the Preview page you will see the Pipe video recorder and you will be able to record videos. This is how your form should look like on your desktop browser.
Congrats! You just added your first Pipe Video Recorder to your Formsite form! Now we are ready to jump on the next step.
Adding more than one video recorder to Formsite
The process of adding multiple video recorders to your form is quite similar to what you have already done so far. What differs is a little change in the Pipe 2.0 JS embed code you will have to make in order to make all the recorders work properly. Let’s see how to do it.
This is the second part of the embed code you added in the second Custom Code field:
<div id="custom-id"></div>

<script type="text/javascript">
  var pipeParams = {
    size: {
      width: 640,
      height: 390
    },
    qualityurl: "avq/360p.xml",
    accountHash: "YOUR_ACCOUNT_HASH",
    eid: "YOUR_ENVIRONMENT_ID",
    mrt: 120
  };


  PipeSDK.insert("custom-id", pipeParams, function(recorderObject) {});

</script>
To make sure all recorders can be clearly identified you will need to assign a unique id to the DIV element and use the same id in the PipeSDK.insert function. This way you will tell the PipeSDK.insert function which element it should target to add the recorder to the page.
You can use any name for each id, in my case I have used the name “first” for the first recorder Id.
This is how the code will look like once you make the changes to the first recorder you previously added to the form:
<div id="first"></div>

<script type="text/javascript">
  var pipeParams = {
    size: {
      width: 640,
      height: 390
    },
    qualityurl: "avq/360p.xml",
    accountHash: "YOUR_ACCOUNT_HASH",
    eid: "YOUR_ENVIRONMENT_ID",
    mrt: 120
  };

  PipeSDK.insert("first", pipeParams, function(recorderObject) {});

</script>
Now, to add a second recorder to the page you will need to add a new Custom Code field to the form, copy the code you just modified in the previous Custom Code field and paste it into the new one. Make sure to use a new unique id for your second recorder. In my case, I have used the Id “second” and this is how my code looks like:
<div id="second"></div>

<script type="text/javascript">
  var pipeParams = {
    size: {
      width: 640,
      height: 390
    },
    qualityurl: "avq/360p.xml",
    accountHash: "YOUR_ACCOUNT_HASH",
    eid: "YOUR_ENVIRONMENT_ID",
    mrt: 120
  };

  PipeSDK.insert("second", pipeParams, function(recorderObject) {});

</script>
Click on the View Form button to check if the Preview page shows the second recorder.
If everything went as expected you should have a page that looks like this:
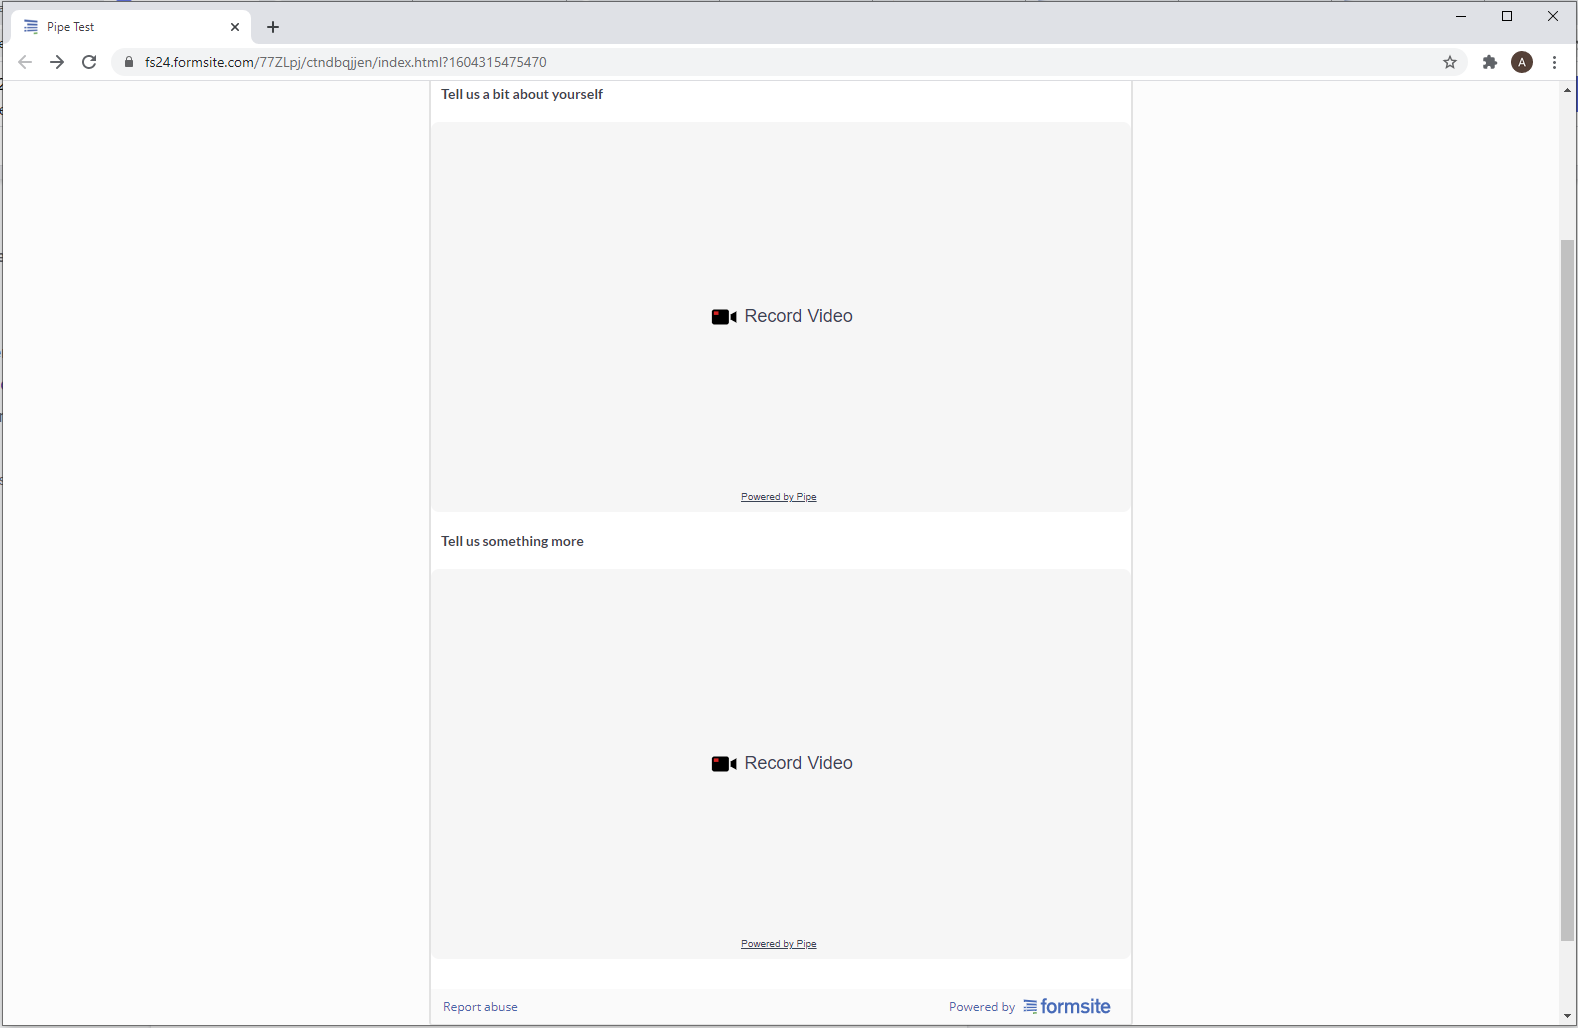
Great Job! Now you can add as many recorders as you like to Formsite. We are finally ready for the last step of this tutorial: saving the video URL(s) of each video created with each recorder.
Saving the video URL generated by each video recorder
Having the video recorders on your page is great, but if you leave your form like it is now, you will only be able to access the recordings from your Pipe account area.
If you want to save the video URLs in your Formsite entries when the users submit their answers, you will need to make some more changes to your form. This is what we will need to do:
- We will need to add a Hidden field below each recorder.
- We will add another piece of code in each Custom Code field where we have the 2.0 JS embed code.
- We will test that the Hidden fields get filled with the right video URL
Adding the Hidden fields
In your Formiste editor click on the Common Items section, drag the Hidden field and drop it below the Custom Code field where you have your first Pipe video recorder.
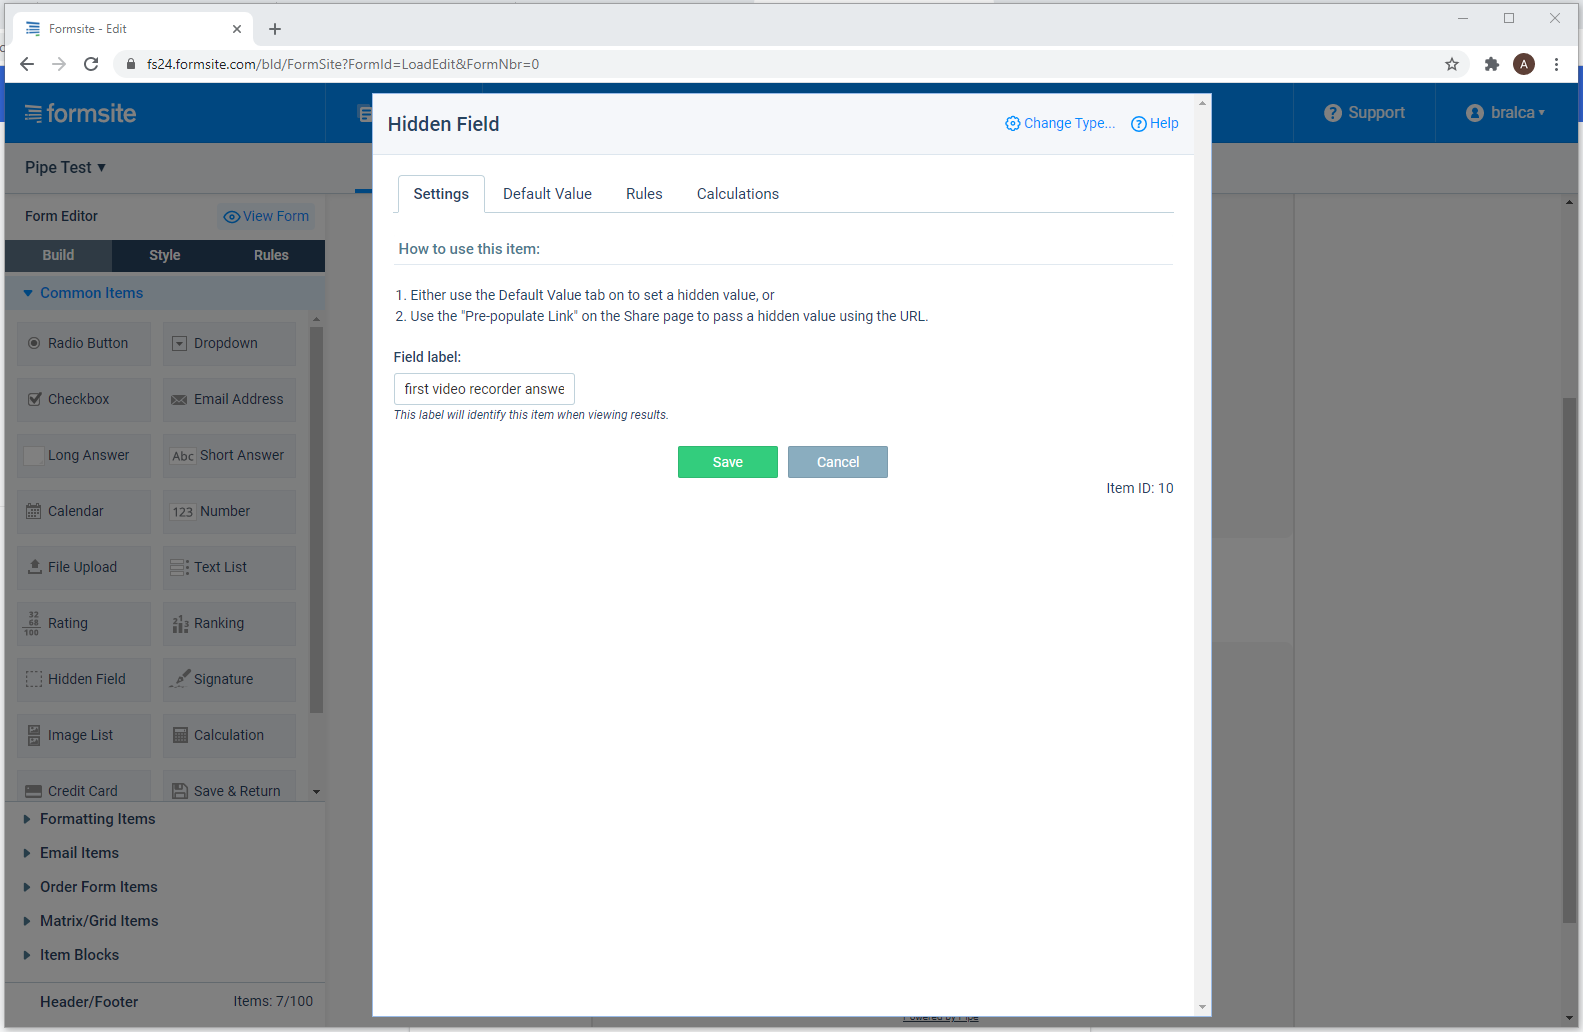
Change the Field label to whatever helps you identify the video answer associated with the first video recorder. I have renamed it “First video recorder answer”
Repeat this process for all the video recorders you have added to your form and make sure to rename them correctly.
Identify the Hidden Fields in the form page HTML
Now that you have all the Hidden fields in your form, you will need to identify them in the form’s HTML code because we will need their unique HTML ID in the next step to be able to populate those hidden fields with the URL to the newly made recording.
First, we need to identify where the element is on the form page.
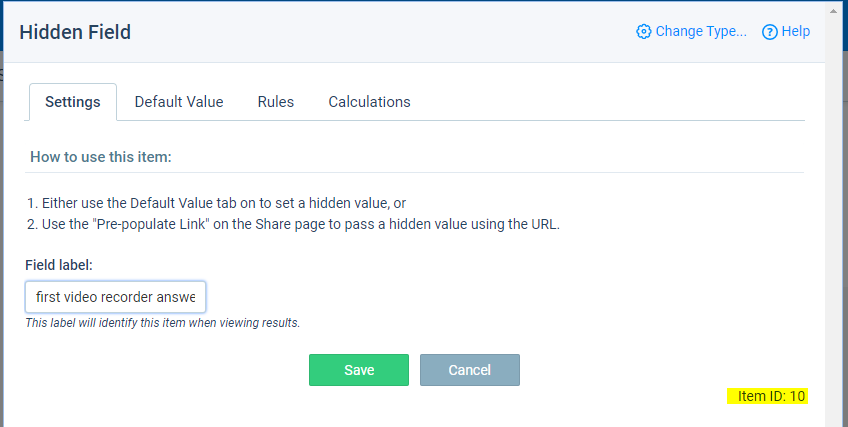
In the Formsite editor click on the edit button for your first hidden field and take note of the Item ID that you will find under the Settings tab. This is not the HTML ID we’re looking for.
Click on the View Form button to open the form preview page. On the preview page right click anywhere in the form and select Inspect from the options.
The section that will pop-up when you click Inspect represents the HTML structure of the form page.
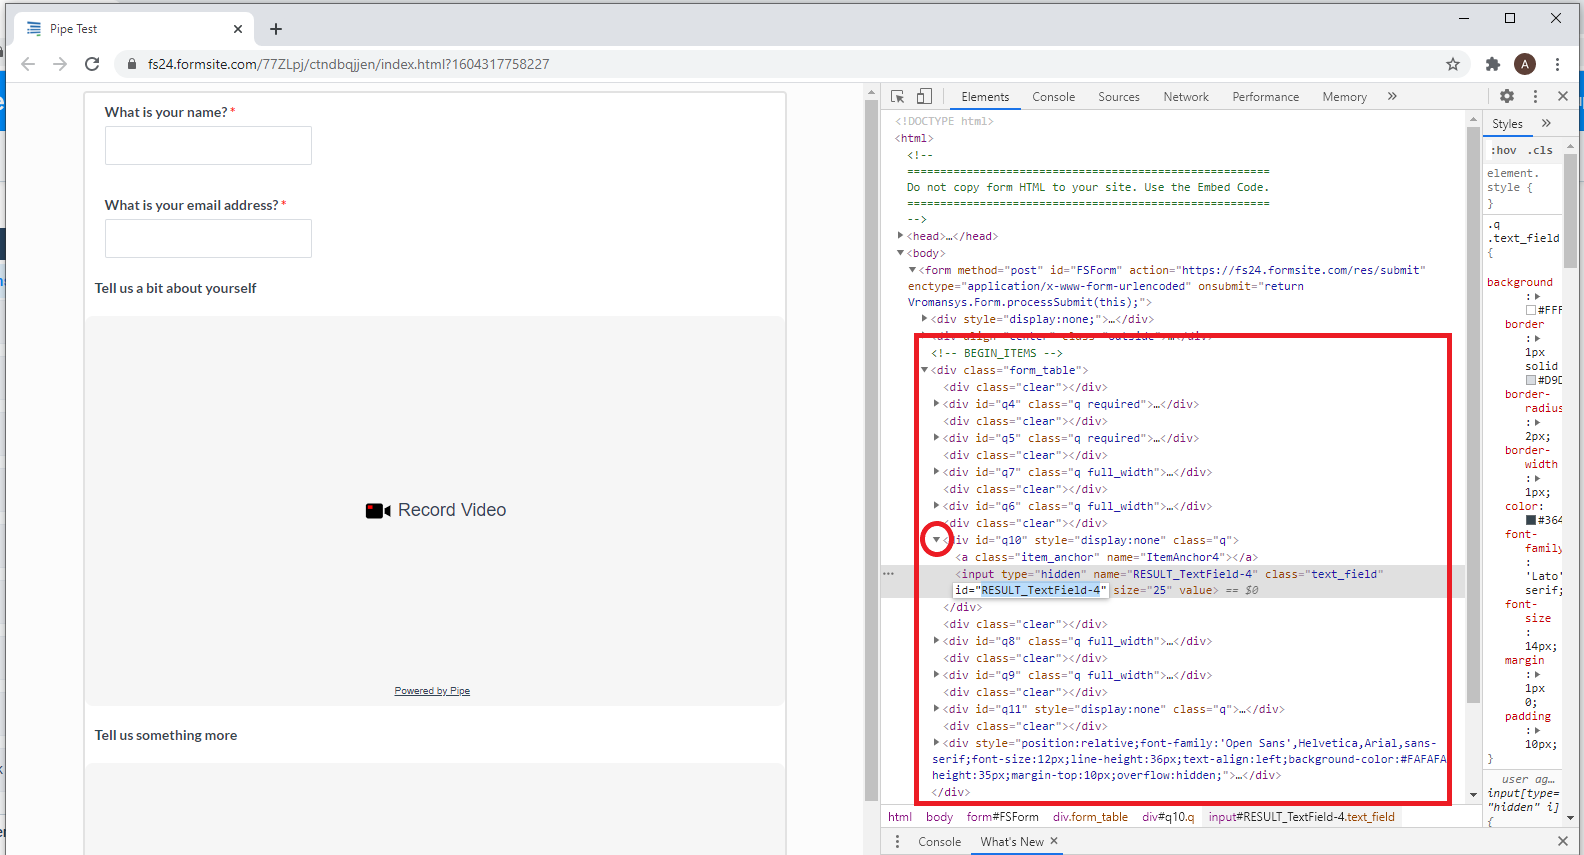
Each field of your form is identified by a unique id with a q prefix. In my case the unique ID of the Hidden HTML element is q10 (because my Hidden field Item ID is 10). Click in the down arrow of the Hidden HTML element and copy the ID of the input HTML element that will show up. In my case the ID is RESULT_TextField-4.
Do the same with the other hidden fields you may have on your form and always remember to save the id somewhere.
Generating the video URLs
Now, Let’s add a new piece of code to each Custom Code field where we previously added the 2.0 JS embed code.
Go to the first Custom Code field where you have the Pipe 2.0 JS embed code and replace this line of code:
PipeSDK.insert("first",pipeParams,function(recorderObject){});
With the following code:
PipeSDK.insert("first", pipeParams, function(recorderObject) {

  let accountHash = "YOUR_ACCOUNT_HASH";
  let formFieldId = "YOUR_FIRST_WEBSITE_FIELD_ID";

  recorderObject.onSaveOk = function(recorderId, streamName, streamDuration, cameraName, micName, audioCodec, videoCodec, fileType, videoId, audioOnly, location) {

    //onSaveOK is part of the desktop recorder's JS events API (recording from camera or screen)

    document.getElementById(formFieldId).value = "https://" + location + "/" + accountHash + "/" + streamName + ".mp4";

  };
  recorderObject.onVideoUploadSuccess = function(recorderId, filename, filetype, videoId, audioOnly, location) {
    //onVideoUploadSuccess is part of the native mobile recorder's JS events API (upload new or existing recording)

    document.getElementById(formFieldId).value = "https://" + location + "/" + accountHash + "/" + filename + ".mp4";

  };
  recorderObject.onDesktopVideoUploadSuccess = function(recorderId, filename, filetype, videoId, audioOnly, location) {
    //onDesktopVideoUploadSuccess is part of the desktop recorder's JS events API (upload existing file from desktop)

    document.getElementById(formFieldId).value = "https://" + location + "/" + accountHash + "/" + filename + ".mp4";

  };
});
In the pasted code replace the following placeholders:
- YOUR_ACCOUNT_HASH string with your real account hash, which you'll find in your Pipe account area under Account.
- YOUR_FIRST_WEBSITE_FIELD_ID with the actual HTML ID of your Hidden field which we've identified above (RESULT_TextField-4 in my case).
The JS code above covers 3 situations:
- New recording made with the camera or microphone using the desktop recorder.
- Existing recording uploaded through the desktop recorder.
- New or existing recording uploaded through the mobile (native) recorder.
This is how my code looks like once I made the changes:
PipeSDK.insert("first", pipeParams, function(recorderObject) {

  let accountHash = "e46b2e13d3ffsadfafrweca342f1a691b00c";
  let formFieldId = "RESULT_TextField-4";

  recorderObject.onSaveOk = function(recorderId, streamName, streamDuration, cameraName, micName, audioCodec, videoCodec, fileType, videoId, audioOnly, location) {

    //onSaveOK is part of the desktop recorder's JS events API (recording from camera or screen)

    document.getElementById(formFieldId).value = "https://" + location + "/" + accountHash + "/" + streamName + ".mp4";

  };
  recorderObject.onVideoUploadSuccess = function(recorderId, filename, filetype, videoId, audioOnly, location) {
    //onVideoUploadSuccess is part of the native mobile recorder's JS events API (upload new or existing recording)

    document.getElementById(formFieldId).value = "https://" + location + "/" + accountHash + "/" + filename + ".mp4";

  };
  recorderObject.onDesktopVideoUploadSuccess = function(recorderId, filename, filetype, videoId, audioOnly, location) {
    //onDesktopVideoUploadSuccess is part of the desktop recorder's JS events API (upload existing file from desktop)

    document.getElementById(formFieldId).value = "https://" + location + "/" + accountHash + "/" + filename + ".mp4";

  };

});
Repeat this process for all your recorders in the form and once you are done click on Update and then click on Preview to test your form.
Testing your form
In your Preview page, record a video using all your Pipe video recorders.
Submit your answers and then check your form’s entries (which you can find in the Results tab in your Formsite editor).
If everything worked as expected, you should see something like this:
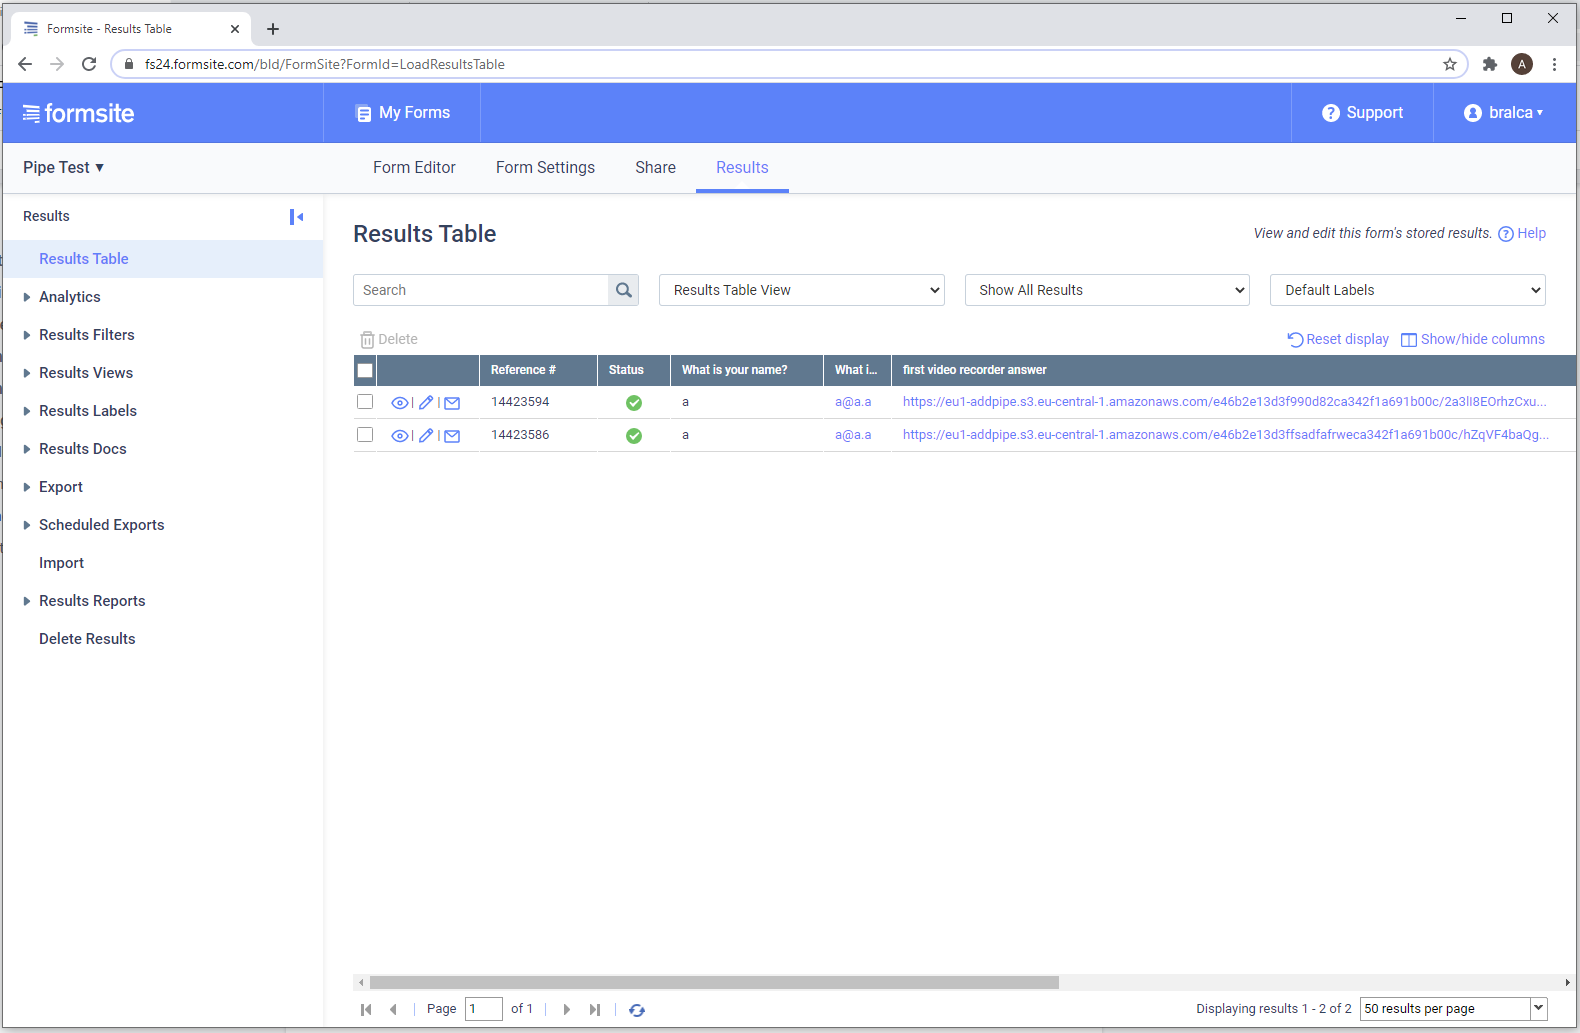
We are done!
Please let us know what you think about the new Pipe Video Recorder and if you have any questions, don’t hesitate to contact us. We’ll be happy to help you!