
How To Capture Videos On Your Wix Website Using Pipe Video Recorder
In this step-by-step guide we cover how to easily capture videos on your Wix Website.
If you have a Wix website and you are struggling with capturing and managing video recordings on your own this guide will save you a lot of time and energy. After integrating the Pipe Video Recorder on your Wix website your visitors will be able to record videos directly on your website and you will be able to access and manage all recordings from your Pipe account area. Let’s go step-by-step!
Table of Contents
- Requirements
- Creating a Wix Website
- Adding the Pipe Video Recorder to A Page
- Testing the Video Recorder on your Wix Website
Requirements
In order to follow this guide you will need to:
- Create a Wix account
- Connect your domain to your Wix website
- Sign up for a Pipe account
Although you can create a Wix account for free, to add the Pipe video recorder to your Wix website you will need to be able to add some code to your Wix website, which is a paid feature. It is thus necessary to upgrade your Wix website to one (any) of their Premium Plans. You can however try any Wix Premium Plan by signing up for a paid plan and cancelling within 14 days to receive a full refund.
Make sure also to have your own domain and to connect it to your Wix website. This is required to be able to access the Tracking & Analytics section, which we will use to add the Pipe video recorder to your Wix website.
With Pipe, if you haven’t signed up already, you can get access to the 14 days free trial. The process is pretty straight-forward, it takes just 1 minute - no credit card required.
Creating a Wix Website
If you already have a Wix website you can skip this step. If you don't, follow along.
Once you have created your account with Wix go to My Sites and click on the Create a new site button. You will be asked to choose what type of website you want to create. For this example, I used the Business option, but you should choose the one that makes more sense to your use case.
Now you can choose if you want to build your website by yourself or if you want to use a Template. I decided to pick a blank template for this example, so I will select the Choose a Template option on the right and in the next screen I selected the Empty option on the left. In the final screen, I chose Start from Scratch to start building my Wix website.

Adding the Pipe Video Recorder to A Page
With your website created we'll use the Wix editor and the embed code from your Pipe account area to add the Pipe video recorder to one of your Wix website pages.
Add a Placeholder Element
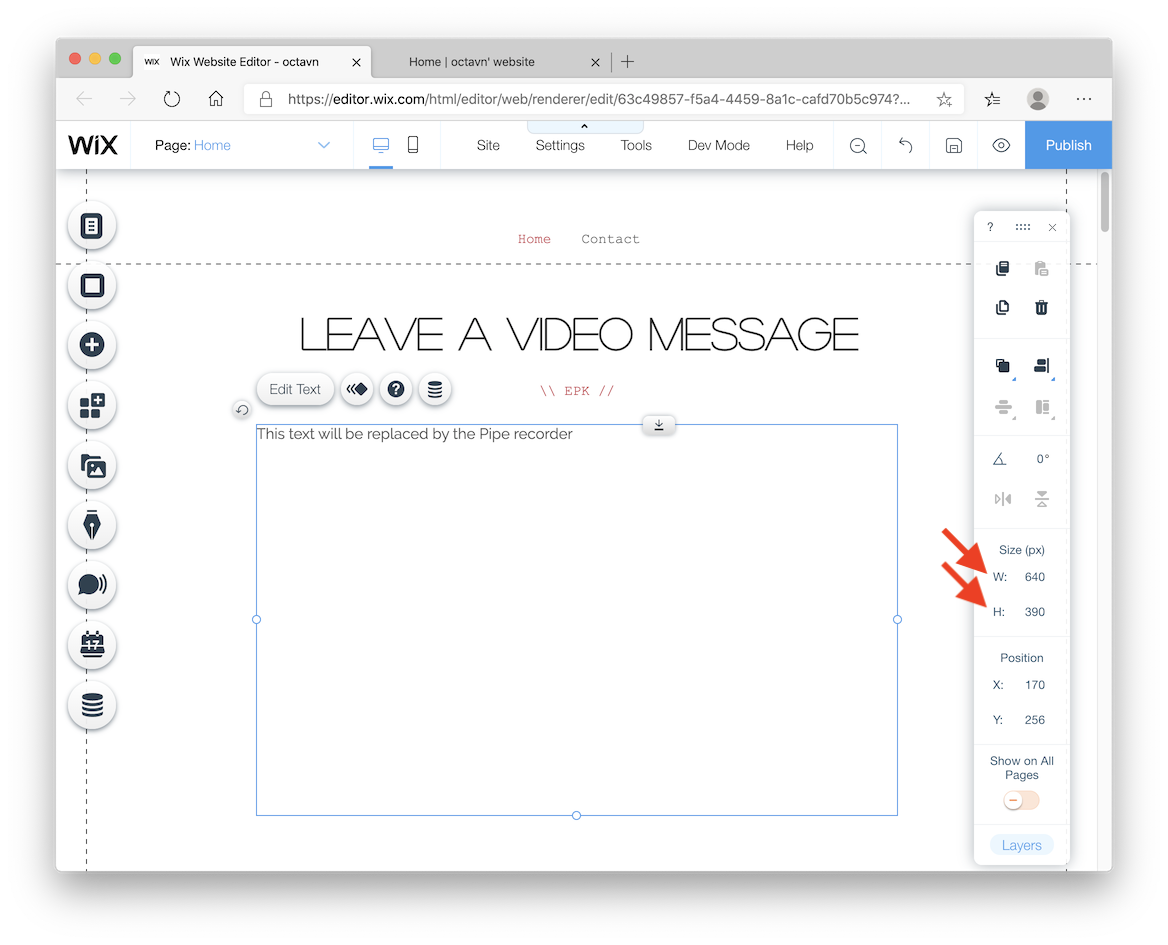
First, let’s add a Paragraph element to the page on your Wix website where you want the recorder to show up. This element will be just a placeholder for the recorder. We'll make it the right size so we'll be able to position it correctly.
To add the placeholder element press the + button on the left side of the Wix editor and choose a plain Paragraph element from Text > Paragraphs .

With the paragraph on your page we'll now resize it from the right menu. Our recorder client will be 640 x 390 px in size on desktop devices so I'll resize the text area to that exact size to have a really good idea of where and how the recorder will be positioned on desktop against other elements on the page. For my use case I'll also center align it.
With the shape correctly sized and positioned you need to Save and Publish the website. These 2 steps will make our changes public.
Next we will turn the placeholder element (a paragraph) into a video recorder with JavaScript. If you are not too technical, don’t worry, it’s going to be easy to follow.
On the published site page, right click on the paragraph -> Inspect and in the right window look for the id of the parent DIV element. Make a copy the id. In our case, the DIV element had the id comp-k6qsb2z2. We will need the id later to tell JS what element to replace on the page.

Add The Pipe JS and CSS Libraries to Your Website
For this step you will have to upgrade your Wix website to a paid Premium Plan and connect your own domain to your Wix website.
The Pipe JS and CSS libraries are required to add the Pipe recorder to a page. To add them to your website go to the Wix site editor and click Settings -> Tracking & Analytics.
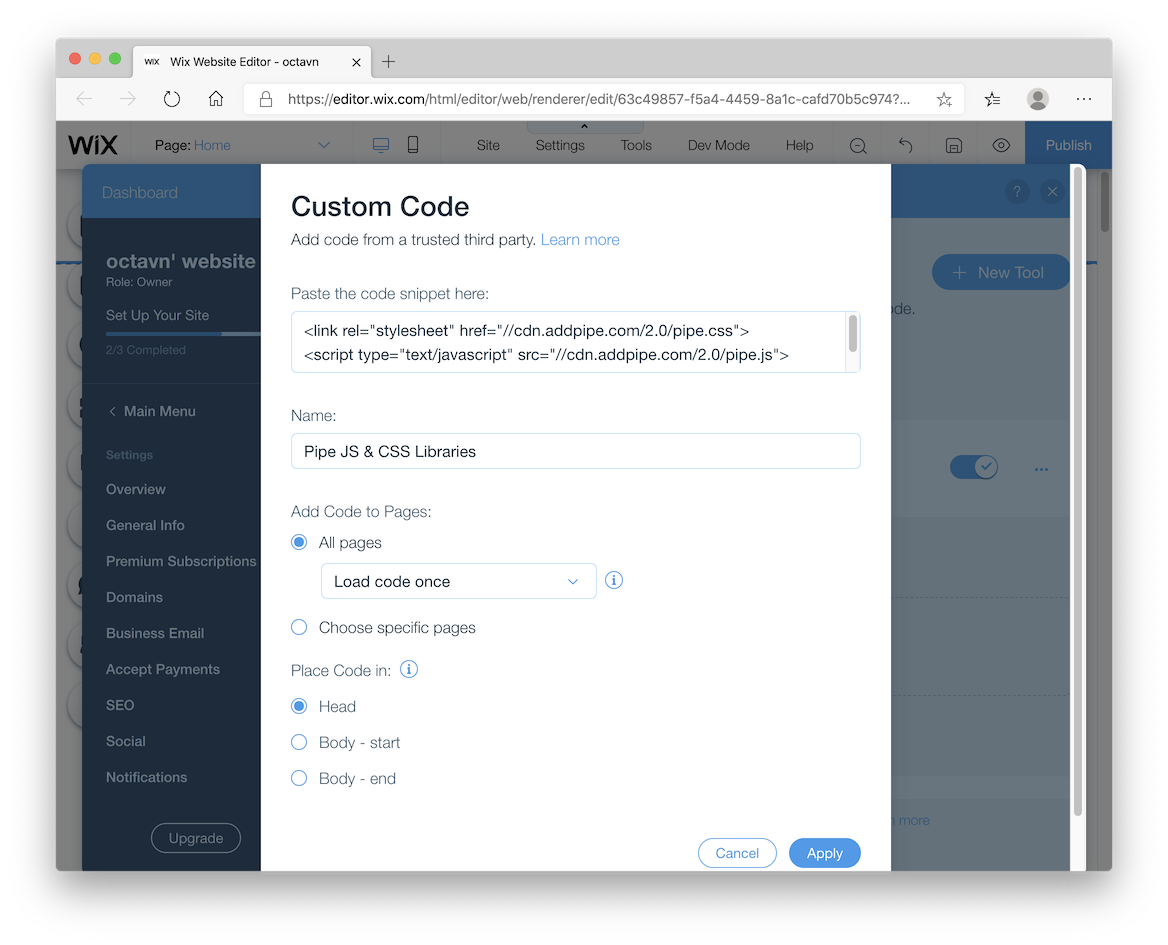
In the Tracking & Analytics section click on the New Tool button and select Custom Code. In the popup we’ll need to add the pipe.css and pipe.js scripts from our Pipe account area to be loaded on all pages in the Head section.
The pipe.css and pipe.js code can be found in your Pipe account area under the Embed Recorder tab. Scroll down and you will find the code you need under the 2.0 JS tab on the right.
We'll be using the 2.0 JS embed code with Wix. The Wix editor is rather strict so we could not use our simpler 2.0 HTML embed code.

Copy the upper section of the 2.0 JS embed code and paste it into the snippet text field inside your Wix Custom Code tool. Give it a name and make sure the Place Code In value is set to Head. This is how the code and your Custom Code modal should look:
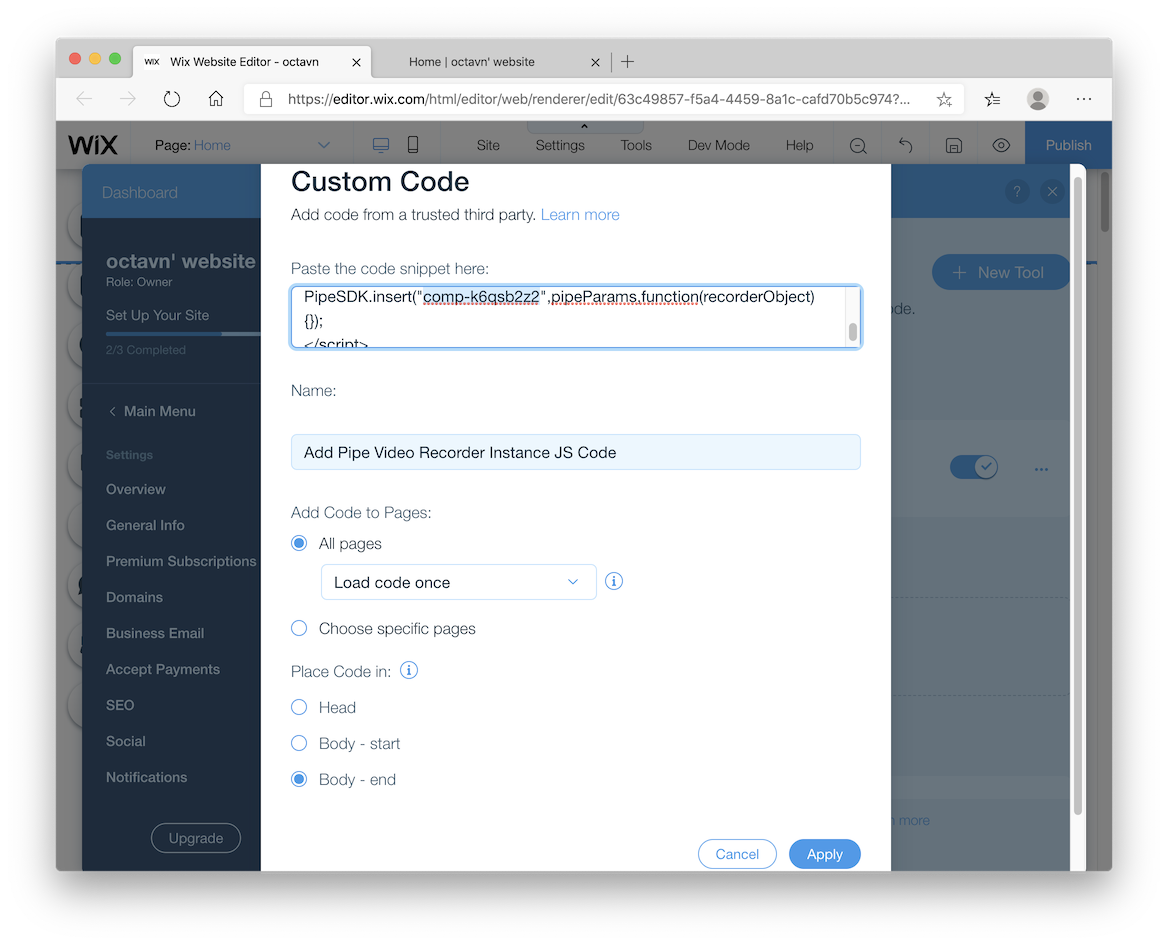
Now click the New Tool button again and select Custom Code. We'll use this 2nd tool to add the rest of the 2.0 JS embed code to be loaded at Body - end.
So:
- copy the 2nd part of the 2.0 JS embed code from the Pipe account area
- paste it into the snippet input field
- remove the 1st line
<div id="custom-id"></div> - change the default custom-id value with the actual id of the Text element we're replacing. In our case the id was comp-k6qsb2z2.
This is how your code should look:
<script type="text/javascript">
  var pipeParams = {
    size: {
      width: 640,
      height: 390
    },
    qualityurl: "avq/360p.xml",
    accountHash: "YOUR_ACCOUNT_HASH",
    eid: "YOUR_ENVIRONMENT_ID",
    mrt: 120
  };
  PipeSDK.insert("comp-k53xsxpc", pipeParams, function(recorderObject) {});

</script>
If your Wix website is supposed to work also on mobile devices, you need to make a little change to the code above. Just change the value of the width from absolute (640) to relative ("100%") and the video recorder will be responsive as the rest of your Wix website.
This is the final code
<script type="text/javascript">
  var pipeParams = {
    size: {
      width: "100%",
      height: 390
    },
    qualityurl: "avq/360p.xml",
    accountHash: "YOUR_ACCOUNT_HASH",
    eid: "YOUR_ENVIRONMENT_ID",
    mrt: 120
  };
  PipeSDK.insert("comp-k53xsxpc", pipeParams, function(recorderObject) {});

</script>
This is how the code AND your Custom Code modal should look:
We are done! Here's how the Wix Tracking Tools & Analytics section should look after adding the Pipe embed codes.
Now click on Apply and then make sure to Save and Publish your Wix website.
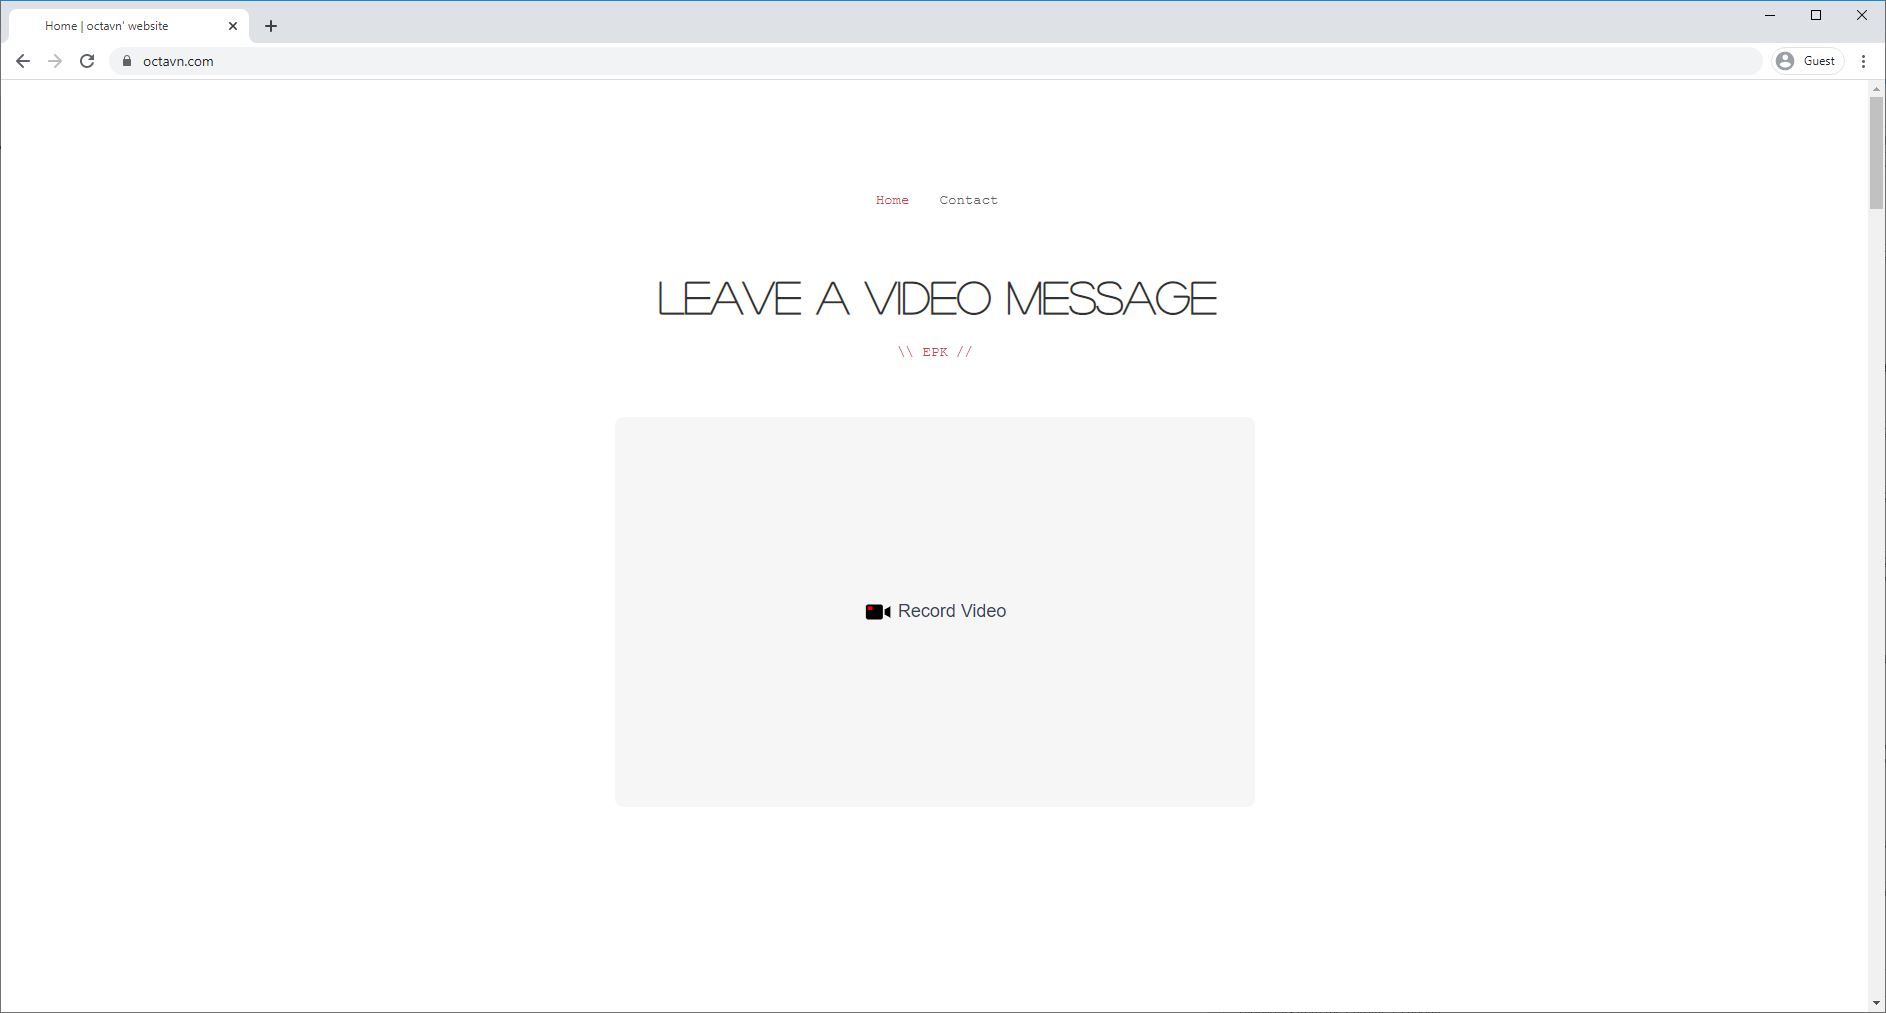
Testing the Video Recorder on your Wix Website
You should see the Pipe Video Recorder loading where you placed the Text element!
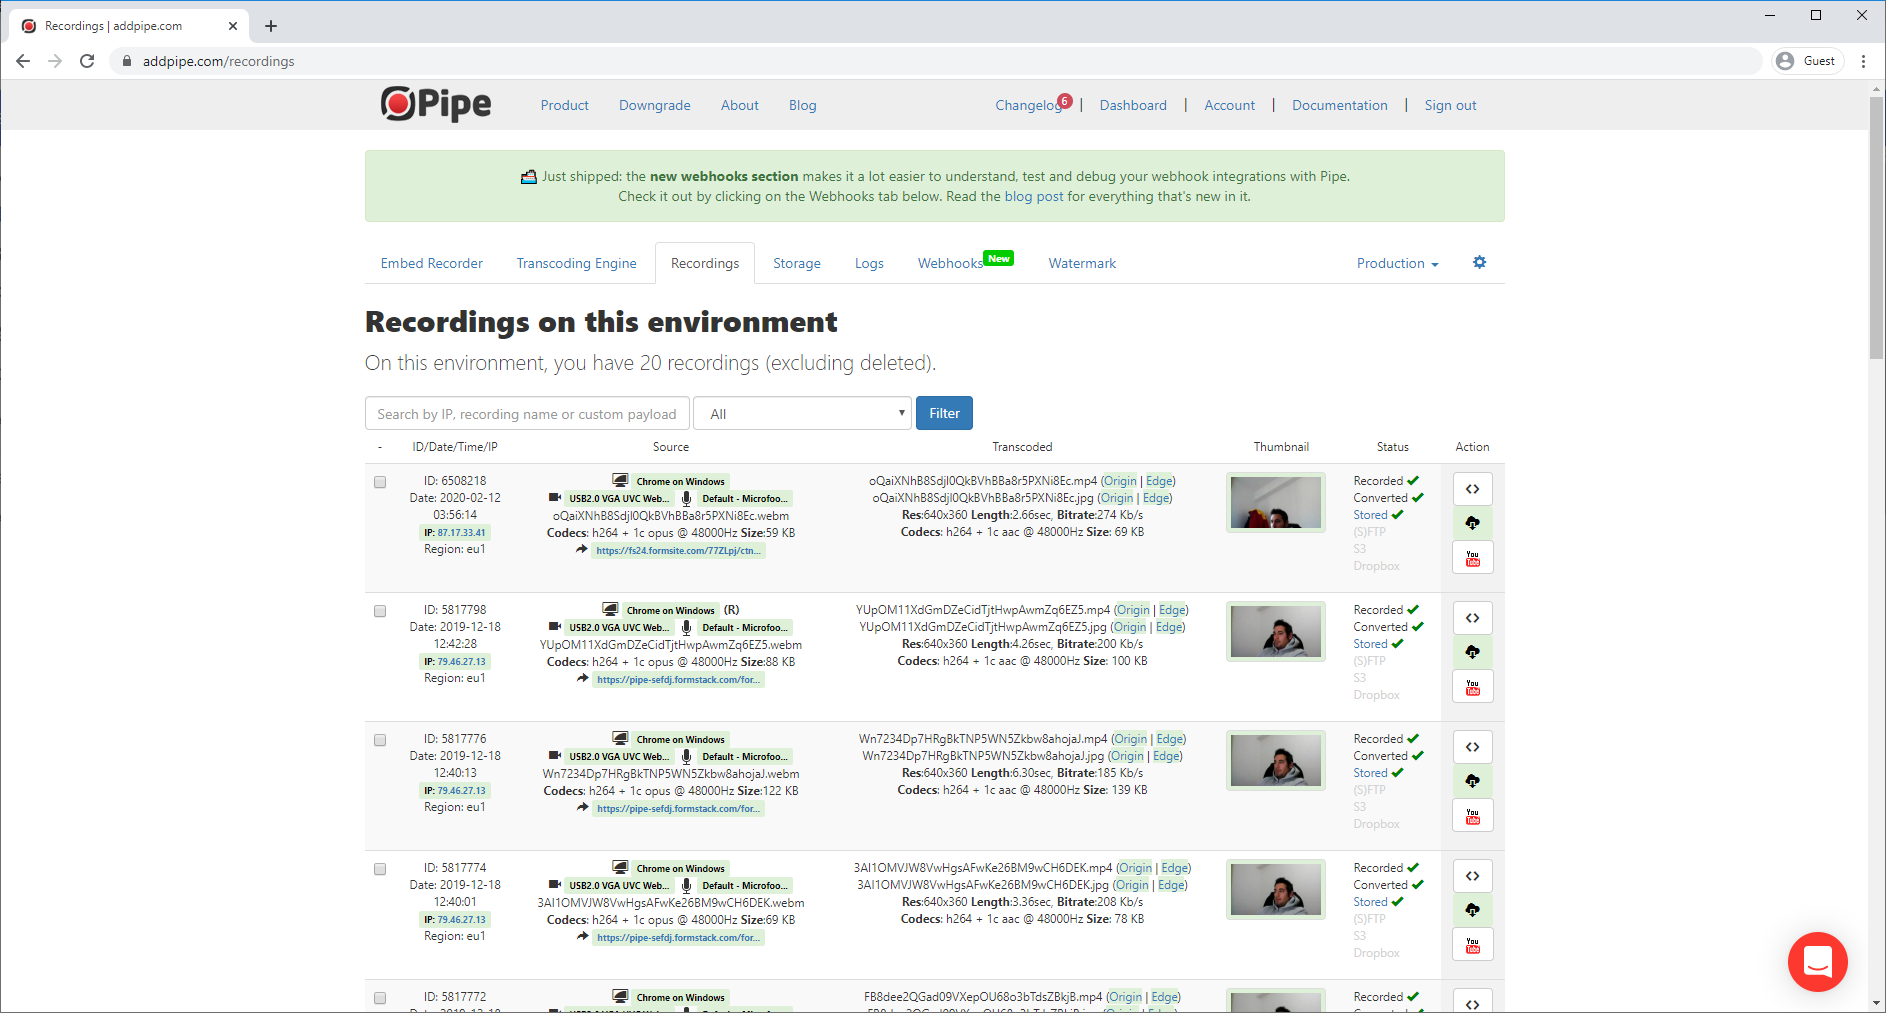
Now all the video recordings you will capture through this video recorder will be saved in your Pipe Account. To access them you can go in the Recordings Tab within your Account Area.
Please let us know what you think about the Pipe Video Recorder and if you have any questions, don’t hesitate to contact us. We’ll be happy to help you!