How to integrate Pipe Video Recorder HTML 2.0 Embed Code with Formstack forms
Follow this step-by-step guide on how to integrate multiple video answers to Formstack using Pipe Video Recorder 2.0
2.5 years ago we wrote our first article covering how to integrate the Pipe video recorder with Formstack. Even though it was very good and many Formstack clients and users got a lot of value from it had one major problem: the recording client we had back then did not allow for multiple video recorders to be placed on the same form or page. Thanks to the new 2.0 embed code which we released in beta almost 1 year and a half ago one can now add as many recorders to the page or form as needed.
Below you'll find a step-by-step guide on how to add multiple video & audio recorders to a Formstack form using our new 2.0 HTML embed code.
Table of contents
- Creating a form with Formstack
- Adding an Embed element to the form
- Using the Pipe 2.0 HTML Embed Code
- Integrating Pipe's Embed Code in your form
- Getting the video URL when users submit answers
- Testing your form
- Adding multiple video recorders to your form
1 - Creating a form with Formstack
From your Formstack dashboard click Create, select Form and click on Next Step and give a name to your new form. For the purpose of this tutorial, I am going to start with a blank form but you can also start with an existing template.
2 - Adding an Embed Code element to the form
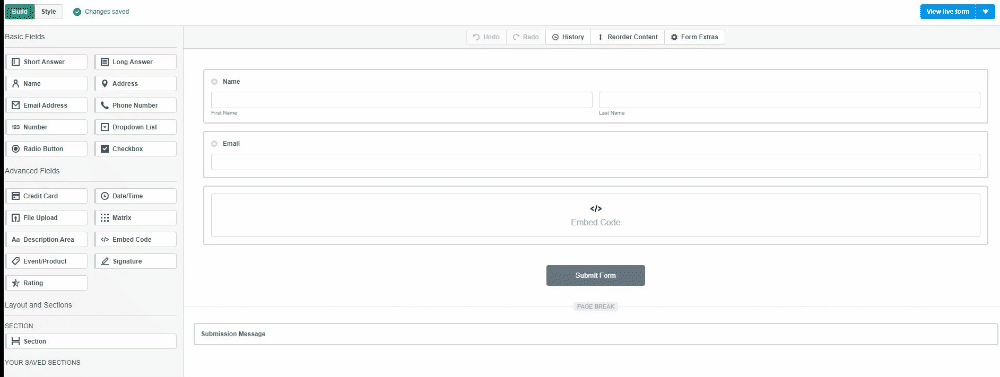
To add the Pipe video recording client to your form go to the left section and add an Embed Code element from the Advanced Fields section. Just drag the element from the left panel and drop it where you want to record the video in your form. We will use this element to create the question + recorder that will collect your video answers.

3 - Using the Pipe 2.0 HTML embed code
In order to use the Pipe 2.0 HTML Embed Code in your form, you need to create an account with Pipe. If you haven’t signed up already you can use this link to get access to 14 days free trial. The process is pretty straight-forward, it takes just 1 minute - no credit card required.
Once you're in your Pipe account area, go to the Embed section. The embed code is on the lower right side of the page. This is the code you need to insert within the Embed Code element in your form on Formstack. We'll use the 2.0 HTML code.

4 - Integrating Pipe’s recorder in your form
Now copy the Pipe 2.0 HTML embed code and paste the code in the Field Specific code editor of the (new) Embed Code element in your Formstack form.

This is the code you should have in your Embed Code element:
<link rel="stylesheet" href="//cdn.addpipe.com/2.0/pipe.css">
<script type="text/javascript" src="//cdn.addpipe.com/2.0/pipe.js"></script>

<piperecorder id="custom-id" pipe-width="640" pipe-height="390" pipe-qualityurl="avq/360p.xml" pipe-accounthash="YOUR-ACCOUNT-HASH" pipe-eid="YOUR-ENV-ID" pipe-mrt="120"></piperecorder>
In this code, there are 2 HTML attributes you should be aware of:
- id: the default value is “custom-id”. We will change this value when we want to add multiple video recorders to the form.
- pipe-accounthash: this is the access key to your Pipe Account and we will use it in the next section to retrieve the URL of the answers provided by the users.
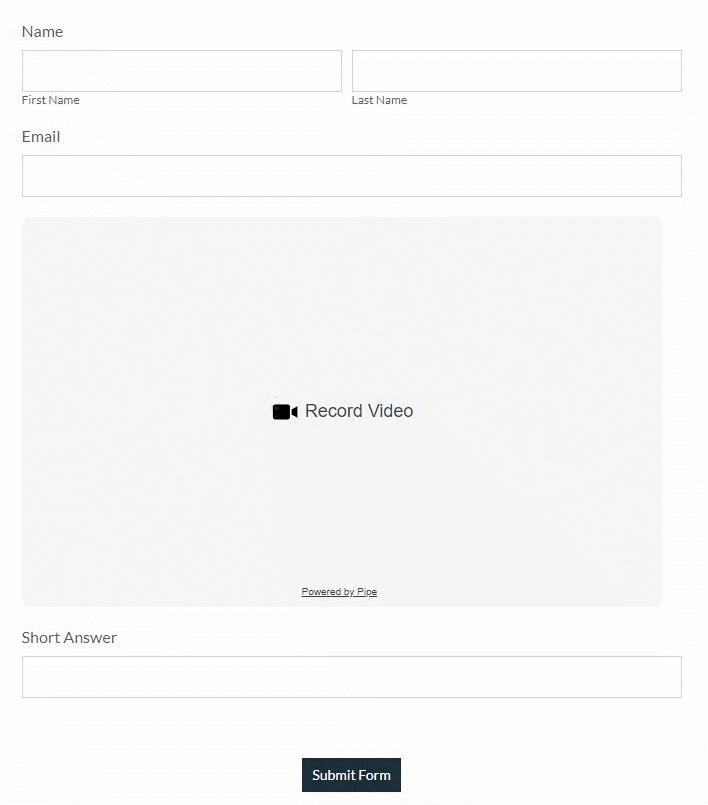
With the recorder embed code in place you can now click View live form (top right) and you should see the form with a recorder in it.
5 - Getting the video URL when users submit answers
Having the video recorder in your form will allow you to collect video answers. These videos will be saved by default in your Pipe account. While this is great, ideally you want the URLs to these video answers to be stored in your Formstack account together with the other data collected with each form submission. To do that, we will need to add another field in our form and apply a little trick to make it invisible to the users. Once we have this field set up, it will be automatically populated with the video URL to the answer. When the user submits the form, the URL will be saved together with the rest of data you collected from the user in your Formstack account. Let’s go step-by-step.
First, you need to add a Short Answer field to your form from the left side of the Formstack form builder.
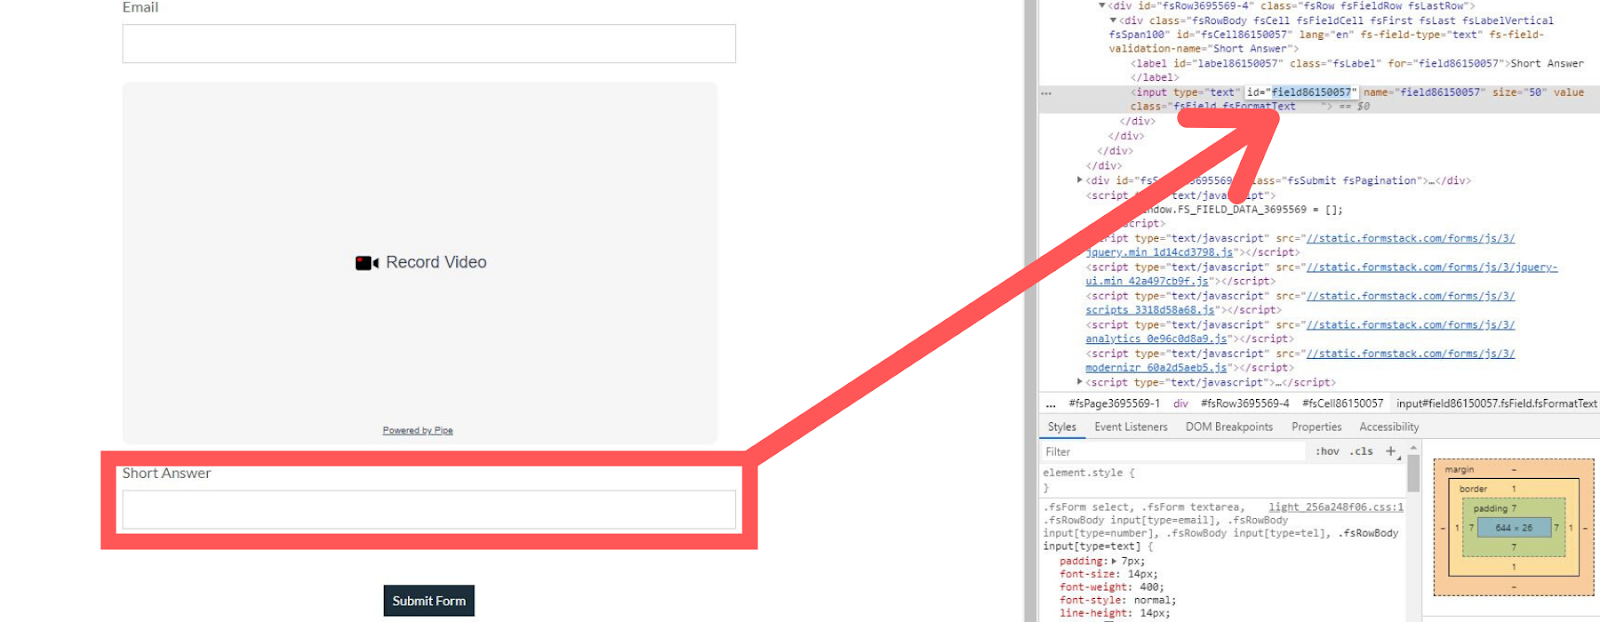
Second, you need to get the HTML ID of this new field. To do that, click the View live form button and, in the live form page, go with your mouse on the Short Answer field, right-click on it and select Inspect. You should see a new section popping up on your right with the HTML code of this field highlighted. There you will find the ID of the field, which you should save it somewhere, we'll use this later. My Id, in this case, is field86150057.
Back in the Formstack builder edit the Embed Code element and paste the JS code from here at the bottom of the existing code.
<script>
PipeSDK.onRecordersInserted = function(){
	accountHash = "ACCOUNT-HASH";
	formFieldId = "HTML-FIELD-ID";
  myRecorderObject =  PipeSDK.getRecorderById('custom-id');
  myRecorderObject.onSaveOk = function(recorderId, streamName, streamDuration, cameraName, micName, audioCodec, videoCodec, fileType, videoId, audioOnly, location){
		document.getElementById(formFieldId).value = "https://" + location + "/" + accountHash + "/" + streamName + ".mp4";
  };
	myRecorderObject.onVideoUploadSuccess = function(recorderId, filename, filetype, videoId, audioOnly, location){
		document.getElementById(formFieldId).value = "https://" + location + "/" + accountHash + "/" + filename + ".mp4";
  }
  myRecorderObject.onDesktopVideoUploadSuccess = function(recorderId, filename, filetype, videoId, audioOnly, location){
		document.getElementById(formFieldId).value = "https://" + location + "/" + accountHash + "/" + filename + ".mp4";
	}
};
</script>
In the pasted code replace the following placeholders:
- ACCOUNT-HASH string with your real account hash, which you'll find in your Pipe account area under Account.
- HTML-FIELD-ID with the actual HTML ID of your Short Answer field which we've identified above (field86150057 in my case).
The JS code above covers 3 situations:
- New recording made with the camera or microphone using the desktop recorder
- Existing recording uploaded through the desktop recorder
- New or existing recording uploaded through the mobile (native) recorder
6 - Testing your form
Great! Everything should be in place now to test our form, so let’s click on the View live form button and in the page that will be opened, you should see the Pipe video recorder and all the other fields you have in your form, including the Short Answer field where we will collect the video URLs. Before hiding this field let’s test if everything works correctly. Just record a short video, when you stop recording, you should see the URL of the video in the Short Answer field.
Now that everything is working correctly, we can go back to the Formstack editor and hide the Short Answer field because we don’t want users to have access to their video answers’ URL.
When a user submits the form you will see the video answers’ URL as in the picture below.

7 - Adding multiple video recorders to your form
In order to add multiple video recorders to our form, we need to make some changes first. For this reason, let’s assume that you need to add 3 video recorders to your form, but the same logic applies for as many recorders as you like.
The first change to make is in the structure of the Pipe 2.0 HTML embed code within our form.
When we added just one video recorder we put all the code within the same Embed Code element, but now that we need to manage multiple video recorders it is better to structure the code in a way that’s easier to maintain. Let’s start by adding a new Embed Code element at the very beginning of our form and pasting the first 2 lines of the 2.0 HTML embed code in it.
<link rel="stylesheet" href="//cdn.addpipe.com/2.0/pipe.css">
<script type="text/javascript" src="//cdn.addpipe.com/2.0/pipe.js"></script>

<piperecorder id="custom-id" pipe-width="640" pipe-height="390" pipe-qualityurl="avq/360p.xml" pipe-accounthash="YOUR-ACCOUNT-HASH" pipe-eid="YOUR-ENV-ID" pipe-mrt="120"></piperecorder>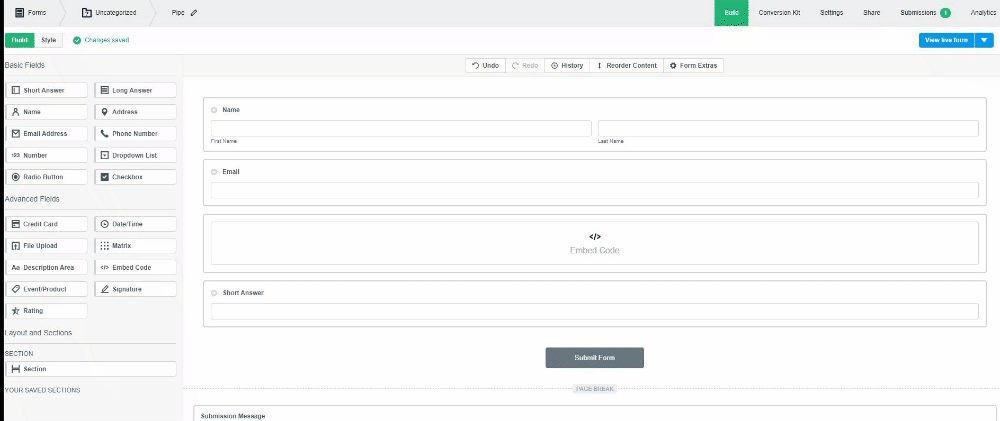
Back in the initial Embed Code element where you want the first video recorder in your form, leave just the line with the `<piperecorder...>` HTML tag and change it's id from “custom-id” to “question-1”.

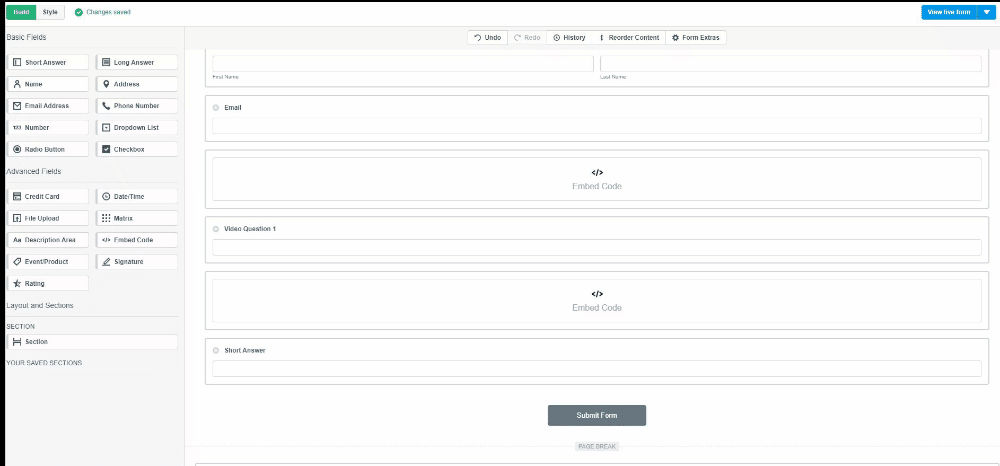
Now make sure to rename the Short Answer field to something that makes sense for you and make it visible again if it was still set up as hidden (since we're testing multiple recorders now). I have renamed it Video Question 1.
To add a new video recorder to your form now you just need to duplicate the Embed Code and Short Answer (or Video Question 1) fields. Make sure to change the ID in the Embed Code field and to rename the Short Answer field in order to link them to the right answer. I used “question-2” for the ID and Video Question 2 for the Short Answer.
Once you added all the video recorders you need, click View live form to retrieve all the IDs of the Video Question fields where we will store the video URLs when the user submits the form. I have added 3 video recorders so I will have 3 fields with 3 different IDs:
- Video Question 1 ID: field86156407
- Video Question 2 ID: field86159124
- Video Question 3 ID: field86163799
Now we have all we need to adapt the script we used before to retrieve the video URL of one video, the only difference is that now we will need to tweak it a bit to make it work with multiple video recorders in order to place the right video URL in the right field.
This is the original code we used before
<script>
PipeSDK.onRecordersInserted = function(){
	accountHash = "ACCOUNT-HASH";
	formFieldId = "HTML-FIELD-ID";
  myRecorderObject =  PipeSDK.getRecorderById('custom-id');
  myRecorderObject.onSaveOk = function(recorderId, streamName, streamDuration, cameraName, micName, audioCodec, videoCodec, fileType, videoId, audioOnly, location){
		document.getElementById(formFieldId).value = "https://" + location + "/" + accountHash + "/" + streamName + ".mp4";
  };
	myRecorderObject.onVideoUploadSuccess = function(recorderId, filename, filetype, videoId, audioOnly, location){
		document.getElementById(formFieldId).value = "https://" + location + "/" + accountHash + "/" + filename + ".mp4";
  }
  myRecorderObject.onDesktopVideoUploadSuccess = function(recorderId, filename, filetype, videoId, audioOnly, location){
		document.getElementById(formFieldId).value = "https://" + location + "/" + accountHash + "/" + filename + ".mp4";
	}
};
</script>
And this is the new code we will place in a new Embed Code element at the very end of the form.
<script>
PipeSDK.onRecordersInserted = function(){
	accountHash = "YOUR-ACCOUNT-HASH";
	// Video Question 1 ID
	formFieldIdQ1 = "field86156407";
	// Video Question 2 ID
  	formFieldIdQ2 = "field86159124";
  	// Video Question 3 ID
  	formFieldIdQ3 = "field86163799"

  	//piperecorder ID 1
    myRecorderObjectQ1 =  PipeSDK.getRecorderById('question-1');
    //piperecorder ID 2
    myRecorderObjectQ2 =  PipeSDK.getRecorderById('question-2');
    //piperecorder ID 3
    myRecorderObjectQ3 =  PipeSDK.getRecorderById('question-3');


    // This group of functions will retrieve the Video URL of Video Question 1 and place it in the right field
    myRecorderObjectQ1.onSaveOk = function(recorderId, streamName, streamDuration, cameraName, micName, audioCodec, videoCodec, fileType, videoId, audioOnly, location){
		document.getElementById(formFieldIdQ1).value = "https://" + location + "/" + accountHash + "/" + streamName + ".mp4";
    };
	myRecorderObjectQ1.onVideoUploadSuccess = function(recorderId, filename, filetype, videoId, audioOnly, location){
		document.getElementById(formFieldIdQ1).value = "https://" + location + "/" + accountHash + "/" + filename + ".mp4";
    }
    myRecorderObjectQ1.onDesktopVideoUploadSuccess = function(recorderId, filename, filetype, videoId, audioOnly, location){
		document.getElementById(formFieldIdQ1).value = "https://" + location + "/" + accountHash + "/" + filename + ".mp4";
	}

    // This group of functions will retrieve the Video URL of Video Question 2 and place it in the right field
    myRecorderObjectQ2.onSaveOk = function(recorderId, streamName, streamDuration, cameraName, micName, audioCodec, videoCodec, fileType, videoId, audioOnly, location){
		document.getElementById(formFieldIdQ2).value = "https://" + location + "/" + accountHash + "/" + streamName + ".mp4";
    };
	myRecorderObjectQ2.onVideoUploadSuccess = function(recorderId, filename, filetype, videoId, audioOnly, location){
		document.getElementById(formFieldIdQ2).value = "https://" + location + "/" + accountHash + "/" + filename + ".mp4";
    }
    myRecorderObjectQ2.onDesktopVideoUploadSuccess = function(recorderId, filename, filetype, videoId, audioOnly, location){
		document.getElementById(formFieldIdQ2).value = "https://" + location + "/" + accountHash + "/" + filename + ".mp4";
	}

    // This group of functions will retrieve the Video URL of Video Question 3 and place it in the right field
    myRecorderObjectQ3.onSaveOk = function(recorderId, streamName, streamDuration, cameraName, micName, audioCodec, videoCodec, fileType, videoId, audioOnly, location){
		document.getElementById(formFieldIdQ3).value = "https://" + location + "/" + accountHash + "/" + streamName + ".mp4";
    };
	myRecorderObjectQ3.onVideoUploadSuccess = function(recorderId, filename, filetype, videoId, audioOnly, location){
		document.getElementById(formFieldIdQ3).value = "https://" + location + "/" + accountHash + "/" + filename + ".mp4";
    }
    myRecorderObjectQ3.onDesktopVideoUploadSuccess = function(recorderId, filename, filetype, videoId, audioOnly, location){
		document.getElementById(formFieldIdQ3).value = "https://" + location + "/" + accountHash + "/" + filename + ".mp4";
	}

};
</script>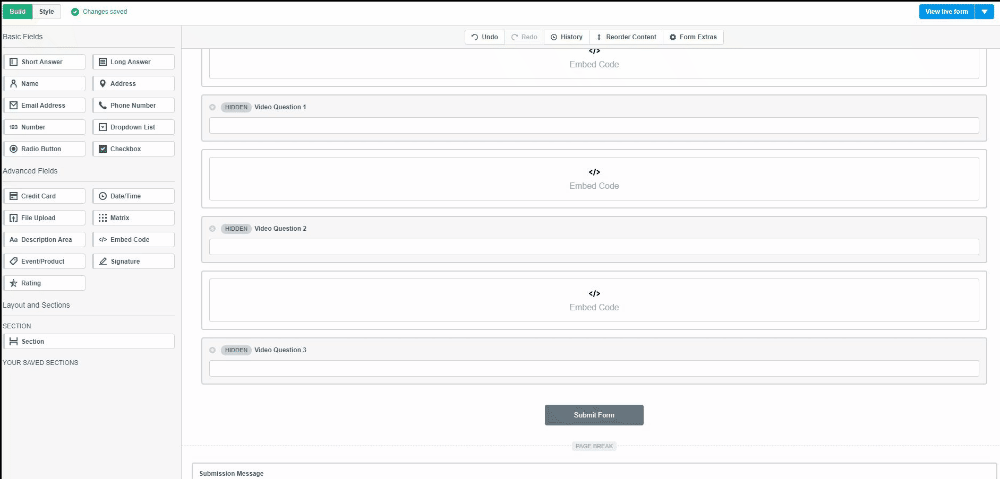
The last step is to go back to the Formstack editor and hide all the fields that store the video URLs so that the users won’t see them.

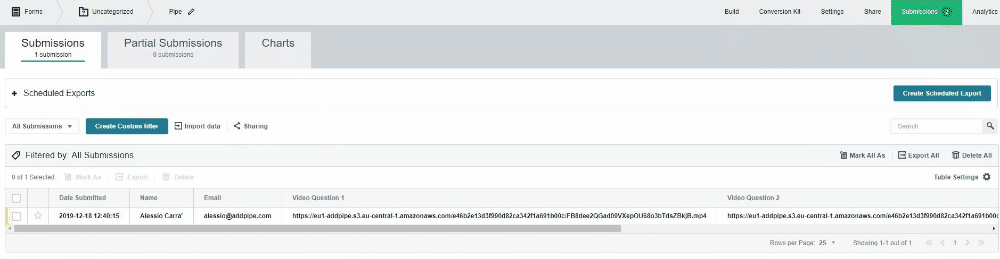
Finally, it’s time to test our form with multiple video recorders. After recording the videos and submitting the forms you should see something similar to the image below in your Formstack account.
We are done! Please let us know what you think about the new Pipe Video Recorder and if you have any questions don’t hesitate to contact us. We’ll be happy to help you!