Using Recorder.js to capture WAV audio in HTML5 and upload it to your server or download locally
This is the 1st post in our new recording audio in HTML5 series. Next, we’ll cover using WebAudioRecorder, vmsg, opus-recorder and the MediaStream Recording API.
Matt Diamond‘s Recorder.js is a popular JavaScript library for recording audio in the browser as uncompressed PCM audio in .wav containers. It is the 1st JS library to deal with audio recording in the browser – the initial commit is from September 2012, almost 6 years ago. Before, the only way was to use Flash.
When used with getUserMedia(), Recorder.js can record audio from a user’s microphone (or other input devices) directly on your website.
Despite its popularity – the project has 2700+ stars on GitHub – the library is no longer maintained. In July 2016, Matt updated the repository to say that:
This repository is not being actively maintained due to lack of time and interest.
That’s also in part because newer libraries, like Web Audio Recorder, vmsg, and opus-recorder, although a lot bigger, can also convert the audio to MP3, Opus, or Vorbis.
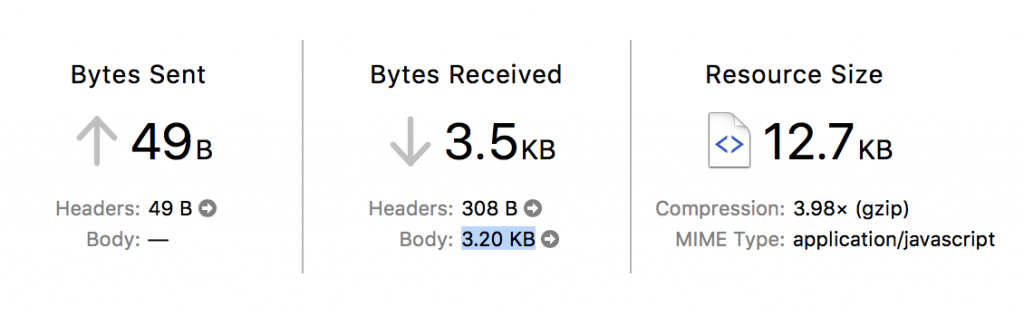
Nevertheless, if you’re looking to record mono or 2-channel uncompressed PCM audio, Recorder.js is still a great choice. It's only 12.7KB (non-minified) and 3.2KB when gzipped, you’re spending only 1 HTTP call, and you can load it directly from the Rawgit CDN for production.
Recorder.js is smart in that it uses a Web Worker to assemble the .wav data, so it doesn't block the browser tab or make it unresponsive.
Audio Quality
Recorder.js will record 16-bit mono/2-channel audio at the sample rate set in your OS for your playback device (as per the spec). You’ll most commonly see 44.1 kHz and 48kHz audio recordings.
Despite what’s written in some tutorials I found, Recorder.js does not support MP3 encoding, only wav. It has a neat pause feature, though.
Recorder.js in action
To get you started with Recorder.js we’ll build a simple demo that allows you to record a voice message in the browser but also pause & resume the recording process. Here’s the live demo and GitHub project.

Our simple demo will have the following files:
index.htmlfile to hold the UIjs/app.jsto hold the app code- we’ll load
recorder.jsthrough Rawgit’s production URLcdn.rawgit.com.
Our index.html file is pretty straightforward:
<meta charset="UTF-8">
<title>Simple Recorder.js demo with record, stop and pause</title>
<meta name="viewport" content="width=device-width, initial-scale=1.0">
<div id="controls">
    <button id="recordButton">Record</button>
    <button id="pauseButton" disabled>Pause</button>
    <button id="stopButton" disabled>Stop</button>
</div>
<h3>Recordings</h3>
<ol id="recordingsList"></ol>
<!-- inserting these scripts at the end to be able to use all the elements in the DOM -->
<script src="https://cdn.rawgit.com/mattdiamond/Recorderjs/08e7abd9/dist/recorder.js"></script>
<script src="js/app.js"></script>
Moving on to app.js we start by setting up a few variables, shims, getting references to our UI elements and adding event listeners:
//webkitURL is deprecated but nevertheless
URL = window.URL || window.webkitURL;
var gumStream;
//stream from getUserMedia()
var rec;
//Recorder.js object
var input;
//MediaStreamAudioSourceNode we'll be recording
// shim for AudioContext when it's not avb.
var AudioContext = window.AudioContext || window.webkitAudioContext;
var audioContext = new AudioContext;
//new audio context to help us record
var recordButton = document.getElementById("recordButton");
var stopButton = document.getElementById("stopButton");
var pauseButton = document.getElementById("pauseButton");
//add events to those 3 buttons
recordButton.addEventListener("click", startRecording);
stopButton.addEventListener("click", stopRecording);
pauseButton.addEventListener("click", pauseRecording);
The code is then split between 4 important functions:
startRecording()stopRecording()pauseRecording()createDownloadLink(blob)
startRecording() launches the promise based getUserMedia() and on success it passes the audio stream to an AudioContext which is then passed to our Recorder.js object. The actual recording process is triggered by rec.record(). We’re passing numChannels:1 to force mono sound. Omit the property or set it to 2 to record 2 channel sound. Uncompressed 2 channel audio will take twice as much space/memory as mono.
function startRecording() { console.log("recordButton clicked"); }
/* Simple constraints object, for more advanced audio features see

https://addpipe.com/blog/audio-constraints-getusermedia/ */

var constraints = {
    audio: true,
    video: false
}
/* Disable the record button until we get a success or fail from getUserMedia() */

recordButton.disabled = true;
stopButton.disabled = false;
pauseButton.disabled = false

/* We're using the standard promise based getUserMedia()

https://developer.mozilla.org/en-US/docs/Web/API/MediaDevices/getUserMedia */

navigator.mediaDevices.getUserMedia(constraints).then(function(stream) {
    console.log("getUserMedia() success, stream created, initializing Recorder.js ...");
    /* assign to gumStream for later use */
    gumStream = stream;
    /* use the stream */
    input = audioContext.createMediaStreamSource(stream);
    /* Create the Recorder object and configure to record mono sound (1 channel) Recording 2 channels will double the file size */
    rec = new Recorder(input, {
        numChannels: 1
    })
    //start the recording process
    rec.record()
    console.log("Recording started");
}).catch(function(err) {
    //enable the record button if getUserMedia() fails
    recordButton.disabled = false;
    stopButton.disabled = true;
    pauseButton.disabled = true
});
}
pauseRecording() is pretty straightforward, it uses rec.recording to determine whether or not a recording is in progress.
function pauseRecording() {
    console.log("pauseButton clicked rec.recording=", rec.recording);
    if (rec.recording) {
        //pause
        rec.stop();
        pauseButton.innerHTML = "Resume";
    } else {
        //resume
        rec.record()
        pauseButton.innerHTML = "Pause";
    }
}
stopRecording() stops the recording process, stops the mic access, triggers the wav export, and enables the Record button to allow for subsequent recordings.
function stopRecording() {
    console.log("stopButton clicked");
    //disable the stop button, enable the record too allow for new recordings
    stopButton.disabled = true;
    recordButton.disabled = false;
    pauseButton.disabled = true;
    //reset button just in case the recording is stopped while paused
    pauseButton.innerHTML = "Pause";
    //tell the recorder to stop the recording
    rec.stop(); //stop microphone access
    gumStream.getAudioTracks()[0].stop();
    //create the wav blob and pass it on to createDownloadLink
    rec.exportWAV(createDownloadLink);
}
When the wav export process is complete createDownloadLink(blob) is called and receives the wav audio data as a blob. It creates an <audio>element for playback in the browser and an <a>link for downloading the pcm audio as a .wav file.
function createDownloadLink(blob) {
    var url = URL.createObjectURL(blob);
    var au = document.createElement('audio');
    var li = document.createElement('li');
    var link = document.createElement('a');
    //add controls to the <audio> element
    au.controls = true;
    au.src = url;
    //link the a element to the blob
    link.href = url;
    link.download = new Date().toISOString() + '.wav';
    link.innerHTML = link.download;
    //add the new audio and a elements to the li element
    li.appendChild(au);
    li.appendChild(link);
    //add the li element to the ordered list
    recordingsList.appendChild(li);
}
You can try the demo in browser here. The entire demo project is available on GitHub.
Uploading the audio file to the server
I’ve seen several demos on StackOverflow using $.ajax() to POST the file to a server side script but for that you need to import jQuery . I preferred to use the native XMLHttpRequest since its just as simple and its supported by all browsers that support getUserMedia().
Here’s the code I placed in the createDownloadLink function above just before the last recordingsList.appendChild(li) line:
var filename = new Date().toISOString();
//filename to send to server without extension
//upload link
var upload = document.createElement('a');
upload.href = "#";
upload.innerHTML = "Upload";
upload.addEventListener("click", function(event) {
    var xhr = new XMLHttpRequest();
    xhr.onload = function(e) {
        if (this.readyState === 4) {
            console.log("Server returned: ", e.target.responseText);
        }
    };
    var fd = new FormData();
    fd.append("audio_data", blob, filename);
    xhr.open("POST", "upload.php", true);
    xhr.send(fd);
})
li.appendChild(document.createTextNode(" ")) //add a space in between
li.appendChild(upload) //add the upload link to li
The code will create an Upload link which when clicked will POST the blob and filename to the server side upload.php script.
Here’s the server side upload.php:
print_r($_FILES);
//this will print out the received name, temp name, type, size, etc.
$input = $_FILES['audio_data']['tmp_name']; //get the temporary name that PHP gave to the uploaded file
$output = $_FILES['audio_data']['name'].".wav"; //letting the client control the filename is a rather bad idea
//move the file from temp name to local folder using $output name
move_uploaded_file($input, $output)
Letting the client control the filename is a rather bad idea and potential security risk. In production, you should generate server side a random file name – restricted to letters and numbers – and use that instead.
Browser support
With the library relying only on the widely available WebAudioAPI and getUserMedia() APIs it is widely supported on desktop and mobile browsers including on Safari on iOS 11 and Safari 11 on macOS (the 1st Safari version to support getUserMedia()) .