
How to record videos on your WordPress website using Ninja Forms and Pipe
August 2024 update: A new tutorial is available for Ninja Forms 3 which uses the HFCM plugin to add the pipe.js and pipe.css libraries. The new tutorial also uses the newer & better 2.0 embed code.
17 November 2016 update: Updated the code to make it work on mobile devices as well.
This tutorial is written for the 2.9 version of Ninja Forms where pasting JS code inside Text inputs is possible. This tutorial will not work with Ninja Forms 3.x which does not support yet including JS in HTML fields.
Also, the 1.0 embed code used in this article is deprecated, you should be using the newer 2.0 embed code.
Giving your users the possibility to record videos directly on your website can be a real game changer for your business.
Here at Pipe we’re always looking for ways on how to make this process easier and faster.
Today we’ll show you how to create a contact form on WordPress using Ninja Forms that also allows the user to record a video message.
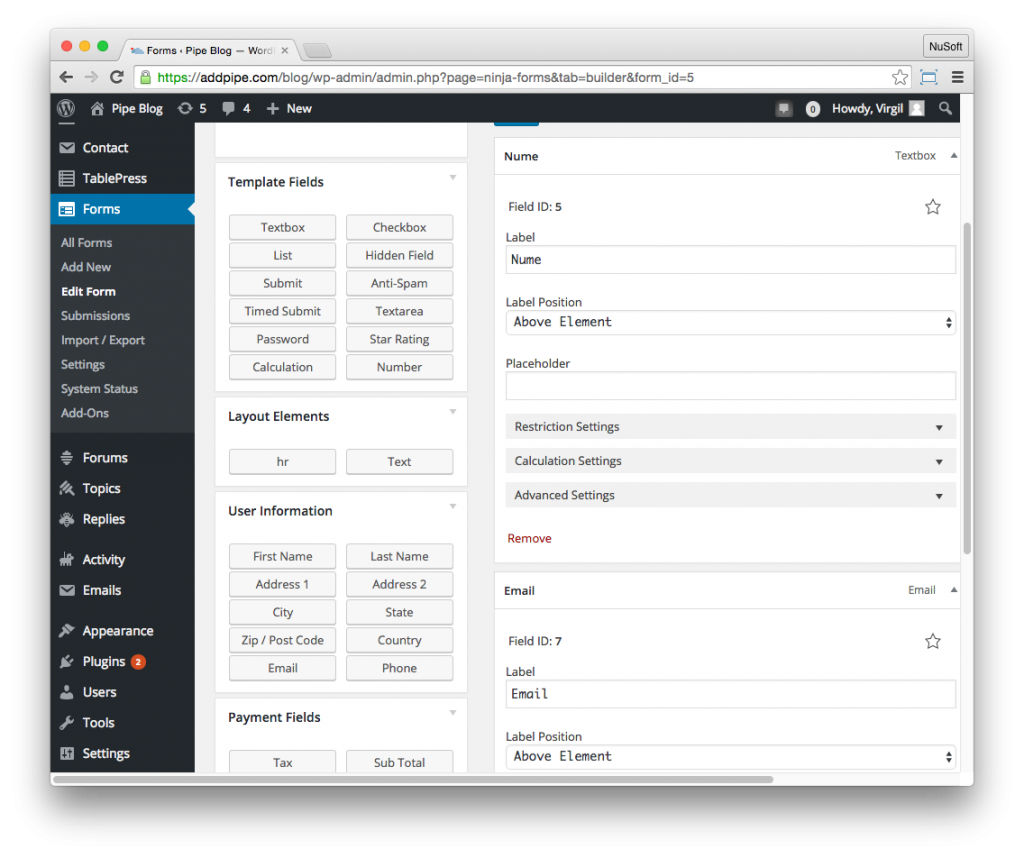
1. Create a new form and add name and email fields
The first step is to create a form within the Ninja Forms interface (Forms > Add New). We should now add some fields in order to identify the person trying to contact us:
- Add a Textbox field and label it Name
- Add an Email field and label it, guess what? Email!
- Save and give your form a title
2. Add the Pipe Video Recorder
Now it’s time to add the pièce de résistance, the actual video recording form element.
We will get the embed code from addpipe.com and add it to a Text element in Ninja Forms.
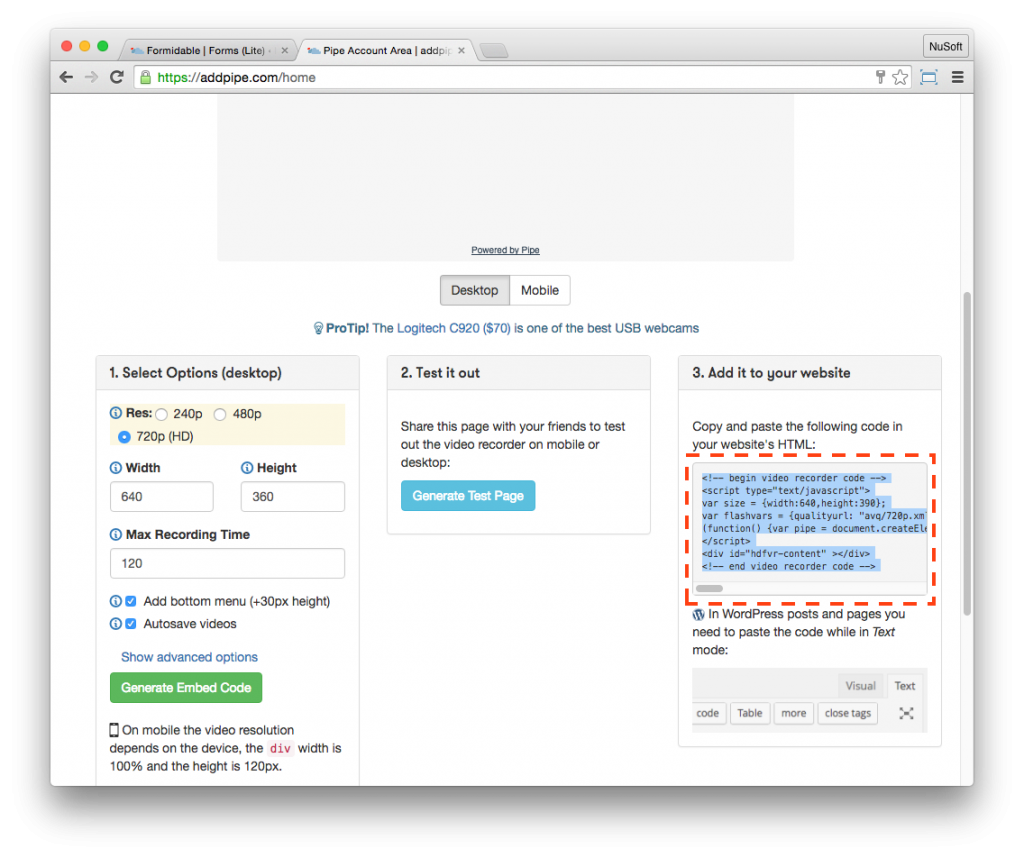
- Log in to your Pipe account at https://addpipe.com/signin (if you don’t have an account click this link and create one )
- Go to the Embed Video Recorder tab, click the 720p (HD) option, generate the embed code and copy the new embed code from the lower right part of the page
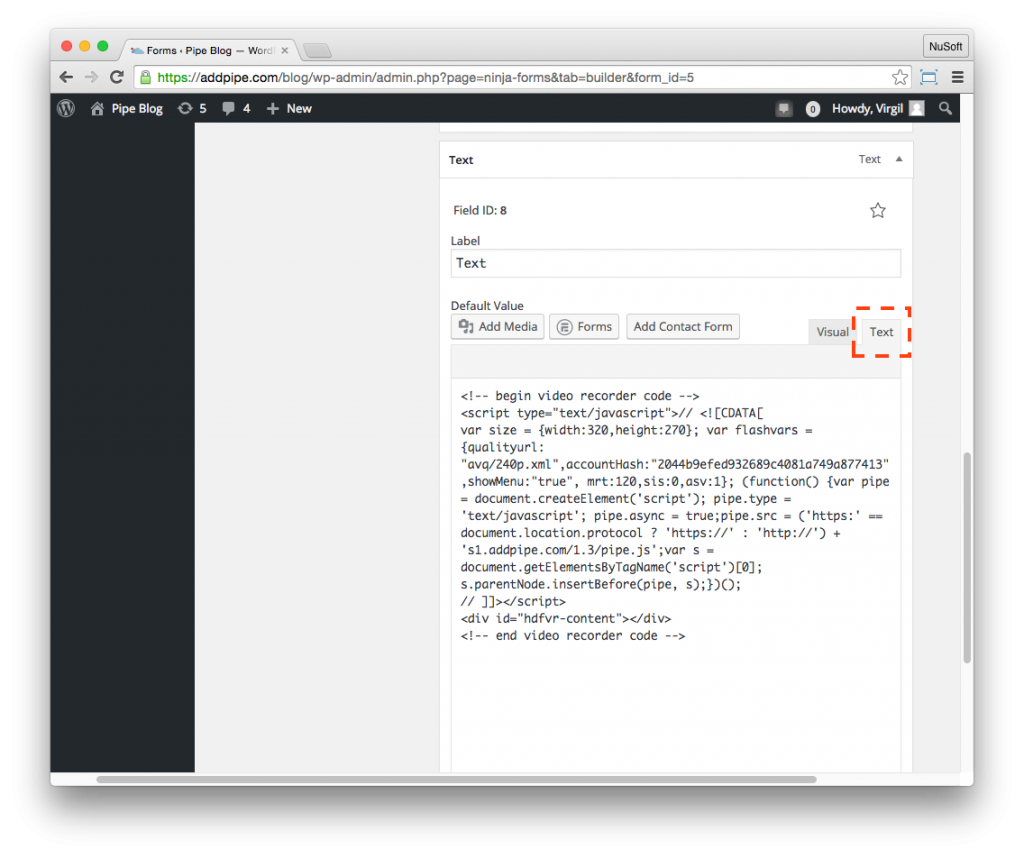
- Add a new Text field from the Layout Elements section and put the text editor in Text mode
- Paste the Pipe embed code and Save your form
Your form now contains an HD video recorder input. Here’s how it’ll look:

Visitors will now be able to type in their email, name and record a quick video, using their webcam, to be submitted together with the form.
But to link each video with each form submission we’ll have to store the actual video URL. For that we’ll use a 4th input which can be hidden.
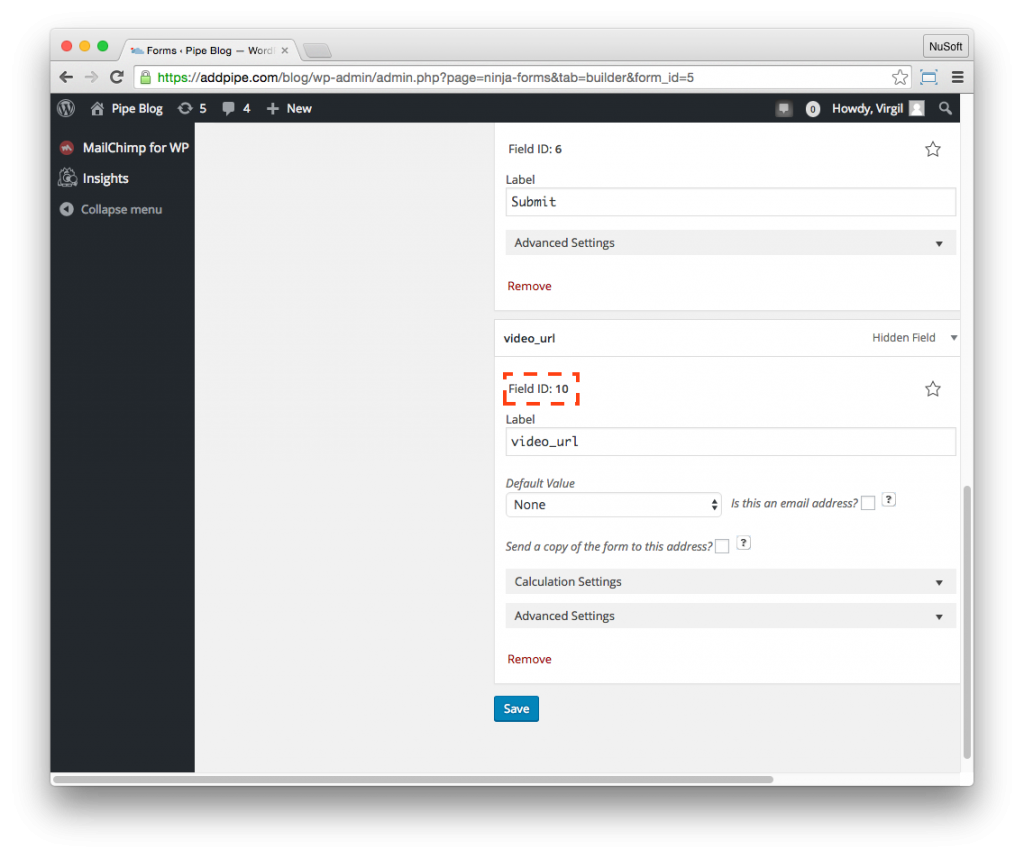
4. Add a (Hidden) Video URL Field
Add a new Hidden Field from the Template Fields section:
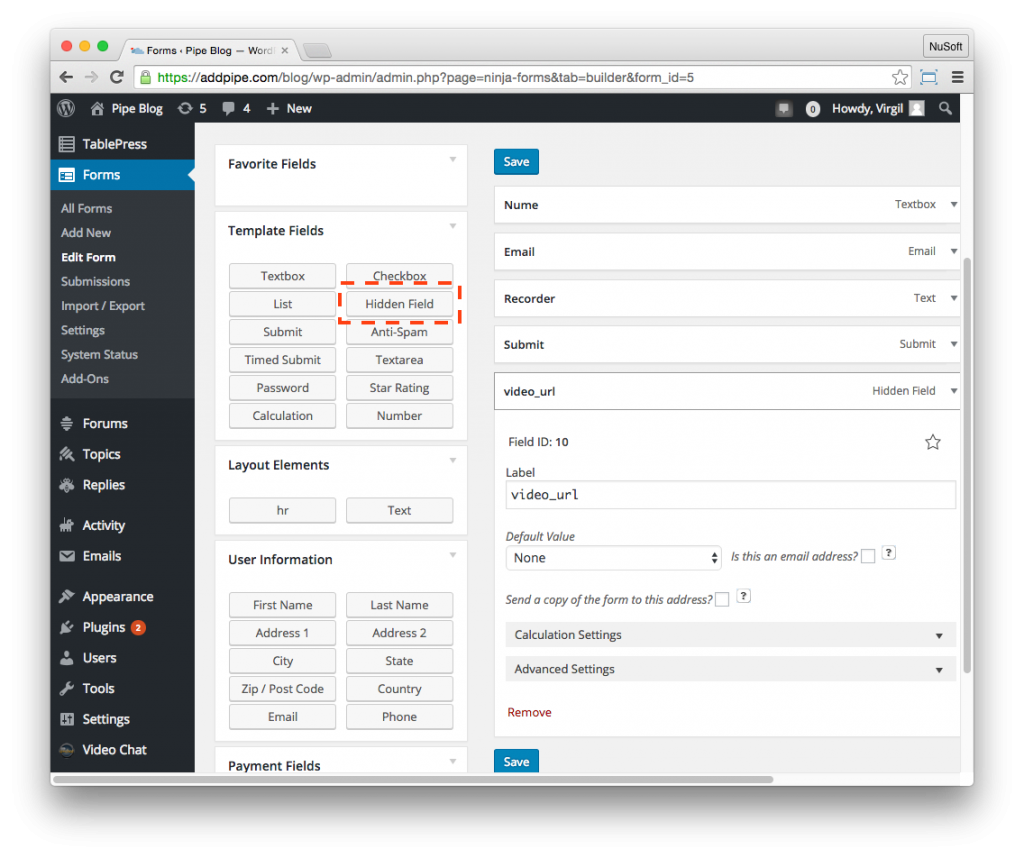
This field will store the video URL and will be saved together with our form submission thus allowing us to view the video attached to the form submission from the WP admin area.
5. Fill the Video URL with the actual URL
The video recorder now needs to populate the above field with the actual URL to the newly recorded video.
For that we’ll be using Pipe’s onSaveOk function (part of Pipe’s Java Script Desktop Events API) which is called by Pipe after a video is recorded and gives us the name of the recorded video and the storage location of the final .mp4 video and .jpg snapshot. Using this info we’ll generate the full URL.
Apart from the name, the function gives us a lot of information about the new video:
- video name (without extension)
- duration
- device names (camera, microphones) if this info is avb.
- audio and video codecs
- the location of the S3 bucket where the final video+snapshot will be stored by us
We’ll only be using the video name in our example but you can include any other video information with the form submission.
To meet our use case we’ll be extending onSaveOk to:
- generate the absolute URL, including the extension, using the video name and location
- populate the (hidden) video URL field with the actual URL.
To make it work on mobile devices we’ll also be using Pipe’s onVideoUploadSuccess function (part of Pipe’s Java Script Mobile Events API).
We’ll start with the following code which we’ll change a bit to make sure it works properly with your own Pipe account and your own Ninja Forms form:
<script>
formFieldId = "ninja_forms_field_ID";
//hidden NF field
accountHash = "ACCOUNT_HASH";
//Pipe account hash
function onSaveOk(streamName, streamDuration, userId, cameraName, micName, recorderId, audioCodec, videoCodec, fileType, videoId, audioOnly, location) {
    //onSaveOK is part of the JS desktop events API
    document.getElementById(formFieldId).value = "https://" + location + "/" + accountHash + "/" + streamName + ".mp4";
}
function onVideoUploadSuccess(filename, filetype, videoId, audioOnly, location) {
    //onVideoUploadSuccess is part of the JS mobile events API
    document.getElementById(formFieldId).value = "https://" + location + "/" + accountHash + "/" + filename + ".mp4";
}
</script>
Here’s what you have to do:
-
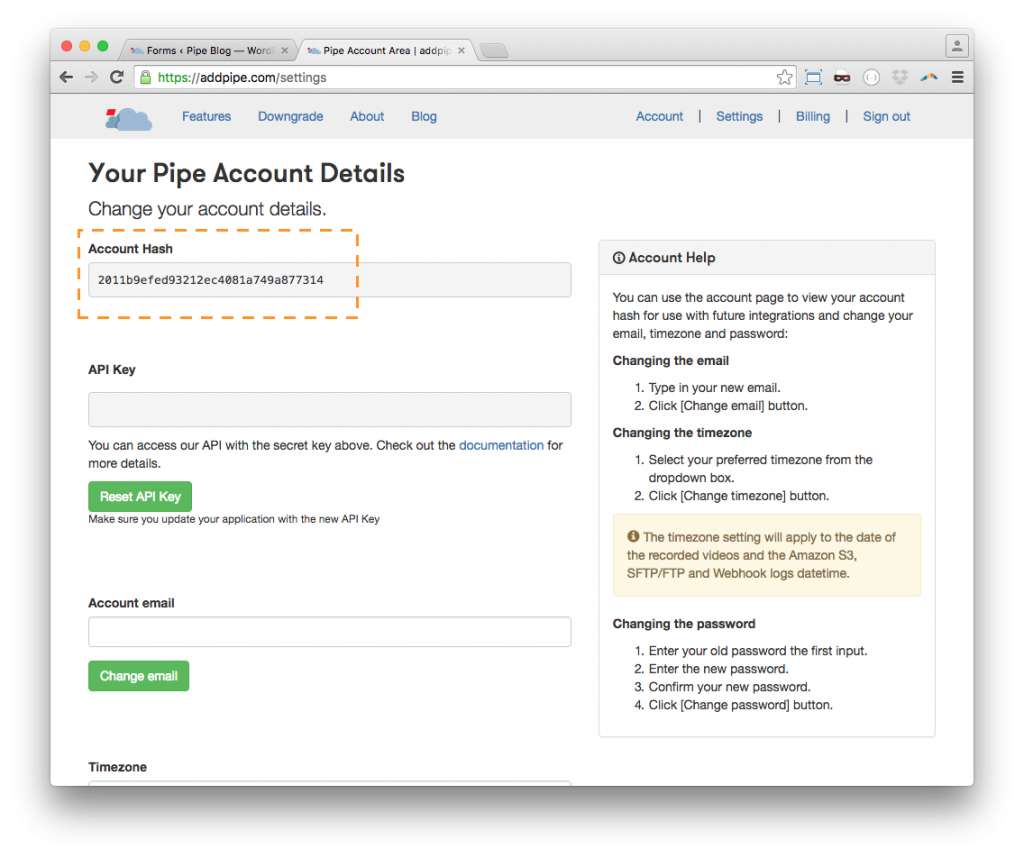
Replace ACCOUNT_HASH in the code above with your own Pipe account hash (it’s in your Pipe Account > Account)
-
Replace ID with the id of the field as given by Ninja Forms:
-
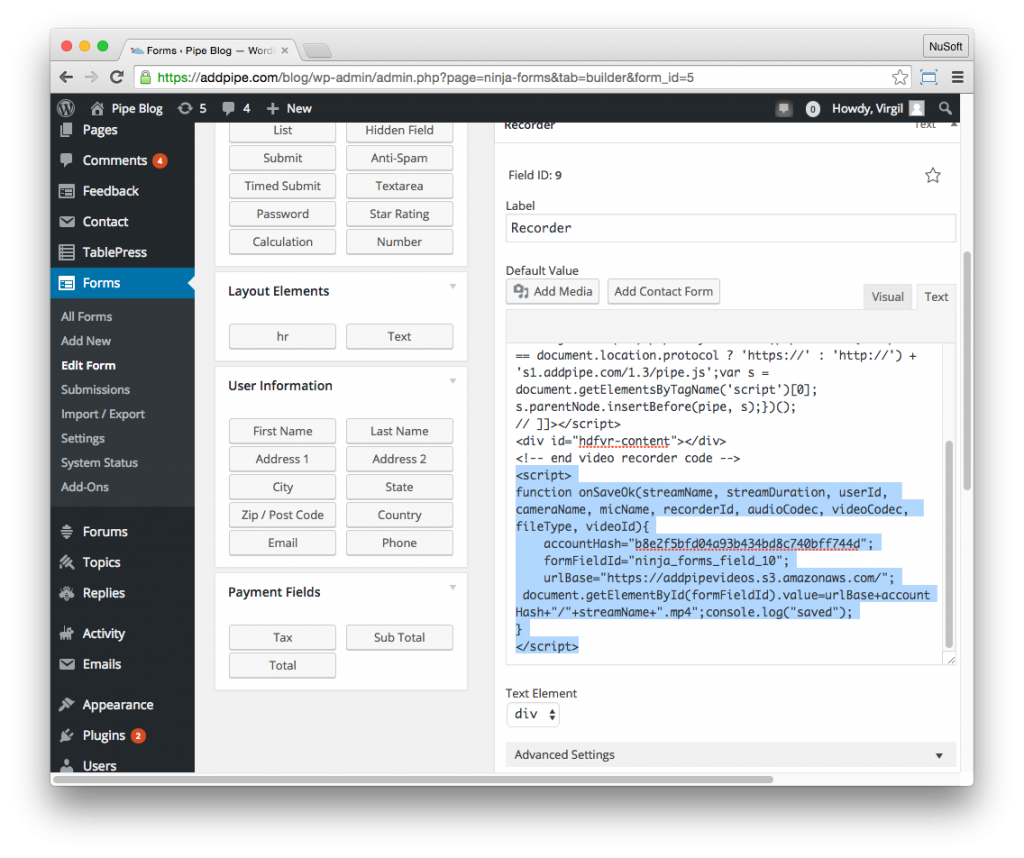
Paste the** modified code** at the bottom of your Text Layout Element (after the existing video recorder code):
Done!
6. Testing and Submitting the First Video Contact Form
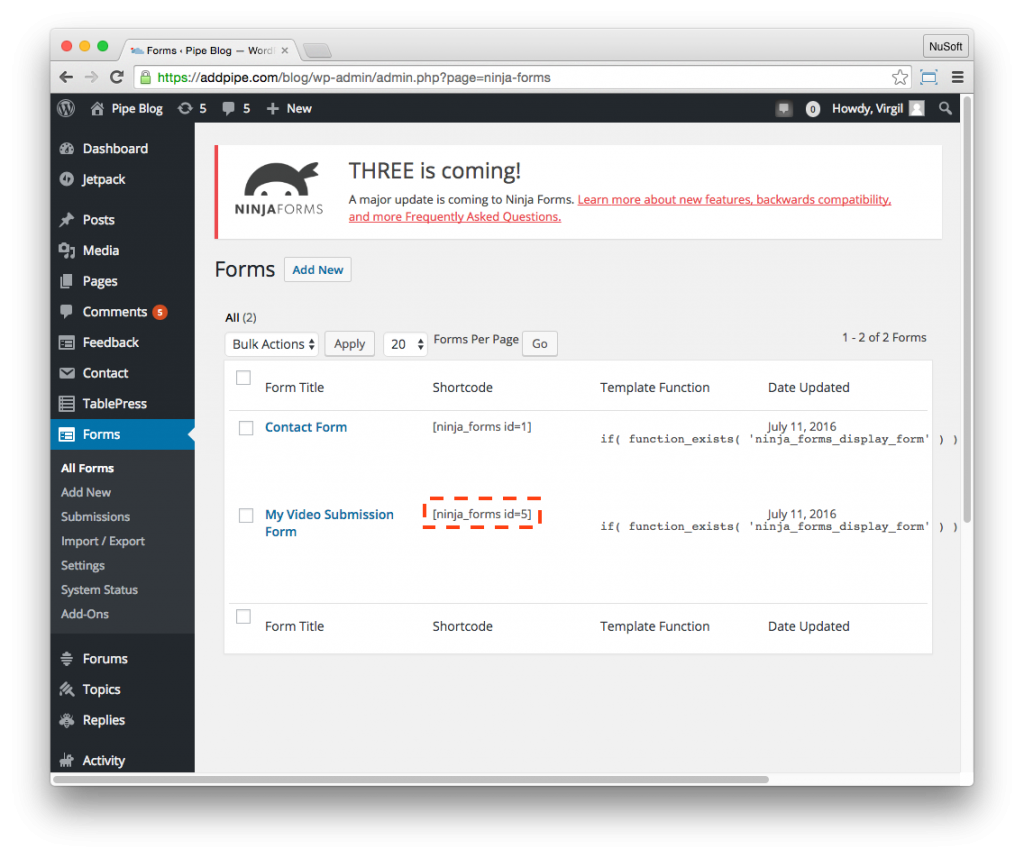
Copy the shortcode generated by Ninja Forms for your form and paste it in any page or blog post:
Your website visitors, when presented with this form will be able to type their name, email and record a video using their webcam.
6.Viewing Form Submissions and Videos
All form submissions will be shown in your WP admin area under Forms > Submissions:
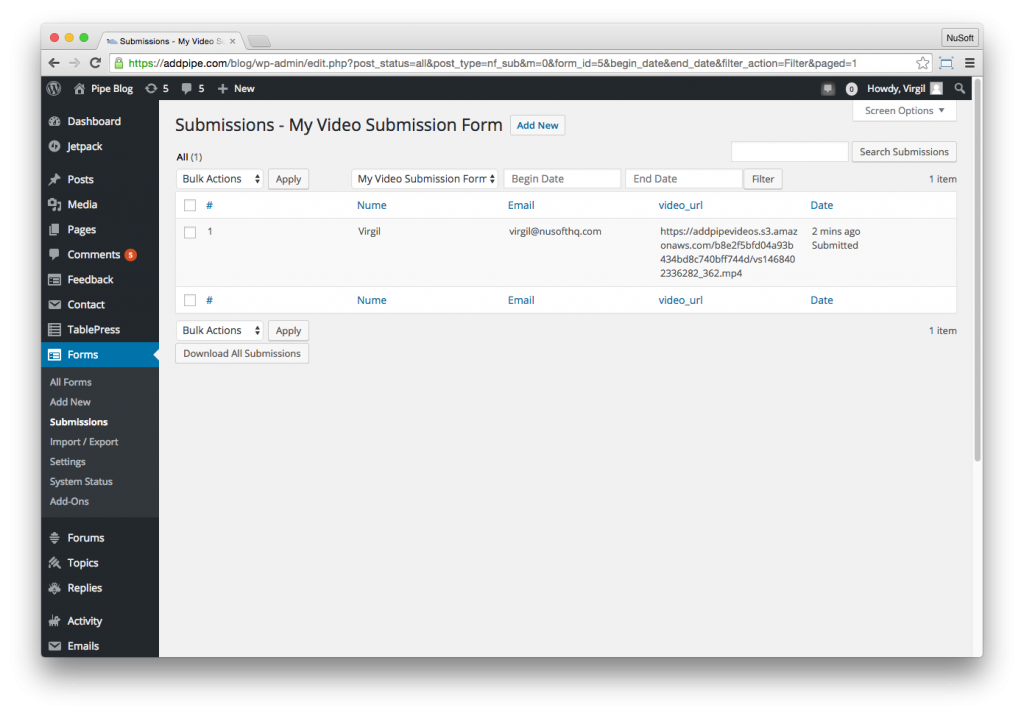
You can see the video_url in the 4th column. This is the direct link to the video and you can copy/paste that address in your browser to view it.
That’s it!
You’re now recording high quality video from your website visitors through a simple form created with Ninja Forms and Pipe Video Recorder.
Not using Pipe yet? Get started today to capture relevant, emotion rich video content from your website visitors.
Download Exported Ninja Forms
Ninja Forms has a cool feature where you can export your form to a file and import it in another WP website with the Ninja Forms plugin. Click here to download the exported version of the form described in this post. Make sure you update the ID value in ninja_forms_field_ID since exporting and importing NF does not keep the original id’s of fields.