How to Record Video Using Gravity Forms and Pipe Video Recorder
11th of September 2023 update: There's a newer/updated article which uses the 2.0 embed code. You should follow that article as the 1.0 embed code used in this article is now deprecated.
17 November 2016 update: Updated the code to make it work on mobile devices as well.
Have you ever wanted to capture the emotion and enthusiasm (or anger 😀) of your website visitors, subscribers or clients?
Have you ever wanted to capture more than just text with a form?
With Gravity Forms and Pipe Video Recorder you can capture all that emotion and detail by including video recording in your website forms.
Wether you’re building a signup form, a questionnaire or a contact form, this tutorial will show you how you can add (HD) video recording to any Gravity Form.
Gravity Forms is a premium plugin for WordPress that allows you to easily create complex forms in minutes.
Pipe Video Recorder is a simple to use video recording service with support for mobile and desktop browsers.
In this post, we will create a contact form with Gravity Forms containing multiple fields including an HD video recorder input powered by Pipe.
Note: You must use an administrator account, otherwise the <script> tags will be stripped automatically by WordPress.
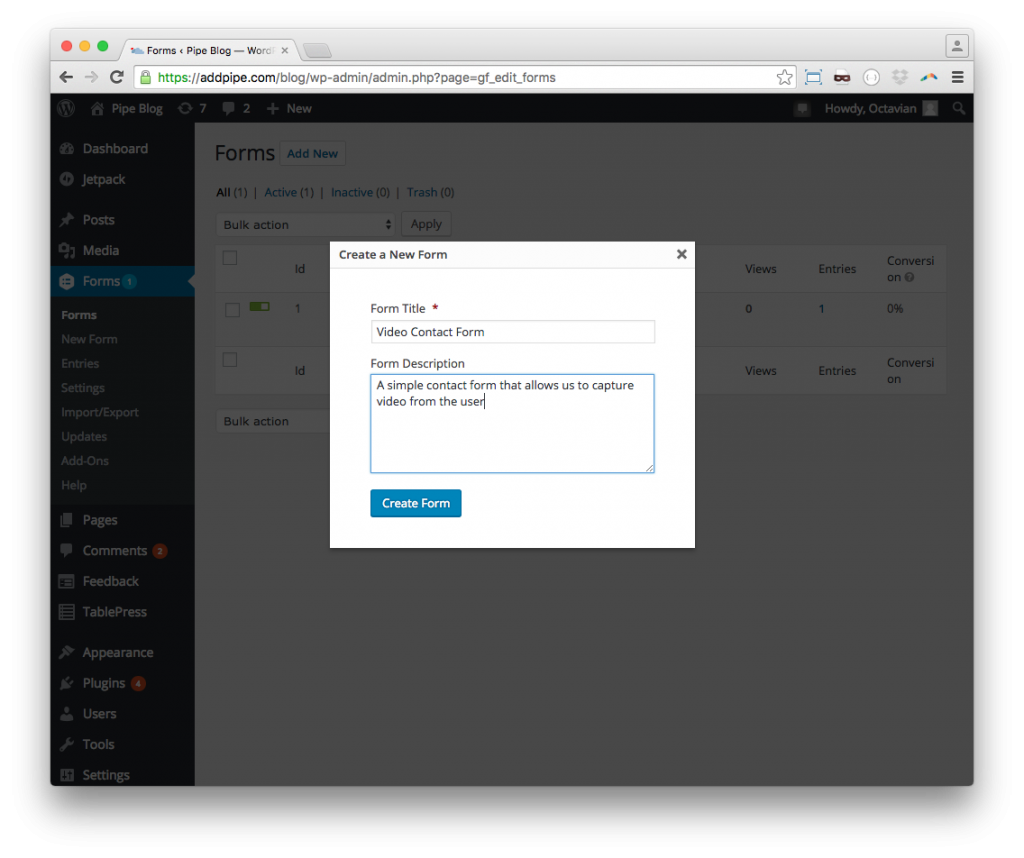
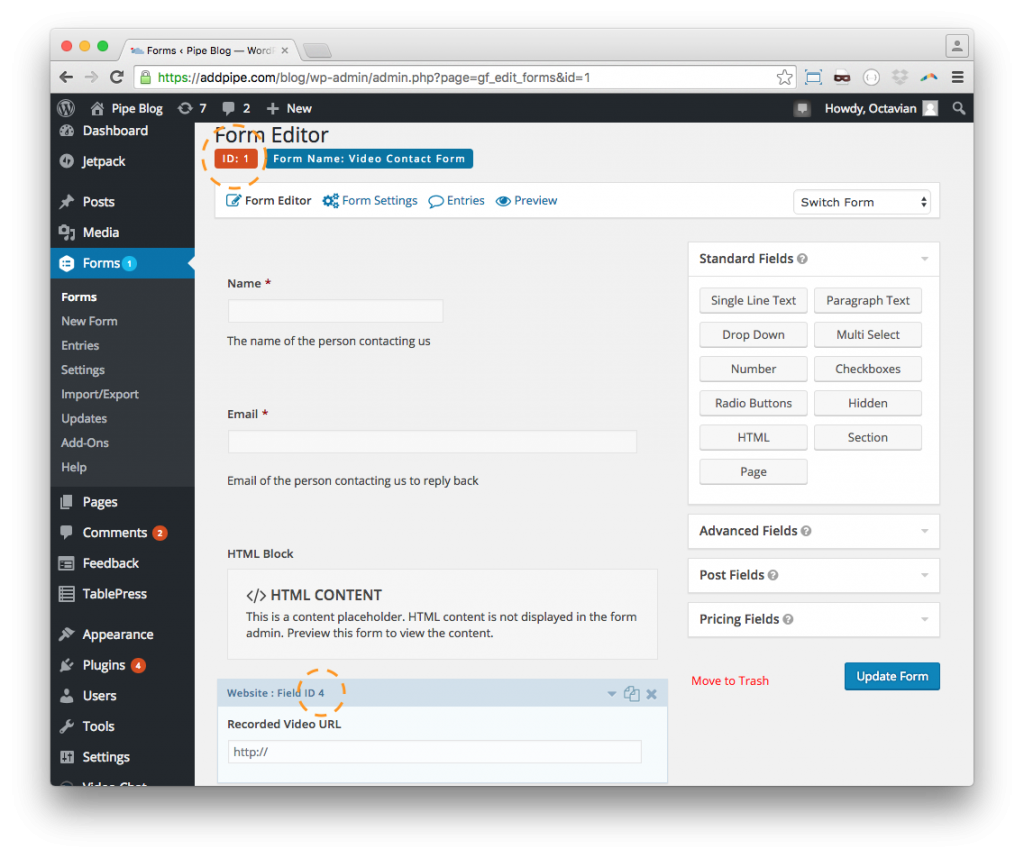
1. Create a New Gravity Form
The first step is to create a Gravity Form. I named mine “Video Contact Form” and gave it a short description:
2. Add Name and Email Fields
Now add 2 fields to the contact form:
- Name: add a Single Line Text field from Standard Fields
- Email: add a Email field from Advanced Fields
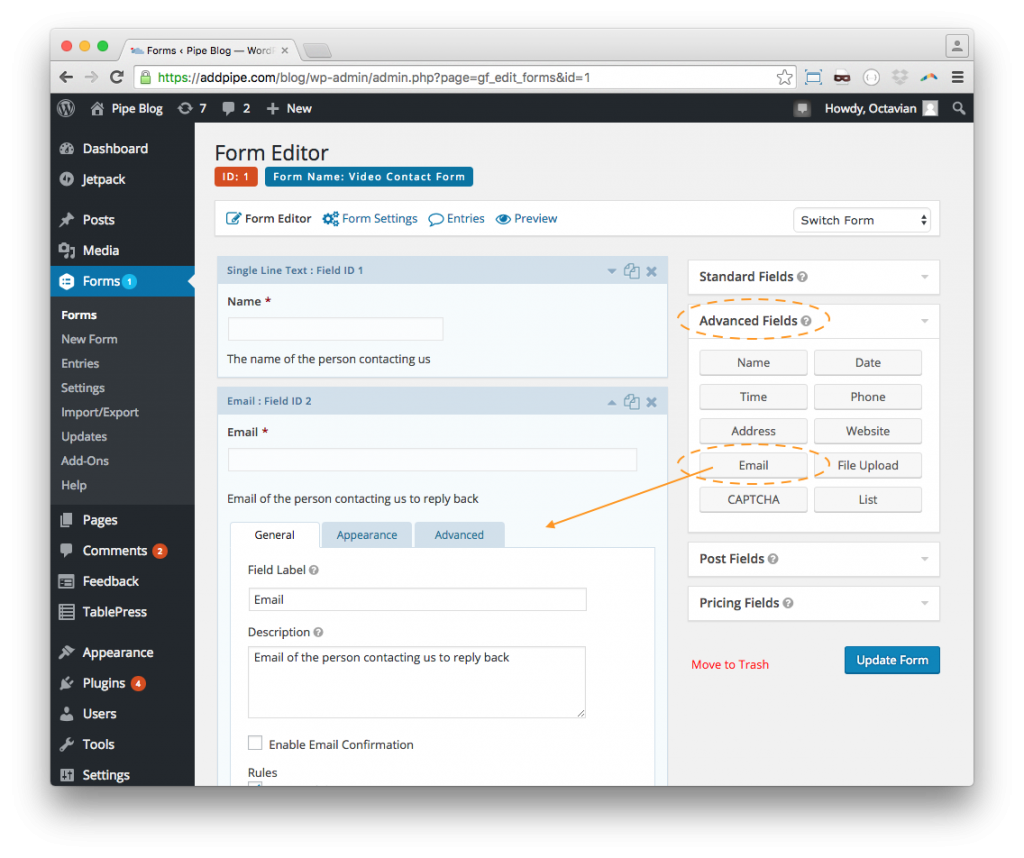
We’ll use these later on to reply to the user.
3. Add the Pipe Video Recorder
We’re now going to add the video recorder to the form, for that we need a HTML block from Gravity Forms in which to paste the Pipe Video Recorder embed code.
- Add a new HTML Block field to your form (this will be the third form field)
- Log in to your Pipe account at https://addpipe.com/signin (if you don’t have an account click this link and create one )
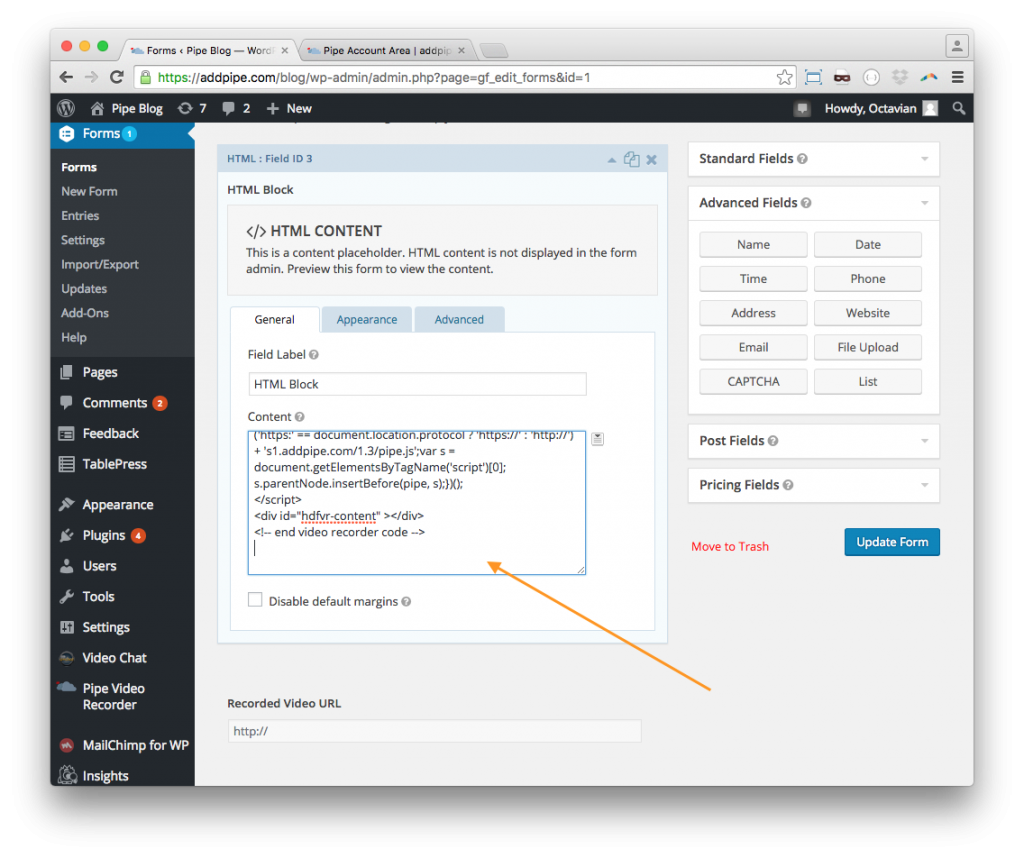
- Go to the Embed Video Recorder tab, click the 720p (HD) option, generate the embed code and copy the new embed code from the lower right part of the page
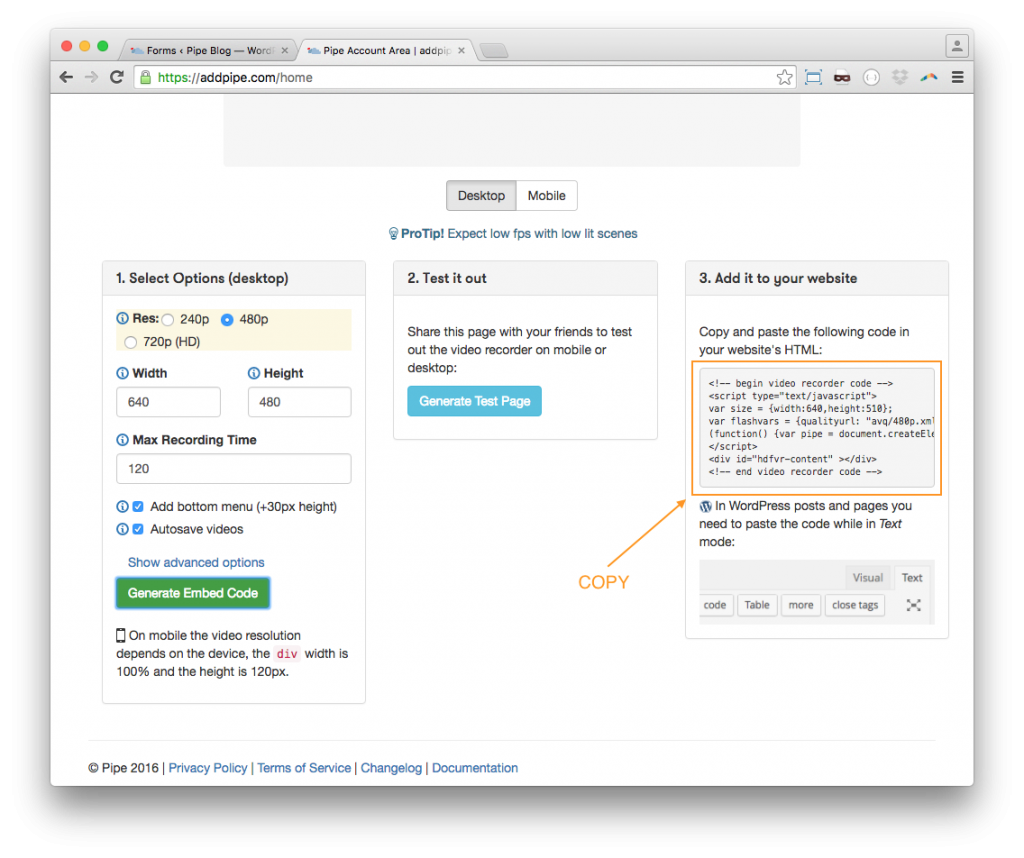
- Now paste that code in your new Gravity Form’s HTML Block field:
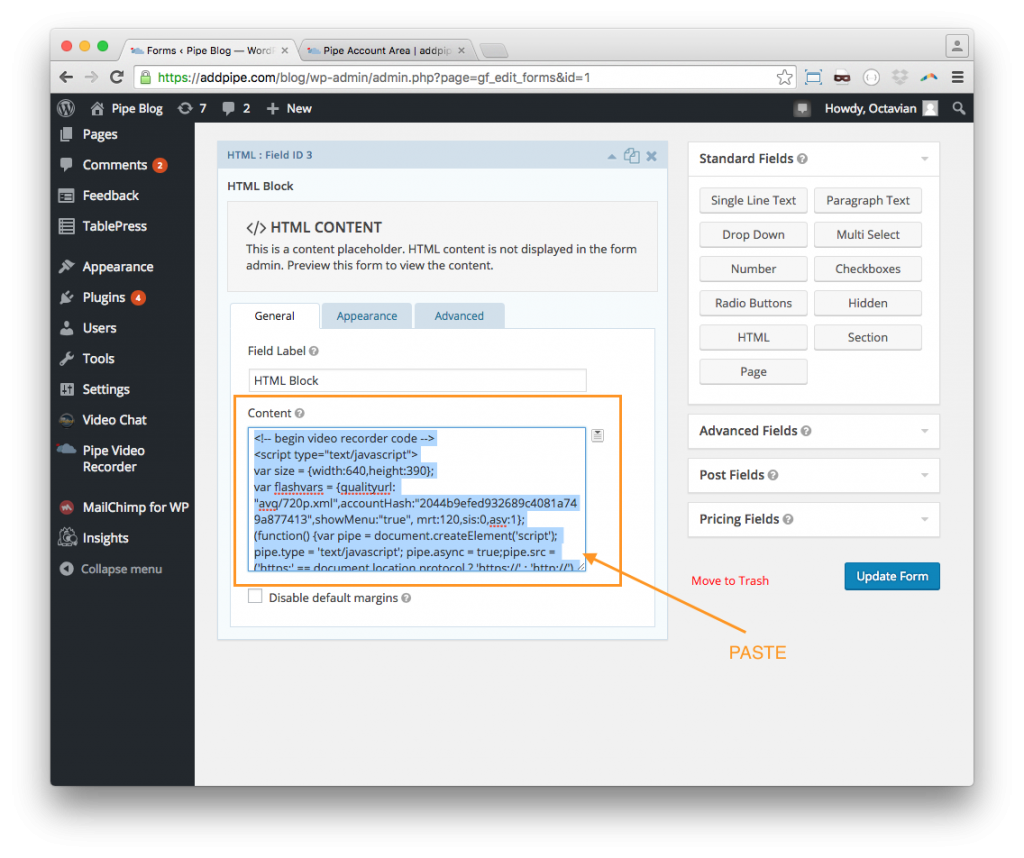
- And click [Update Form] on the right side
Your form now contains an HD video recorder input.
Here’s how it’ll look if you preview it:
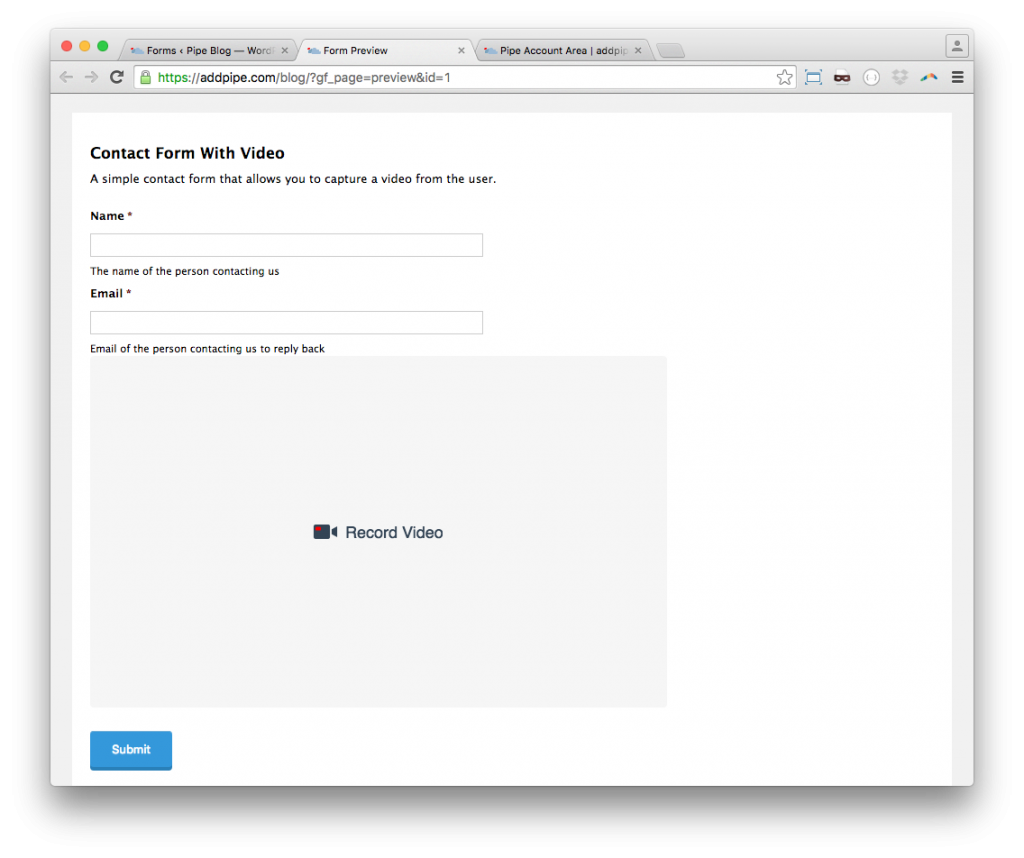
Visitors will now be able to type in their email, name and record a quick video using their webcam to be submitted together with the form.
But to link each video with each form submission we’ll use a 4th input to keep hold of the actual video URL.
4. Add a (Hidden) Video URL Field
Add a new visible Website field from Gravity Forms to your form:
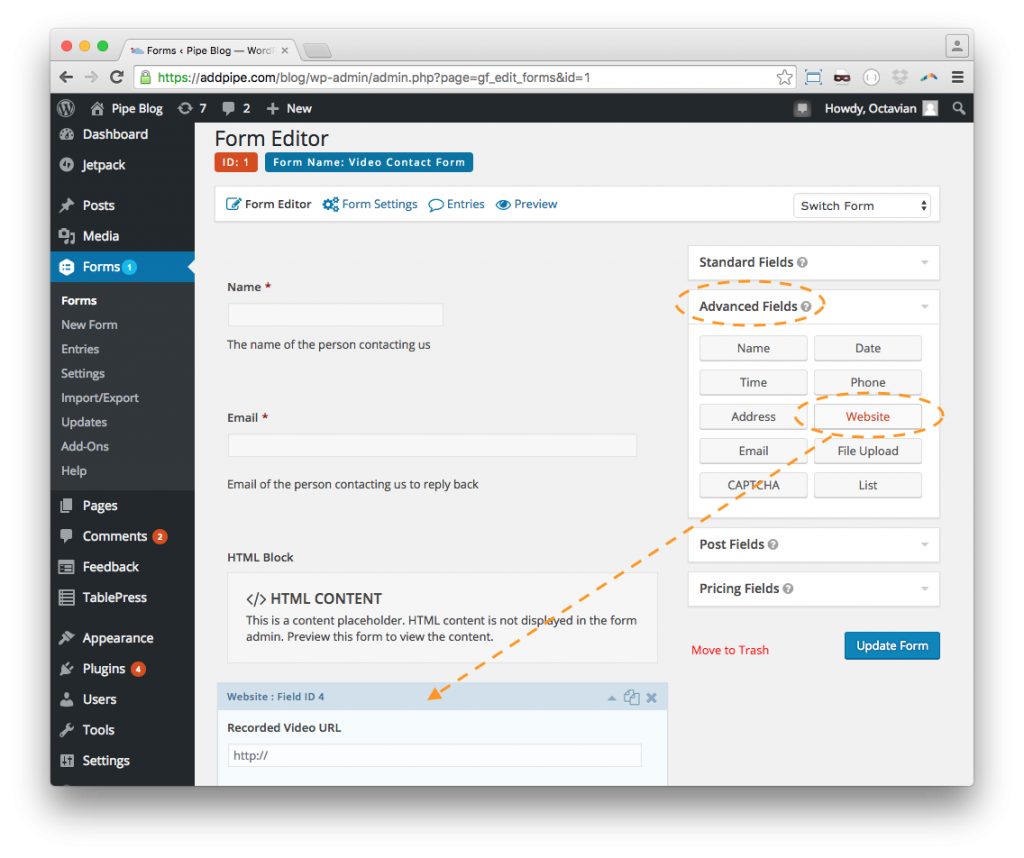
We’re using the Website input because it will hold a URL.
This field will be saved together with our form submission and it allows us to view the video later from the WP admin area.
When you publish the form on your website you can convert the field to a hidden one, but for now we’ll want a visible one to make sure the code below works.
5. Fill the Video URL with the actual URL
The video recorder now needs to tell Gravity Forms the URL to the newly recorded video.
For that we’ll be using Pipe’s onSaveOk function (part of Pipe’s Java Script Desktop Events API) which gives us the name of the recorded video and the storage location for the final .mp4 video and .jpg snapshot. Using this info we’ll generate the full URL.
The onSaveOk function is called by Pipe after a video is recorded and gives us a lot of information about the new video including:
- video name (without extension)
- duration
- device names (camera, microphones) if this info is avb.
- audio and video codecs
- the location of the S3 bucket where the final video+snapshot will be stored by us
We’ll only be using the video name in our example but you can include any other video information with the form submission.
We’ll be extending onSaveOk to:
- generate the absolute URL, including the extension, using the video name and storage location
- populate the hidden video URL field with the actual URL.
To make it work on mobile devices we’ll also be using Pipe’s onVideoUploadSuccess function (part of Pipe’s Java Script Mobile Events API).
We’ll start with the following code which we’ll change a bit to make sure it works properly with your Pipe account and GF form:
<script>
accountHash = "2044b9efed932689c4081a749a877413";
formFieldId = "input_1_4";

function onSaveOk(streamName, streamDuration, userId, cameraName, micName, recorderId, audioCodec, videoCodec, fileType, videoId, audioOnly, location) {
    //onSaveOK is part of the JS desktop events API
    document.getElementById(formFieldId).value = "https://" + location + "/" + accountHash + "/" + streamName + ".mp4";
}

function onVideoUploadSuccess(filename, filetype, videoId, audioOnly, location) {
    //onVideoUploadSuccess is part of the JS mobile events API
    document.getElementById(formFieldId).value = "https://" + location + "/" + accountHash + "/" + filename + ".mp4";
}
</script>
Changes:
-
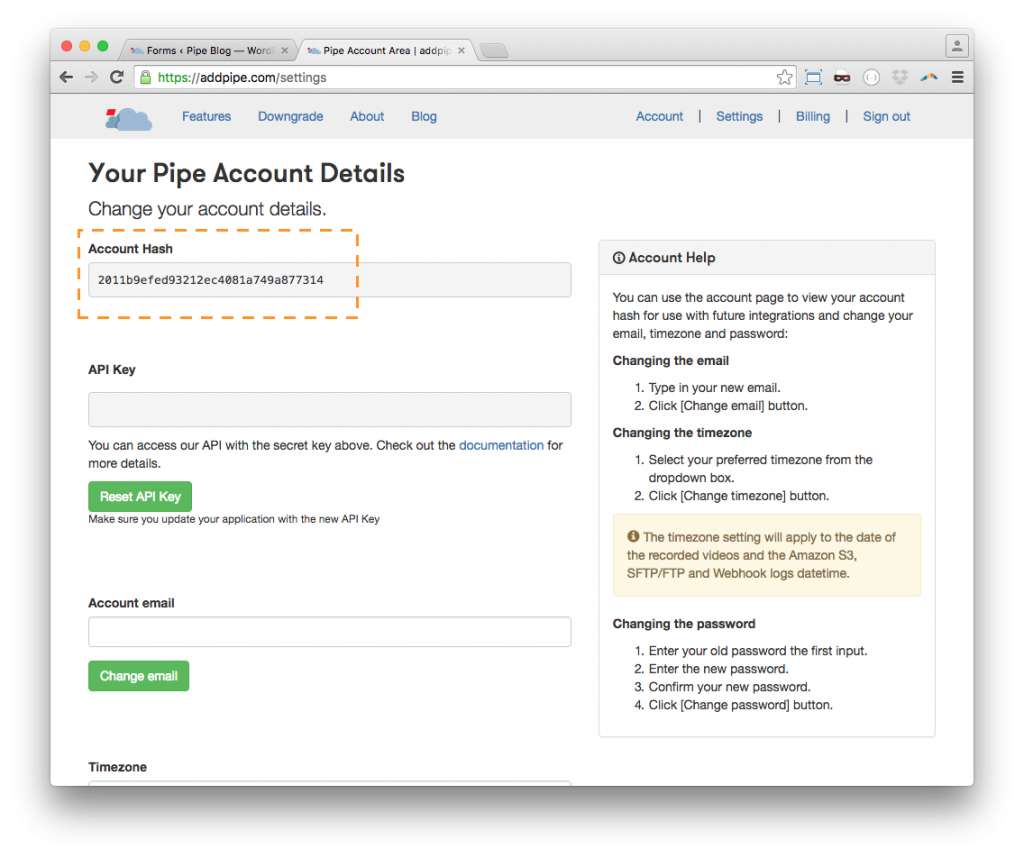
Replace the Pipe account hash value in the code above with your own Pipe account hash (it’s in your Pipe Account > Account)
-
Replace the 1 and 4 in “input_1_4” with your Form ID* and your Video URL Field ID respectively:
If this is your 7th form and the video URL field is your 12th field the string should be “input_7_12”. -
Paste the (modified) code at the bottom of your HTML Block after the existing video recorder code:
Done!
If you now preview the form and record a video, after clicking STOP, you should immediately see the actual video URL in the last field:
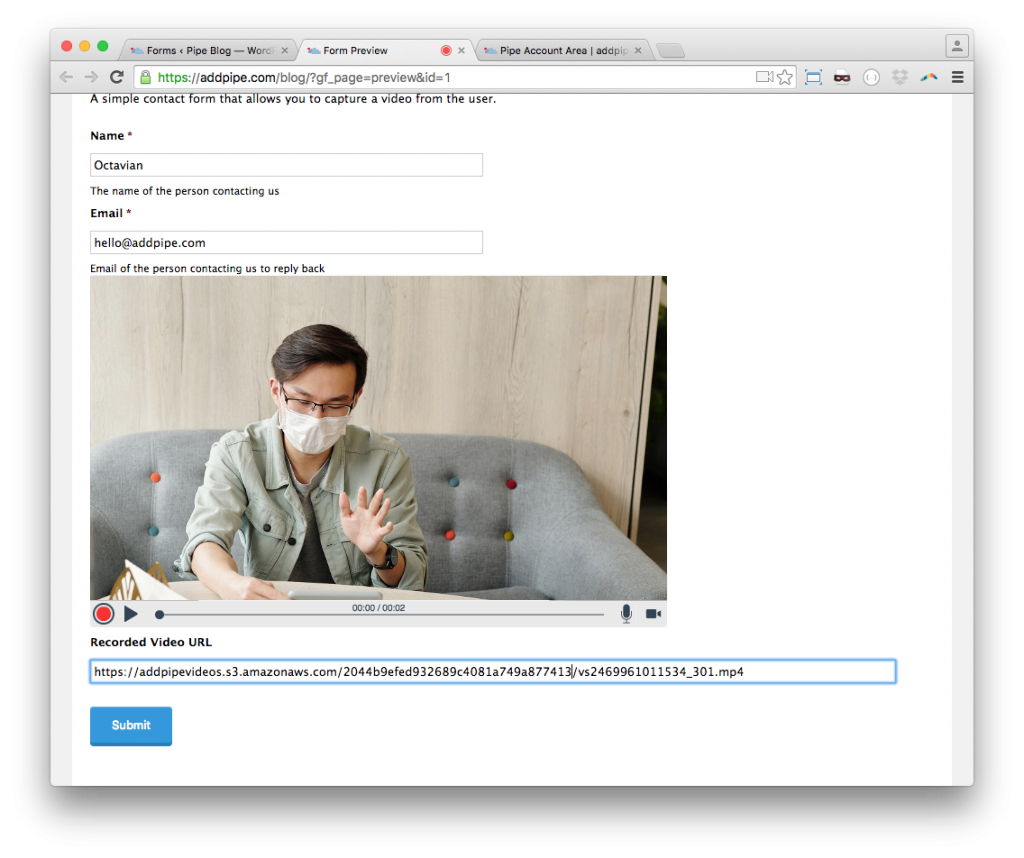
The visible Video URL field added in Step 4 now allows us to to easily check if our code :
- generates a proper working URL
- assigns the URL to a Gravity Forms input field
6. Testing and Submitting the First Video Contact Form
You can now embed the form in any page or post on your WP website by clicking the [Add Form] button when editing the post/page content.
Your website visitors, when presented with this form will be able to type their name and email, record a video using their webcam, and submit the form.
If you have more than 1 audio or video recording device, Pipe will ask you to select the preferred one (similar to Skype):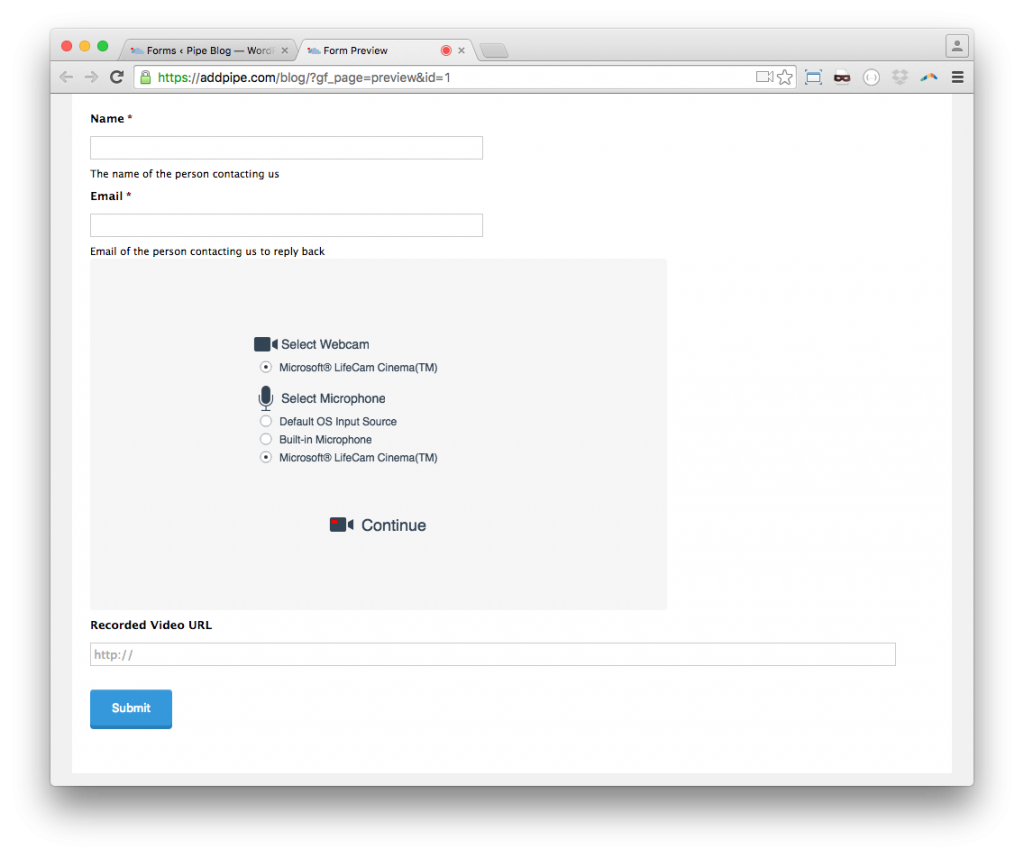
7.Viewing Form Submissions and Videos
All form submissions will be shown in your WP admin area under Forms > Entries:
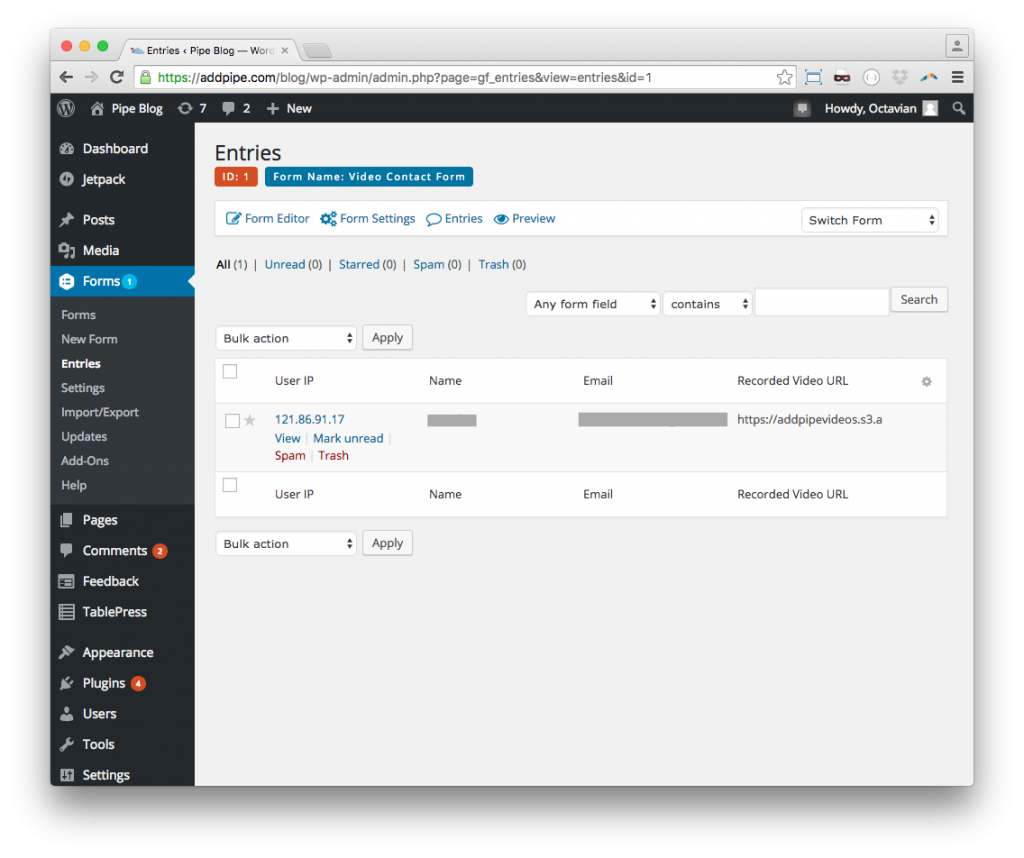
You can see the Recorded Video URL in the rightmost column. Clicking the entry will bring up the detail page where the full video URL is shown and can be clicked:
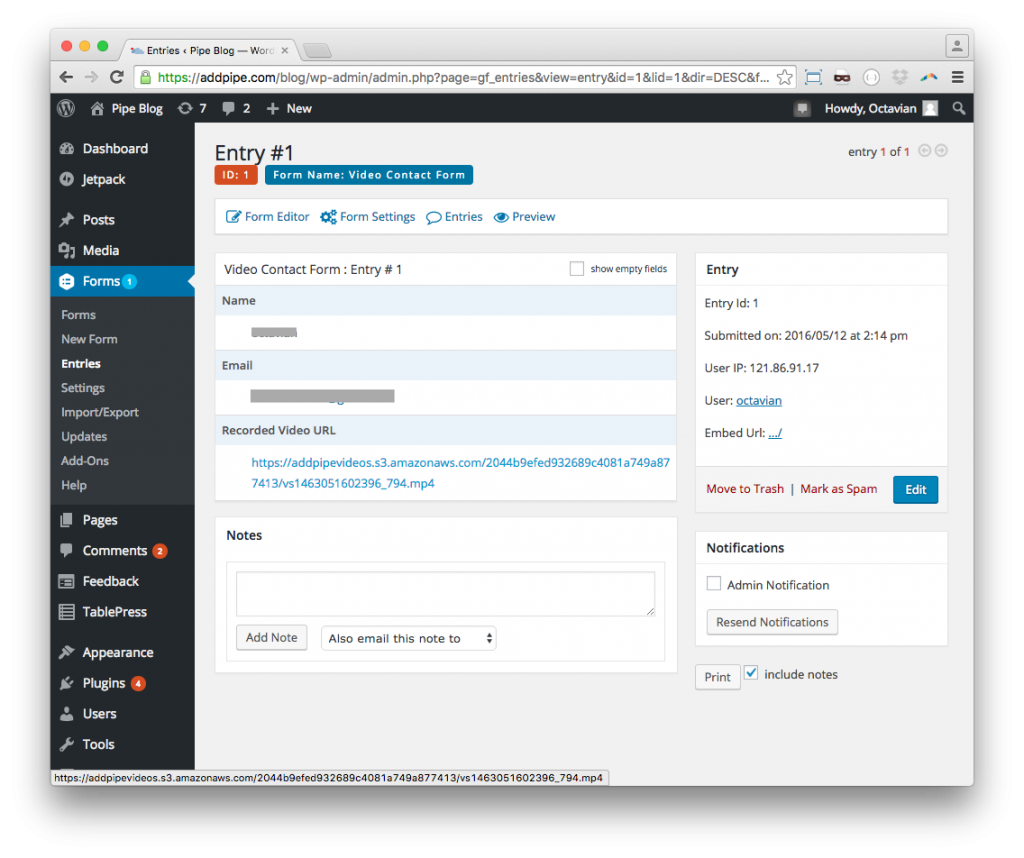
Clicking it will bring up the recorded video in a new browser tab.
That’s it!
You’re now recording high quality video from your website visitors through a simple form created with Gravity Forms and Pipe Video Recorder.
Not using Pipe yet? Get started today to capture relevant, emotion rich video content from your website visitors.
Download Exported Gravity From
Gravity Forms has a cool feature where you can export your form in JSON format and import it in another WP website with the Gravity Forms plugin. Click here to download the JSON export of the form described in this post.